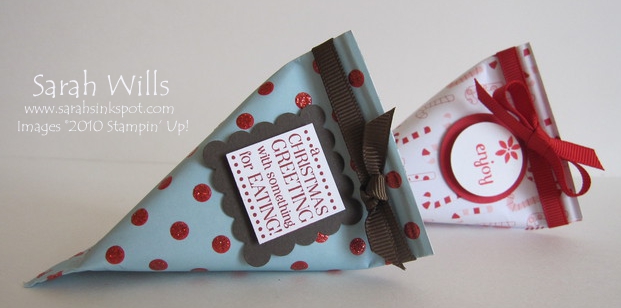
With Christmas almost upon us, I decided to show you very cool little Twisted Treat Holders that you can make in minutes – these would be perfect for place setting treats at your holiday dinner table or for party favors…
They are made simply from a piece of patterned paper and you can add whatever embellishments you like…they are the perfect size to hold a few candies – to give you an idea of their size, approx 5 Hershey Kisses fit inside.
Please read on for details about how I made it, details of my Blog Candy and a link to my printable tutorial so that you can make your own…
They are SO easy to make using just a piece of patterned paper sized 5 1/2″ x 4 1/4″ and you can easily adjust the size simply by changing those dimensions.
You fill them with candies or other little goodies and seal them inside – on the ends of each, you can see a crimped edge – this is very easy to make using a simple tool – the Crimper that you can find on pg 198 of the Catalog.
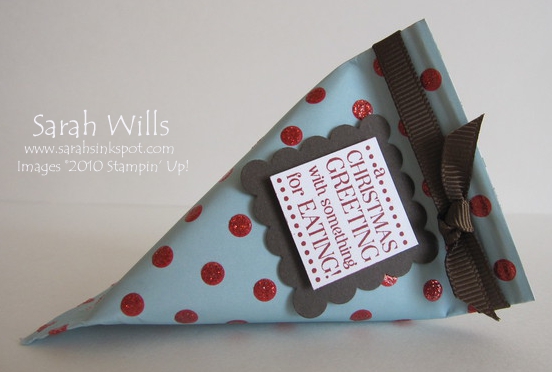
Here is my first one…I used a piece of paper from Candy Cane Christmas and added a length of 1/4″ Espresso Grosgrain Ribbon to the top and finished with a knot…I stamped a greeting from Tags til Christmas and attached it to a shape I punched out using my Scallop Square Punch…isn’t it cute?
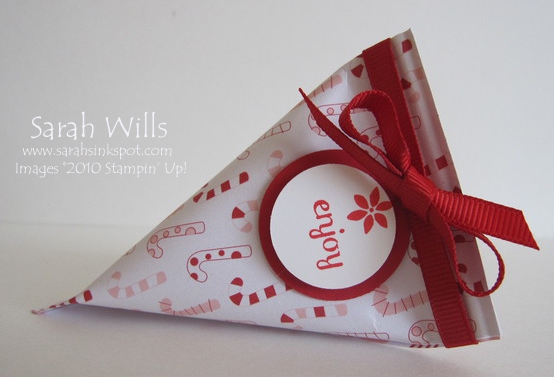
And here my second one…again, using a piece of paper from Candy Cane Christmas and at the top I added a piece of 1/4″ Real Red Grosgrain Ribbon and finished with a bow. I made my sentiment tag using a stamp from Fabulous Phrases and that cute poinsettia is from Season of Joy – I then punched out circles using my 1″ and 1 1/4″ Circle Punches and attached it using Dimensionals and tape…
I think they turned out cute and are the perfect size for place settings – they literally take minutes to make each and are a great way to use up those Holiday themed papers…
WANT THE TUTORIAL SO THAT YOU CAN MAKE YOUR OWN TWISTED TREAT HOLDER? Click HERE to find it in my Project Tutorials section plus in that tutorial you will find a printable version too!
Onto this week’s Blog Candy…leave me a comment to let me know what you think and you will be entered into a drawing where one lucky winner will be drawn this Friday morning – Christmas Eve – that lucky winner will receive a sampling of new papers & ribbons featured in the upcoming Occasions Mini Catalog – COOL!
Come back and visit me on Friday to see if you won!
TO ORDER YOUR STAMPIN’ UP! SUPPLIES ONLINE CLICK HERE!


These will be great favors for Christmas or even New Years Eve. Thanks for the great idea. You are awesome!
They are too cute to open!
These are super cute!
I think they are adorable! We called them sour cream packages! I don’t know what others called it! I love the papers! They’re so bright & festive to me! Thanks for sharing and for a chance to win an awesome giveaway!
These are such a cute project! I love so many of your tutorials. Thanks for the chance to win some samples of the new papers and ribbons from the upcoming mini!
Subscribe to your blog and love it ~ must say today’s headline really peeked my interest (wondering how Tuesday gets twisted). Your “sour cream” containers would be adorable as place settings on one’s holiday dinner table (could always add each person’s name too). Thanks for sharing all your ideas and tutorials. Happy Holidays, Sarah!
This style of treat holder was the first I ever made. It was a crafting light bulb moment and making 3D treats has been my passion ever since. These are still a favorite…we called them Sour Cream Containers back when I learned how. So fun to make and give out. Thanks for sharing. jmniffer
These treat holders are perfect for the holiday – quick and easy. Thanks for sharing and the opportunity to win blog candy.
These are adorable Sarah! Haven’t made these in quite awhile, thanks for the reminder. Hope you and your family have a fabulous and blessed Christmas and New Year.
so cute, as always:)
hope you and your family have a happy holiday season!
I love these! They look so different with the different papers and it looks easy to embellish them for different occasions. Thanks for sharing!
I love these! What a great idea to use them for place settings!
I made those earlier this month for the girls in my stamp club!
Sooo easy, and they loved them!
I will check out your tutorial to see how you did them, I forget where I got mine!