If you received this FREE beautiful Feather Card Kit in the mail from me, here is where you will find how to put it together…
In your Kit you will find all of the pre-cut & scored cardstocks, die cut shapes and twine that you need to put it together – I hope you enjoy making it – it is one beautiful perfect-for-Thanksgiving card!
Do you want to receive FREE card kits like this from me too?
I send them out EVERY MONTH in a package to those customers who have placed an order with me during that month – and in that same package you will receive 1-2 kits for you to put together plus useable samples of things like DSP, Ribbons & Embellishments – and sometimes Sneak Peaks of upcoming items too!
AND those customers receive a hand made thank you card from me too!
To automatically receive my next “Make & Take in the Mail Kit” simply place an order OF ANY VALUE by November 30th using the link to my online store which you can find by clicking HERE
Once your order is placed using that link, your thank you card and FABULOUS HOLIDAY THEMED Make & Take in the Mail Kit will be flying out of the door and on their way to you!
How to put your Feather Card Kit together:
This is the finished card that your kit will make…
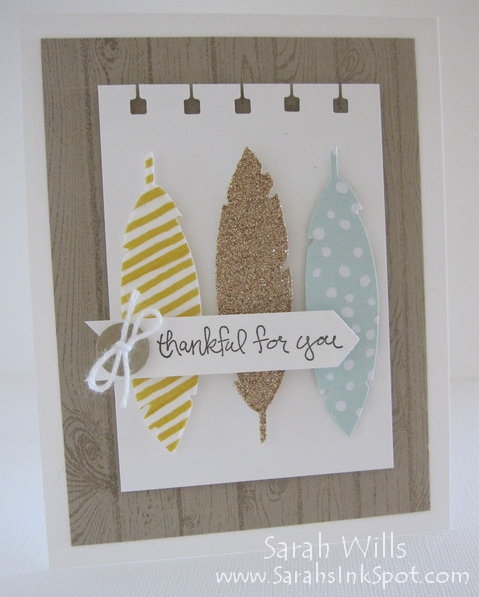
Take your white card base and adhere the Crumb Cake layer onto it – stamp it using any background stamp you would like – I used the wood effect background stamp Hardwood (pg 175).
Take the white layer with the shaped top – that edge was shaped using the fabulous Spiral Border Punch (pg 222) – and attach it to your card – use Dimensionals for an elevated look
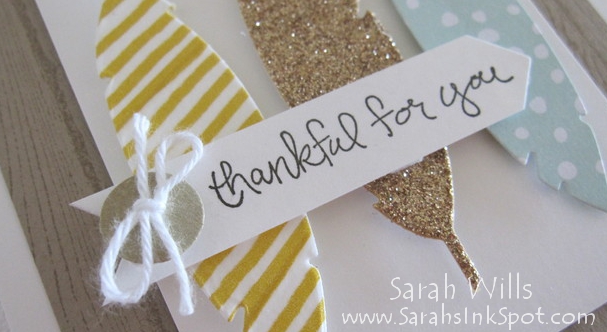
Attach the feathers using dimensionals so that they ‘pop’ out from the card – they were die cut using one of the feather dies featured in Feathers Framelits Dies (pg 42 Holiday Catalog) – wondering how they were created?
- The Yellow Striped Feather – was made by sticking washi tape from Color Me Autumn (pg 41 Holiday Catalog) diagonally onto a piece of white cardstock and then die cutting it out
- The Glittery Feather – was made using Champagne Glimmer Paper (pg 193)
- The Blue & White Feather – was made using a piece of paper from All is Calm DSP (pg 22 Holiday Catalog)
I just LOVE how those colors & textures work together!
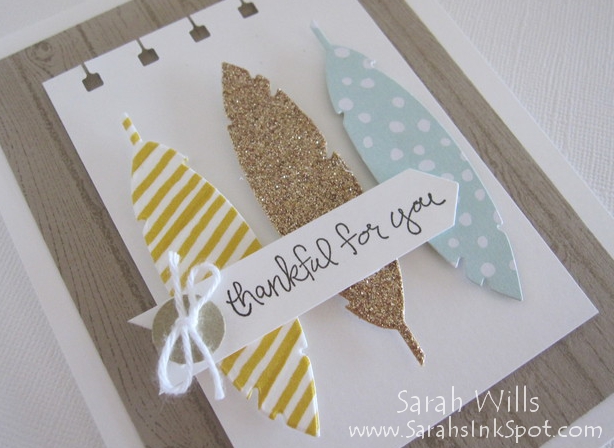
The white die cut banner is for you to stamp your sentiment – it was made using a die from Project Life Cards & Labels Framelits (pg 188) and I used a stamp from the set Good Greetings on my card
And then add the finishing touch – the faux gold button which is a cute & lightweight feature – VERY important when thinking about mailing cards as this keeps down your postage cost – simply thread your piece of White Bakers Twine through those holes, tie a bow and add to your card.
That faux gold button was easy to make using Brushed Gold Paper (pg 193) and two circle punches…to make some of your own, you simply use a 1/16″ Handheld Circle Punch to make two holes…
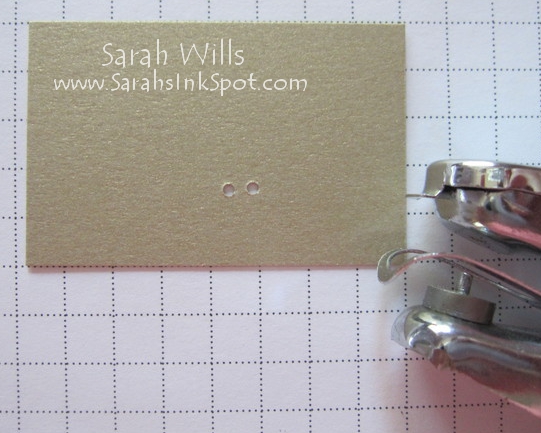
And then position a 1/2″ Circle Punch over them and punch 0ut!
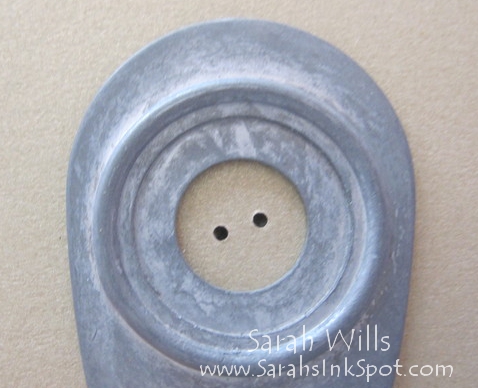
And there is one cute, lightweight & very cost effective embellishment…
Want to make more cards just like this?
Here are the supplies that I used to make this card:
Stamps: Hardwood (CM 133035/WM 133032), Good Greetings (CM 135017/WM 134014)
Cardstocks: Whisper White (100730), Crumb Cake (120953)
Ink: Memento Black (132708)
Dies: Feathers Framelits (135852), Project Life Cards & Labels (135707)
DSP: All is Calm (135823)
Specialty Paper: Champagne Glimmer (127885), Brushed Gold (102935)
Washi Tape: Color Me Autumn (135842)
Punches: 1/16 Circle Handheld (134363), 1/2″ Circle (119869), Spiral Border (119872)
Misc: White Bakers Twine (124262), Dimensionals (104430)