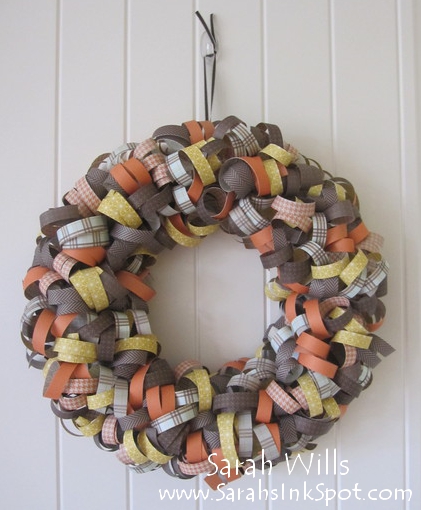
This wreath looks so complicated to make so you might be surprised to find out that it is actually super easy – really!!!
It looks absolutely stunning and is wonderful for decorating your own home or giving as a gift to someone else…I plan to make a few for teacher gifts this holiday season…just by changing out patterned papers you can theme it for any time of the year or occasion…my wreath here sports papers from Sweater Weather DSP for a fall look…
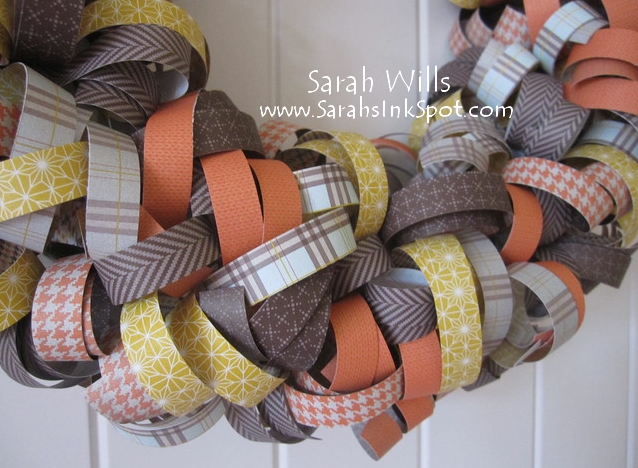
Here is a close up of a section of this wreath…isn’t it gorgeous?
Here is my tutorial so that you can make your own Curly Wreath– at the end of this tutorial you will find a printable version too so that you can print it out and keep it for reference.
Supplies needed:
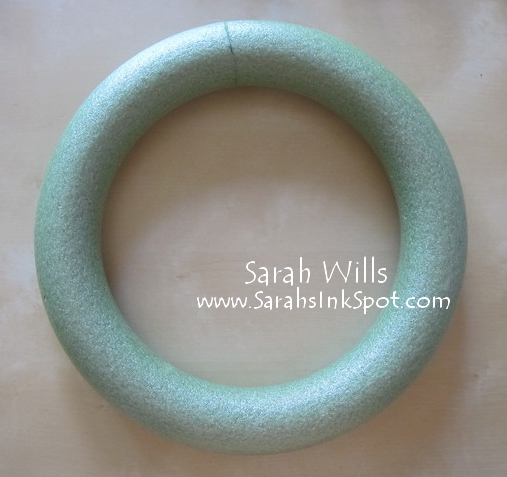
- Foam wreath – I used a 12″ wreath – you can find them at Walmart & big box craft stores
- 6 sheets of 12×12 Designer Series Papers, in different patterns
- 144 Dressmaker Pins
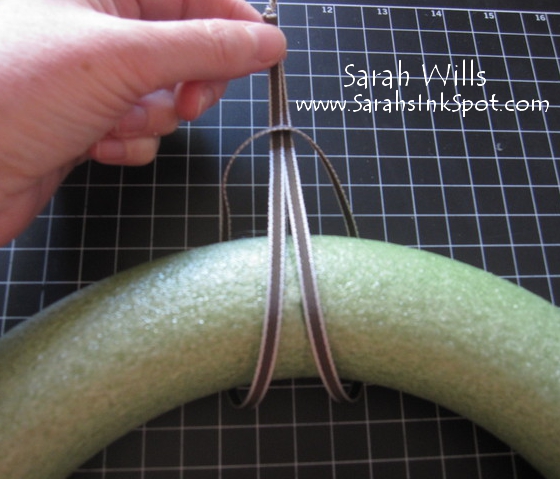
- Ribbon to hang your wreath
Take your foam wreath and lay it flat on your work surface…don’t worry about what color it is because you won’t be able to see any of this base once you are done…
Next take a length of ribbon and tie it around your wreath – it is MUCH easier to do this first than when you have finished, trust me!!!
Take your first sheet of patterned paper and using your paper trimmer, cut it into 1/2″ strips – you will end up with 24 strips measuring 1/2″ x 12″ – and then repeat for the other 5 sheets of paper…
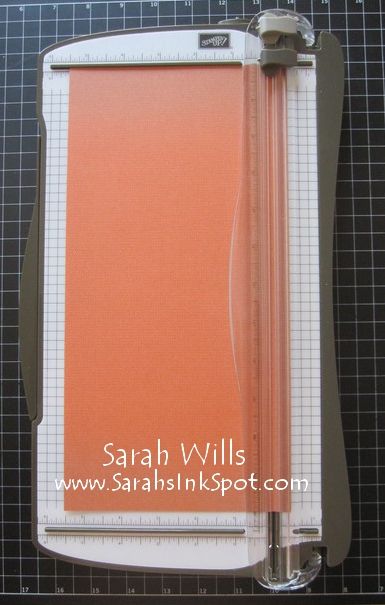
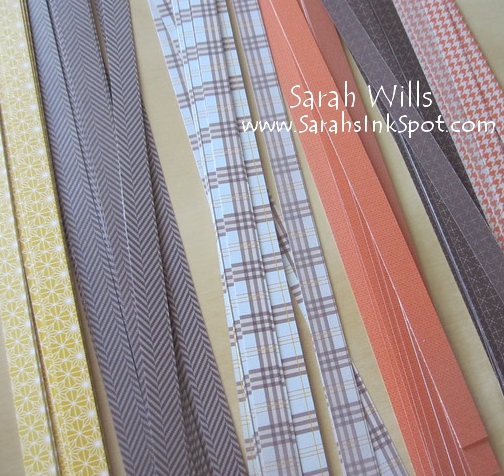
When finished, you will have a total of 144 strips of paper to work with – as you can see below, I used 6 different patterned sheets of paper from Sweater Weather DSP which is featured in the Holiday Catalog – I wanted a brown & orange base theme with splashes of yellow and blue and so choose my papers accordingly…
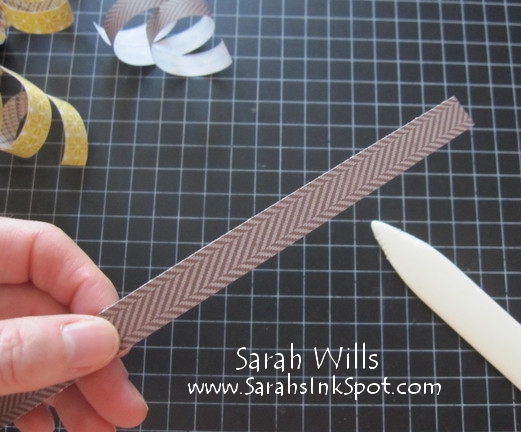
Next you are going to curl your papers – very easy and quick to do – with one hand simply grasp a strip of paper in the center (6″ in from one end) and take your Bone Folder in your other hand and pull it along the length of the paper, just as you would when curling ribbon…
And there you have a curl…

Turn your paper strip around and repeat for the other end – and this is what you will have…
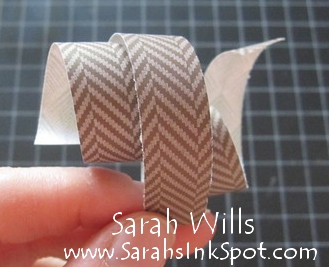
And then repeat for the other strips of paper…

Next you are going to add them to your wreath – simply push a dressmakers pin through the center of a strip…

And push it into your wreath…
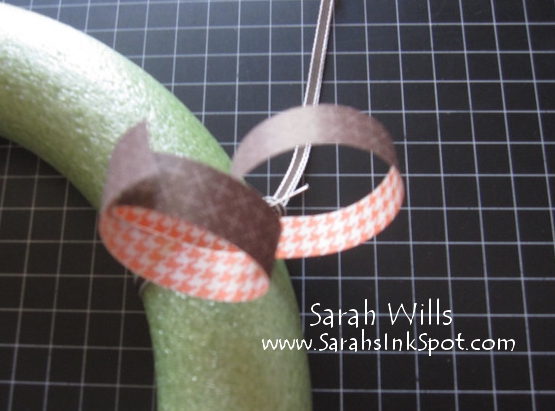
Keep on adding strips to your wreath using alternating strips so that you get a mix of all of the patterns & colors and very soon you will see it start taking shape…

Work your way around and ta-dah- once done you will end up with this…
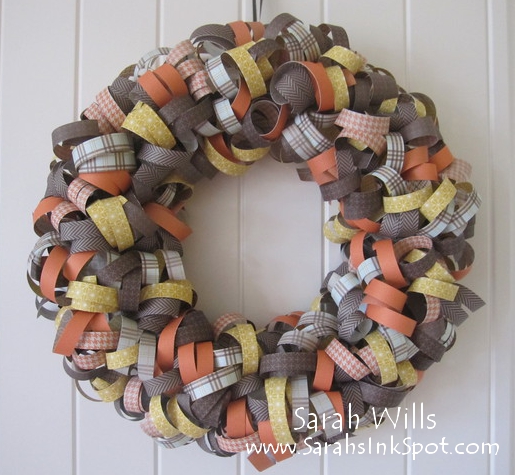
Absolutely gorgeous, easy & a fun project to do in an evening – and SO MUCH CHEAPER than those store bought wreaths!!!
WANT TO PRINT OUT THIS TUTORIAL? PLEASE CLICK HERE FOR A PRINTABLE VERSION WHICH WILL OPEN IN A NEW BROWSER WINDOW
Please click HERE to view my other Project Tutorials
just found your web page. I can’t wait to try this with some Christmas paper. This is so cute. Thanks!
I loved this , can bbn I do this with 1/2:inch ribbon