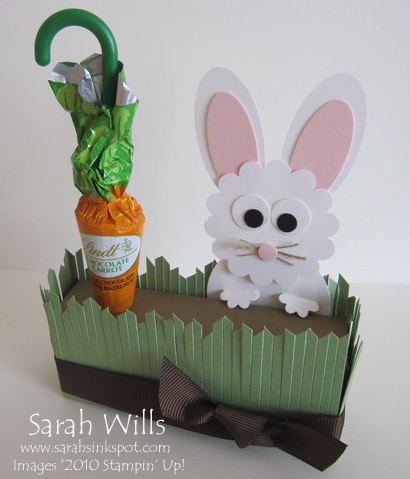
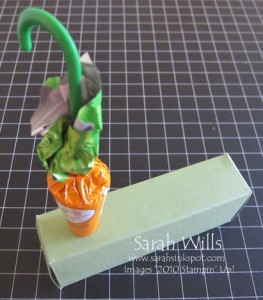
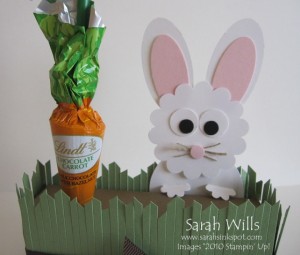
This is one cute way to deliver an Easter treat! Check out this cute Bunny popping out of the grass with his eyes on that carrot.
It is a delicious Lindt chocolate carrot that fits snugly into a hole made into the cardstock box – all you need to make this box are two colors of cardstock for your grass and soil and white car stock for your bunny…
It is a fun project that kids and adults alike will love – where did I find those chocolate Carrots? They come in a box of 4 and I find them at Target and Walmart…
Here is my tutorial so that you can make your very own cute Bunny and Carrot Box – at the end of this tutorial you will find a printable version too so that you can print it out and keep it for reference.
To make the box…
Cut a piece of cardstock to be 8″ x 5 1/2″ – this will create the inner box part – in my tutorial below I have used a piece of green cardstock but in my actual box above I used the brown color Soft Suede to make it look like soil.
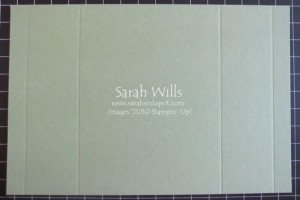
Place into your score tool or Paper Trimmer with score blade inserted – with the longest side along the top edge of your trimmer – and score at 1/2″, 2″, 6″ and 7 1/2″…
Turn around so that the shortest side is along the top edge of your trimmer and score at 1/2″, 1 1/2″, 3″ and 4″…
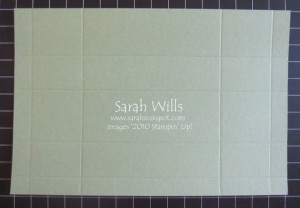
Turn back so that the longest side is along the top edge of your trimmer with the 1/2″ strip at the top – you need to make score lines at 1 1/2″ and 6 1/2″ – BUT you need to leave one panel not scored along both of those score lines.
Score down to the 3rd intersecting score line – skip a panel – and score the final panel so that you have this…
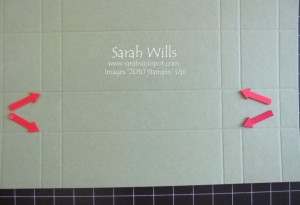
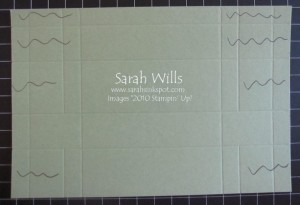
Now you need to trim sections away so that you can form your box – you need to trim away the areas that I have marked in pencil below…
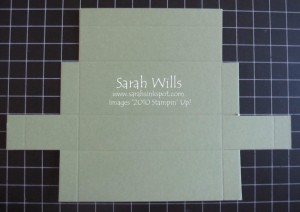
And this is what you will have…
For easy assembly, cut the corners away on each flap…
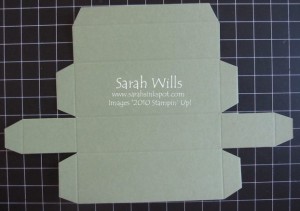 And fold along all score lines.
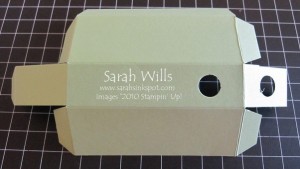
Now to make the hole where you carrot will slot in…to make this easy I used a 1/2″ Circle Punch but you could also use your Circle Scissors Plus to do the same thing.
To get my hole where I wanted it I needed to be able to get my punch in there – to do this I folded an end panel in and punched a hole through both of these layers – don’t worry about the hole on the end panel though – it will be covered by the grass outer layer so will not be seen…
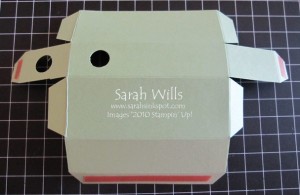
Apply strong adhesive tape such as Sticky Strip to th e flaps…
And fold and assemble your box…
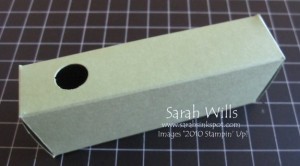
And that is the basic box completed – and as you can see, your carrot fits nicely into the hole and is very well supported…
To make the grass around the edge…
I used the color Wild Wasabi for mine and cut a piece of cardstock to be 11″ x 2″.
Place into your score tool or Paper Trimmer with score blade inserted with the longest side along the top edge of your trimmer – and score at 1″, 5 1/8″, 6 3/16″ and 10 1/4″…and trip the corners of the little end tab as shown below…
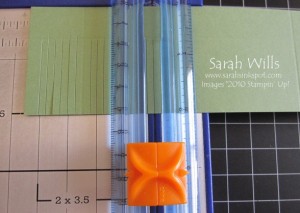
Place into your score tool or Paper Trimmer with score blade inserted with the shortest side along the top edge of your trimmer and score a line at 1/2″ – this is where your line will be…
Place into your Paper Trimmer with the cutting blade inserted and cut down to this line at 1/8″ intervals – this will create your blades of grass…
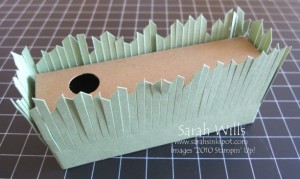
Then using sharp scissors such as Paper Snips cut the top of your grass with diagonal cuts to create a rustic field of grass look…you can make these cuts random or even…
Using strong tape adhere to your box, tucking the tab underneath the bigger panel to conceal it…
To make the Bunny…
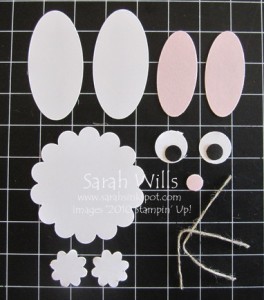
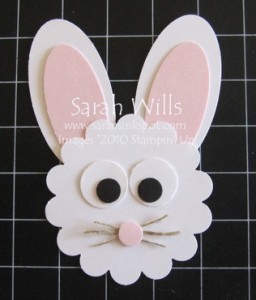
Use punches to create the pieces you will need – I used:
1 x White Scallop Circle using the 1 3/4″ Scallop Circle Punch
2 x White Ovals using the 1 3/4″ x 7/8″ Oval Punch
2 x Pink Ovals using the 1 3/8″ x 5/8″ Oval Punch
2 x White Circles using the 1/2″ Circle Punch
2 x Black Circles using the 1/4″ Circle Punch
1 x Pink Circle using the 1/4″ Circle Punch
2 x White Scallop Circles using the Boho Blossoms Punch
Length of Linen Thread for the whiskers
Assemble your Bunny – I use Mini Glue Dots on these punched pieces to make assembly easy…
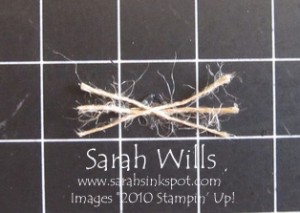
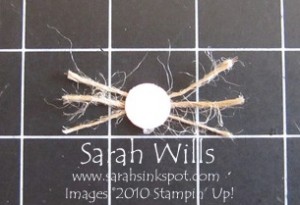
An easy way to create the whiskers is to put a Mini Glue Dot onto your work surface or straight onto the face…cut three strands of Linen Thread and add them to this glue dot in a criss cross manner…
Add another Mini Glue Dot on top and add the nose…
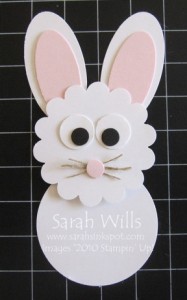
To make his body, I used used a 1 3/4″ Circle Punch and added the head onto it using Dimensionals…if you wish to add paws, fold those two little scallop circles in half and attach them to the body…
Slot the Bunny into your box, add a carrot and maybe a piece of ribbon 0r a sentiment and there you have one CUTE treat!
WANT TO PRINT OUT THIS TUTORIAL? PLEASE CLICK HERE FOR A PRINTABLE VERSION WHICH WILL OPEN IN A NEW BROWSER WINDOW
Please click HERE to view my other Project Tutorials
Now to make it super simple for you to make your own…
HERE IS MY BUNNY MEETS CARROT KIT!
What is in a Kit? ALL the consumables you need to make 1 Box as shown above – included in your kit will be:
- Punched out shapes and 3″ of Linen Thread to make the Bunny
- 15″ Brown 5/8″ Ribbon
- A strip of Green cardstock to make the grass – already scored – you will cut the grass
- A piece of Brown cardstock to form the Box – already scored and cut to shape with the hole punched
- A Brown Scallop Oval & layering white oval punched piece for you to add a sentiment if desired
The Kit price includes shipping – please note that you will need to supply adhesives to assemble it and the carrot to put into your finished box.
How do you purchase my Kit?
By clicking on my Buy Now link below and select how many kits you would like – please note that I ship to US mailing addresses only.
YOUR KIT WILL SHIP FAST – WITHIN 12 HOURS OF YOUR PAYMENT – I am taking orders for these from now through Monday April 18th to ensure delivery before Easter!
