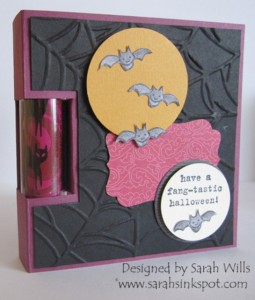
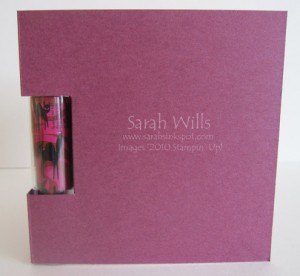
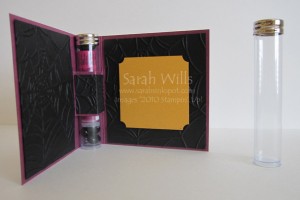
This is such an easy card to make and looks fabulous – it uses a Test Tube in the spine of the card that you can fill with candies, drink mixes or even a themed lip balm which is what I have done here…
I am loving using Test Tubes and I came across these – they are PLASTIC, have screwtops and flat bottoms making them perfect for filling with treats for school children – they are kid-perfect!
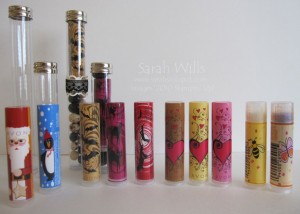
NEED TEST TUBES? I have both Tall and Small Tubes available in my store – please see the end of this tutorial for more details…WHERE CAN YOU FIND THOSE SEASONAL THEMED LIP BALMS? I got mine through Avon.com – they often have them in the clearance section too and are fabulous value for money…I have a photo at the bottom of the delicious ones that I have…
This card uses the Small Tube but you could also size a card slightly larger to use the Tall Tube. How do you make this cute card? It’s a piece of cake…
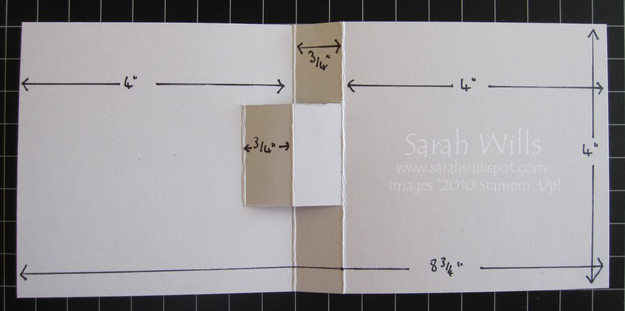
You can find my template with sizes and lines showing you where to cut and score at the very end of this tutorial
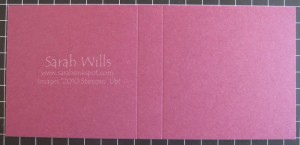
Cut a piece of cardstock to 4″ x 8 3/4″…place in your trimmer with your score blade installed or place in your score tool- the longest edge should be along the top…
Score at 4″ and again at 4 3/4″…
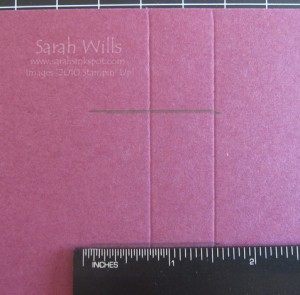
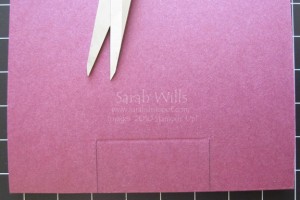
At the second score line from the left side, measure 1 1/4″ from the top and mark a small pencil mark on that score line – then on the same score line measure 1 1/4″ from the bottom and mark.
Then take a ruler and measure out 1 1/2″ from the top mark on your score line towards the left and mark your line with a pencil – repeat for the second mark lower down – this is what your lines will look like…
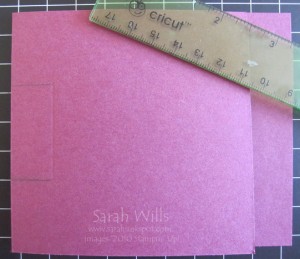
Next you need to score between these lines downwards to create a third score line – but a small one, just between your two pencil lines. Fold along your two big score lines.
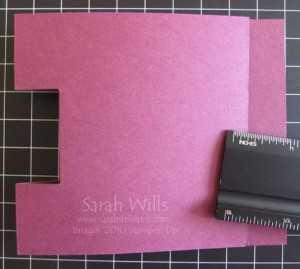
Now you need to make the little bit that will hold your Test Tube – fold along the first score line…
And using sharp scissors snip down the two lines that you drew right to the small score line…
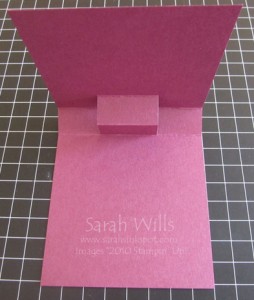
Open up your card and gently push through onto the little score line to force that little band into the center of your card – push down to make a crisp fold…
And this is how your card will look on the inside…
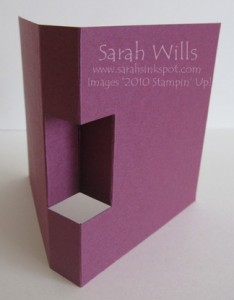
And on the outside…
And now it just awaits it’s Test Tube filled with whatever goodies you desire…
This is my finished card inside…I used the new SPIDER WEB Embossing Folder that is on pg 6 of the Holiday Mini Catalog which I love – it makes it so easy to embellish projects and is so much more cost effective that using papers…once you have it, you have it for life and can reuse it forever!
I would love to see your creations using this template – if you email them to me, I will feature them on my blog!
NEED TEST TUBES? I have two sizes available in my store – Tall and Small – I used the Tall size for this project and they are perfect for kids since they are made of plastic for safety, have screwtop lids to keep the contents secure and flat bottoms so no need to make a rack to hold em!
WHERE CAN YOU FIND THEM? In my store – click HERE for Small Tubes and HERE for Tall Tubes!
I combine shipping costs and happily mix and match your order – want 2 Tall and 4 Small Tubes? No problem – just click here to Contact Me!
WANT TO PRINT OUT THIS TUTORIAL? PLEASE CLICK HERE FOR A PRINTABLE VERSION WHICH WILL OPEN IN A NEW BROWSER WINDOW
Please click HERE to view my other Project Tutorials
Lovin’ the lip balms…you can find all sorts of seasonal ones through the year – I found mine at avon…aren’t they fab?
