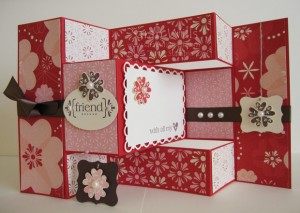
This card has a real ‘wow’ factor…
And it is SOOO easy and fun to make – all you need to make the base is a piece of Cardstock, a Paper Trimmer with a Scoring Blade, a Hobby Knife and a Ruler…
You can decorate your card with any theme of Designer Series Paper and embellishments that you have to hand…it is a stunning, elegant and beautiful card and the recipient will be wowed…
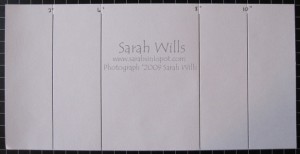
Step 1 – cut a piece of cardstock to the measurements of 5 1/2″ x 12″
Step 2 – using your Paper Trimmer & Score Blade, score at 2″ 4″ 8″ and 10″ as shown below:
Step 3 – measure in 1 1/2″ from the top long edge and using your Craft Knife and self-healing mat, cut a slit from the 2″ score line to the 10″ score line. Measure in 1 1/2″ from the bottom long edge and cut another slit from the 2″ score line to the 10″ score line – see below for visual details:
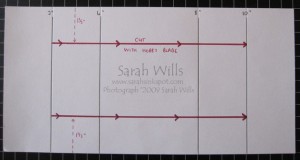
Your piece of cardstock should look like this:
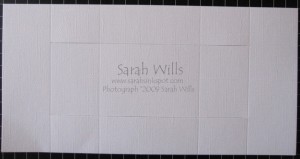
Step 4 – fold carefully along your score lines as show below – use a Bone Folder to make your lines crisp:
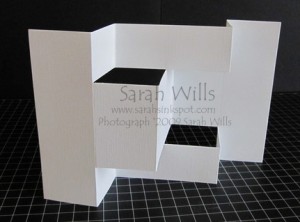
Step 5 – the really fun and creative part – decorate your card!
If you use papers from a pack of DSP it is super easy to co-ordinate the colors and prints – the papers I used in my card at the top of this tutorial are from the Sending Love Specialty pack which you can find on pg 13 of the brand new Occasions Mini catalog and it has glittered sheets too – it is just gorgeous. I also custom made a mat in the center using the brand new Scallop Trim Corner & Scallop Trim Border Punches – the corner punch is in the Occasions Mini Catalog and the border punch is part of Sale-a-bration – you can get it for free!
WANT TO PRINT OUT THIS TUTORIAL? PLEASE CLICK HERE FOR A PRINTABLE VERSION WHICH WILL OPEN IN A NEW BROWSER WINDOW
To make cutting the papers to decorate your card super easy you can use this format – close up your card and use the T shape on the front as a template to cut out two pieces, one for the front and one for the back – trim 1 1/16th from all sides of those pieces.
Then cut papers the following sizes: 4 pieces at 1 7/8” x 1 3/8” – 2 pieces at 1 7/8” x 3 7/8” and 1 piece at 2 3/8” x 3 7/8”
The result will be a beautiful card perfect for special thank yous, birthdays, Easter greetings, Valentine’s Day and Mother’s Day…have fun with this tutorial…
Please click here to view my other Project Tutorials