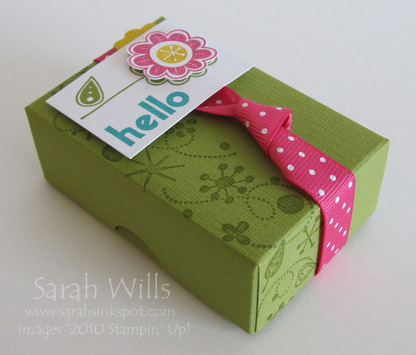
This is a box that is perfectly sized to hold 8 Hershey’s Nuggets – and I love it not just because I can see the versatility of this little gift for many occasions, but because it is such a very affordable way to give a little gift…perfect for teacher gifts and shower & party favors…
You need no special equipment – all you need to make it is a sheet of colored cardstock, a piece of ribbon and the stamp set and inks you wish to use – there are no Dies to purchase – you simply cut, score, fold and assemble…

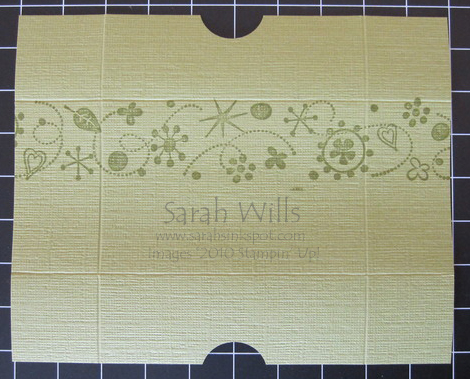
Firstly cut your piece of colored cardstock to size – I used Old Olive Textured cardstock and you need to cut 2 pieces at 5″ x 4″. Score both pieces 1″ from each edge – lay one piece down and ink up a wheel or stamps and make a pretty border all the way along it – the box above uses the Retro Remix Wheel (pg 205) stamped with Old Olive ink. This is your top piece – take a 3/4″ Circle Punch and punch a half-circle notch on each long side as shown below:

At each short end, take your scissors and cut 1″ along the score line until you reach the intersecting line – do this 4 times – fold in the flaps to assemble your lid and adhere with strong adhesive such as Sticky Strip. Take a piece of ribbon approximately 10″ in length and 3″ from one end tie a knot in it – wrap around the box lid and adhere to the insides of the lid.
Stamp your images on a piece of cardstock measuring 1 3/4″ x 1 1/4″ – I used stamps from the set Hello Again to stamp a flower and sentiment and used Dimensionals to attach it to the lid.
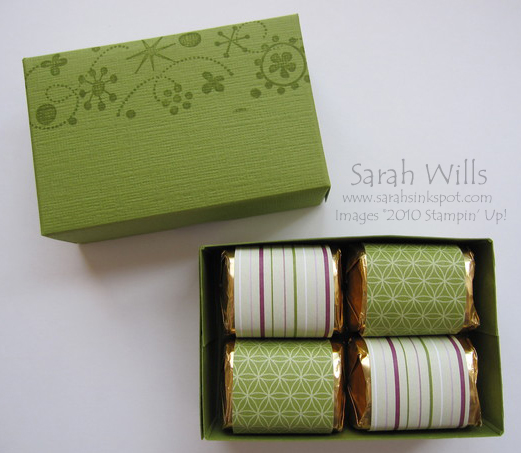
To create the base, assemble as you did for the lid and put in your gift – I used 8 Hershey’s Nuggets and covered each using Designer Series Papers from the Cottage Wall pack – simply cut your papers to be 1″ wide by 3″ long and wrap around each nugget securing with Sticky Strip – then put 2 layers of 4 nuggets into the box and not only is the outside of the box pretty, but the inside is too…

Pop the lid on and there you have a very economical and cute gift just perfect for saying thank you…

WANT TO PRINT OUT THIS TUTORIAL? PLEASE CLICK HERE FOR A PRINTABLE VERSION WHICH WILL OPEN IN A NEW BROWSER WINDOW
Please click HERE to view my other Project Tutorials