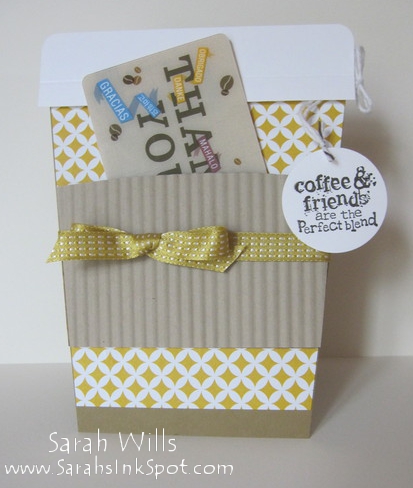
This Travel Coffee Cup Gift Card Holder is so cute and easy to make – and you can make it for any occasion…
Using different patterned papers you can a simple thank you (like mine below) or use Holiday papers to theme it for Halloween, Thanksgiving, Christmas…Valentines, Easter, Teacher Appreciation…birthdays…any event!
Here is my tutorial so that you can make your very own Coffee Cup Gift Card Holder – at the end of this tutorial you will find a printable version too so that you can print it out and keep it for reference.
To make your Coffee Cup Gift Card Holder:
Cut a piece of cardstock to be 11″ x 4″ and score in the center at 5 1/2″…

Fold in half facing towards you.
Measure down from the left top edge (score line) 1/2″ and make a pencil mark – repeat for the other side.
Measure in from the left bottom edge by 1/2″ and make a pencil mark – repeat for the right side – join those lines like so…

And using your Paper Trimmer, cut along those diagonal lines – and this is what you will have.

Isn’t that easy? I love how simple & quick these cards are to make!
To make the top trim take a piece of White cardstock and cut it to be 1 1/2″ x 4 1/4″ and using a Corner Rounding Punch shape the top two corners.
Place into your score tool or Paper Trimmer with score blade inserted – with the shortest side along the top edge of your trimmer – and score a line down at 1/4″ in from the edge with square corners – and this is what you will have…

And the bare bones of your card are complete and ready for assembly!
Next is the fun bit – you get to decorate your card however you wish!
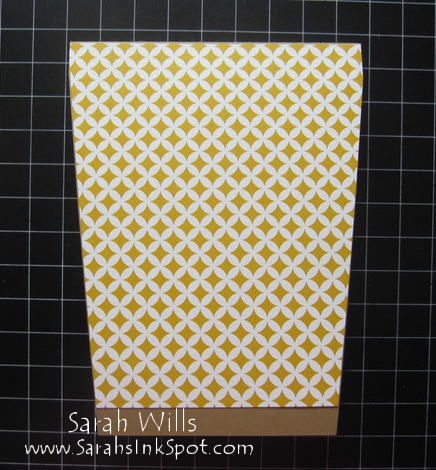
First cut a piece of patterned paper to fit the front of your card – I place a piece of DSP on my desk and lay the card shape on top of it – I leave about 1/2″ at the bottom and then draw pencil lines onto the DSP following the shape of the card – I then trim along these lines and this will give you a perfect shape to adhere to your card base…
Then you simply use Dimensionals to attach your white ‘lid’ and add your belly band.
Belly Band:
Simply take your belly band and open it out – place your card base on top of it and position where you want your belly band to be – using a pencil, gently draw down each side so that you are marking the belly band – and then cut along those lines.
You can do this and then use that as a template to cut a piece of colored cardstock or DSP if you would prefer.
I attached mine to the card using just a length of Sticky Strip along the bottom edge – I didn’t need to tape along the side edges because my gift card stayed snuggly in there without me doing that – but of course you can always tape down those edges if you want to…
Pop your gift card in however you like it to be – my top photo shows it sticking out but you can also put it in so that it is horizontal if you prefer, like this…
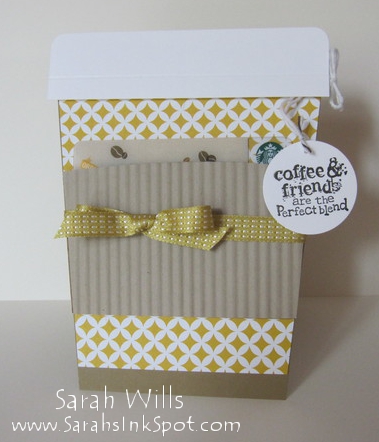
Isn’t it cute? I love how it turned out – what a great gift card holder that I think people are going to LOVE!
WANT TO PRINT OUT THIS TUTORIAL? PLEASE CLICK HERE FOR A FREE PRINTABLE VERSION WHICH WILL OPEN UP IN A NEW BROWSER WINDOW
Please click HERE to view my other Project Tutorials