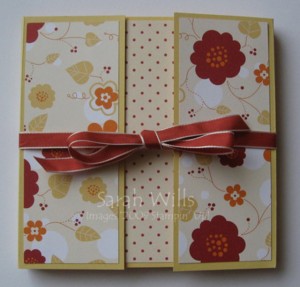
How to make this neat and economical scrapbook…
This is just the coolest little scrapbook I have ever made and is a great one to give to family members and for presenting a teacher with photos of the class at the end of the school year – it is fun to make and is very economical over the costs of buying a scrapbook – it uses only 3 sheets of 12″x12″ cardstock along with 5 sheets of patterned 12″x12″ paper – any of the Stampin Up Designer Series Papers would be just perfect for this project as the sheets of paper in each package co-ordinate beautifully with each other and the solid cardstocks…
At first glance the directions appear to be quite complex but if you follow them step by step as you make your book, it all makes sense and is an amazingly easy ‘wow’ project to make which is alot of fun…

Ingredients
Cardstock & Papers – 3 sheets of 12″x12″ solid cardstock & 5 sheets of 12″x12″ double sided Designer Papers – I used So Saffron cardstock and Washington Apple Designer Series Papers
Ribbon – 1 yard of co-ordinating thick ribbon – I used Riding Hood Red Taffeta
Miscellaneous – Strong Adhesive such as Sticky Strip, ordinary adhesive such as Snail, Bone Folder
How to:
Cut each sheet of solid paper in half so that you have six sheets of 12″x 6″ – set aside 1 of the 6 for the cover.
Score the remaining five sheets from 3″ on both ends so the sheets are scored at 3 inches and 9 inches (on the long side).
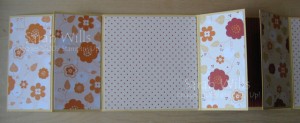
Fold all of the scores inward. Line up all your pieces in a long row so you have all your flaps facing up and your 6×6 pieces laying flat on the table – it should look like this:
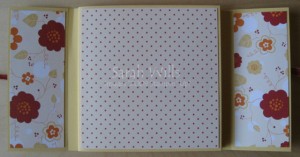
\_/\_/\_/\_/\_/ – using your strong adhesive, adhere the 3″ scored pieces to the neighbors 3″ scored piece.Lay the piece flat so all the 3″ scored doors are facing upward, you should have five panels (6″ x 6″ pieces) – close the doors so that panels 1, 3, and 5 are covered.Fold panel 1 in over panel 2 and panel 5 in over panel 4, fold once inward so you have a square. This will not be completely flat, so just push it down so it is flatter.
Take each sheet of Patterned Paper and cut two strips of 5 ¾” x 12″ out of it – do for all five sheets so that you will end up with ten pieces measuring 5 ¾” x 12″. Cut each strip into two squares of 5 ¾” so that you end up with 20 5 ¾” squares – you can save the little extra piece for embellishments if desired.
Reopen your book and work out how you would like to place your papers – using regular adhesive, adhere five 5 ¾” pieces to panels 1-5 as desired.Cut six of the 5 ¾” squares into 2 ¾” x 5 ¾” strips and adhere these pieces to the front and back of the doors on panels 1, 3, and 5 as desired.Continue closing your book and covering with printed paper until only the middle back is uncovered.

Take the 6×12 piece of solid cardstock that you put to one side and score it at 3″ and 2 ½” AND at 9″ and 9 ½” to create some room for the thickness of your book. Lay out the newly scored piece and find the center line – adhere the ribbon across it and cut slits on the scored lines nearest the center for the ribbon to pass through. Thread the ribbon through these slits.With your book closed and using strong adhesive, adhere this new cover to the blank back cover of your book. Cover the new front panels with 2 ¼” x 5 ¾” printed paper.

Add photographs and embellish as desired – when finished, tie closed with the ribbon.

WANT TO PRINT OUT THIS TUTORIAL? PLEASE CLICK HERE FOR A PRINTABLE VERSION WHICH WILL OPEN IN A NEW BROWSER WINDOW
If you have any questions or would like help with these instructions please click here to contact me and I will be very happy to help.
Please click HERE to view my other Project Tutorials