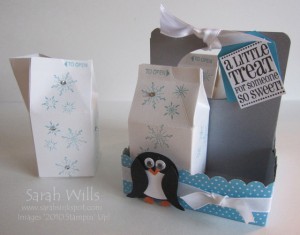
This tutorial will show you how to make a Caddy that holds 4 Mini Milk Cartons made using the Mini Milk Carton Bigz L Die…you can find this die on page 209 and it is just darling. There are stamps that co-ordinate with the carton in the set Got Treats that you can find on pg 55 – they are great for showing the recipient of your treats how to get into them…
You can make this caddy to hold 4 cartons or if you prefer just 2 cartons – that would be a cute way to hang treats on doors of co-workers, friends, children…and wouldnt that make a fun Halloween BOO neighbor treat idea? Love it…
Be sure to use sturdy cardstock – I used Brushed Silver for my caddy – and have some very strong adhesive to hand such as Sticky Strip.
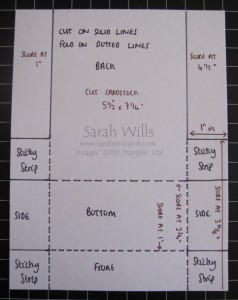
Here is my tutorial and you can find a printable version at the very end…the measuring, scoring and cutting guideline is below for your reference…click on it to make it larger…
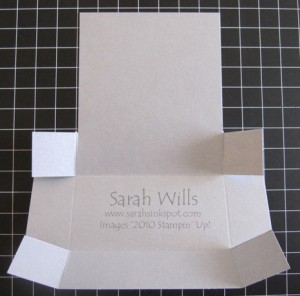
Firstly take a piece of sturdy cardstock and cut it to be 7 1/4″ x 5 1/2″. Score it at 1″ in from each long edge and 1″ from the bottom edge. Score again at 2 3/4″ from the bottom edge. And finally score at 3 14/16 from the bottom edge BUT ONLY at 1″ outwards each side – see diagram above for a visual on this – score and fold along the dotted lines and cut along the solid lines, as shown above and you will have this…
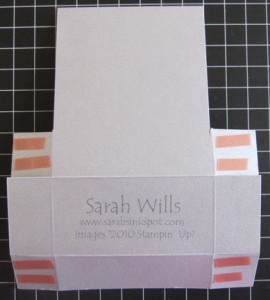
Next turn your cardstock over and apply Sticky Strip or your choice of strong adhesive to the 4 flaps as show below…
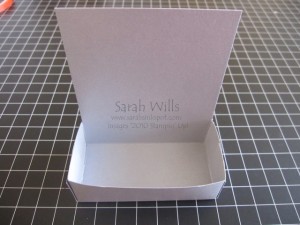
Turn back over and adhere the flaps in place, inside the large ones…and voila – here is one side of your caddy.
YOU CAN FINISH HERE TO HAVE A 2 CARTON VERSION just perfect for hanging on doors – simply punch your choice of an oval or round shape to make the handle and decorate as wished, filling with your cute milk carton treats…
WANT TO MAKE A 4 CARTON VERSION? Read on…
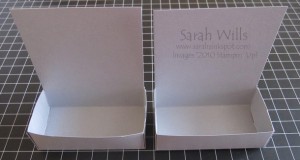
OK repeat the above directions so that you end up with 2 caddy pieces…
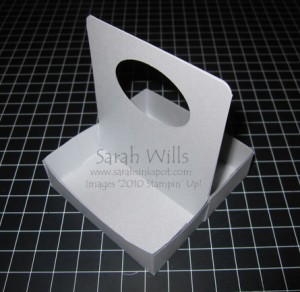
Next you need to make your handle – to avoid damaging your punch by trying to punch through two layers of sturdy cardstock, what I do is this – I punch my shape through the first caddy and lay it back-to-back on top of the second – I draw the punch shape onto the second caddy with pencil, remove it and use that to perfectly align my punch to make that cut – I used the Wide Oval Punch to make my handle which you can find on pg 203. I also like to round the corners at the top before sticking them together.
When you’ve made your handle shapes use Sticky Strip to adhere the caddies back-to-back being careful to align them perfectly…and there you have the basic caddy, ready for decorating and embellishing…
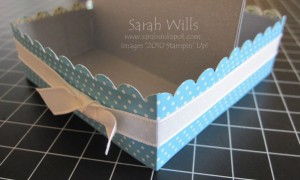
To cover the seams at the sides, simply cut some cardstock or DSP to size and wrap around – I also used my Scallop Border Punch to decorate the top edge as well – and I finished up with some Ribbon tied around that I secured using Mini Glue Dots…and there you have a very easy to make and perfectly sized caddy for your Mini Milk Cartons…
WANT TO PRINT OUT THIS TUTORIAL? PLEASE CLICK HERE FOR A PRINTABLE VERSION WHICH WILL OPEN IN A NEW BROWSER WINDOW
Please click HERE to view my other Project Tutorials
