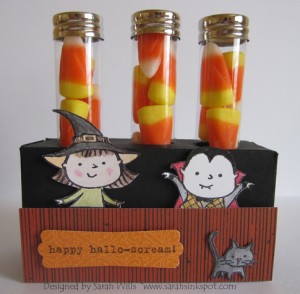
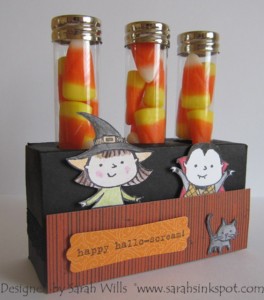
I am loving using Test Tubes and I came across some that are PLASTIC, have screwtops and flat bottoms making them perfect for filling with treats for school children – they are kid-perfect!
NEED TEST TUBES? I have both Tall and Small Tubes available in my store – please see the end of this tutorial for more details…
You can fill these fun Tubes with bath salts, candies, drink mixes – anything for any occasion, for kids and grown-ups alike – and to make gifts you can make a cute rack to hold 3 of them…
I went looking for ideas to create a Test Tube Rack but could find nothing to fit with what I wanted so I decided to design my own – this box is very easy to make from one sheet of cardstock and I sized it to fit 3 test tubes which I filled with candy corn.
I decorated my box using adorable stamped images from the set FANG-TASTIC as featured in the Holiday Mini Catalog and a piece of Designer Series Paper which was perfect for creating my fence that the little characters are peering over…and this is how I made it…
You can find my template with sizes and lines showing you where to cut and score at the very end of this tutorial
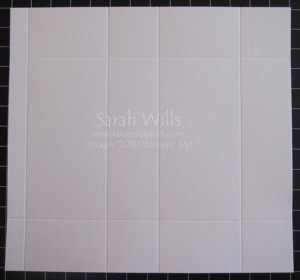
Cut a piece of cardstock to 7″ x 6 1/2″ and score as follows:
With the 6 1/2″ side to the top of your paper trimmer/score tool score at 1 1/4″ in from each side
Turn your cardstock so that the 7″ side is to the top and score at 1 1/4″ and 3 1/4″ and 4 1/2″ and 6 1/2″ – you will have a little left at the end to create your adhesive flap and this is what your cardstock will look like…
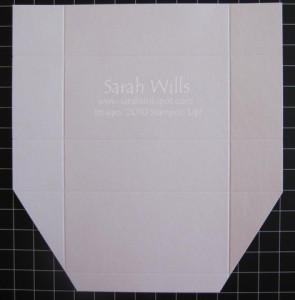
Turn so that your adhesive flap is at the bottom and trim diagonally each side from the bottom to the second score line as follows:
This will make it easier to fold up into a box shape. Next down each side cut in from the edge to the 1 1/4″ score line – this will create the end flaps of your box.
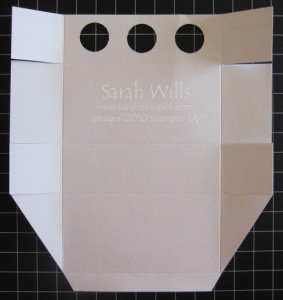
Take a 3/4″ Circle Punch and evenly space holes along the very top section for your tubes. To make this easy, I punch out a circle from scrap paper and use it to position my center hole, draw around it with pencil and then do the same for the two other holes – punch the holes out and use an eraser to rub out the pencil marks. Fold along the score lines and this is what you will have…
‘Dry’ fold your box to make sure that it all fits together – you might need to trim your adhesive flap depending on the position of your punched circles.
Apply a strong adhesive such as Sticky Strip to bottom flap and the side flaps – fold the side flaps in ensuring that the largest is on the outside of your box for a neat finish and adhere your bottom flap in place…
Decorate as desired and add your Test Tubes for one cute gift package…
NEED TEST TUBES? I have two sizes available in my store – Tall and Small – I used the Tall size for this project and they are perfect for kids since they are made of plastic for safety, have screwtop lids to keep the contents secure and flat bottoms so no need to make a rack to hold em!
WHERE CAN YOU FIND THEM? In my store – click HERE for Small Tubes and HERE for Tall Tubes!
I combine shipping costs and happily mix and match your order – want 2 Tall and 4 Small Tubes? No problem – just click here to Contact Me!
WANT TO PRINT OUT THIS TUTORIAL? PLEASE CLICK HERE FOR A PRINTABLE VERSION WHICH WILL OPEN IN A NEW BROWSER WINDOW
Please click HERE to view my other Project Tutorials
Here is my template for reference, showing you sizes, cutting and score lines…
