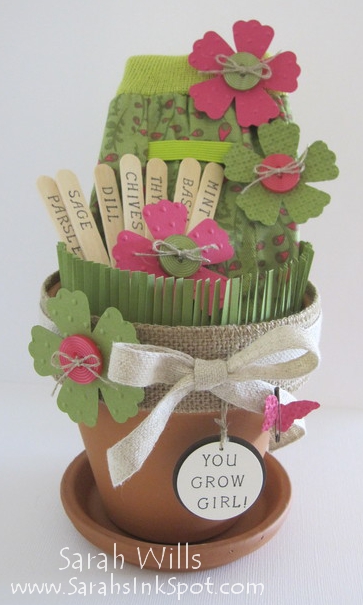
This is a super cute gift that I think any gardener would love to receive…it is a simple flower pot that you can find in most stores that is fun & easy to decorate and contains a pair of gardening gloves and some Seed Marker Sticks that are made from popsicle sticks, stamps & ink…
Here is mine…I found the most fabulous brightly colored gardening gloves and wanted to create a cool way to gift them – I used the colors in those gloves for my color theme and had a ball creating this gift!

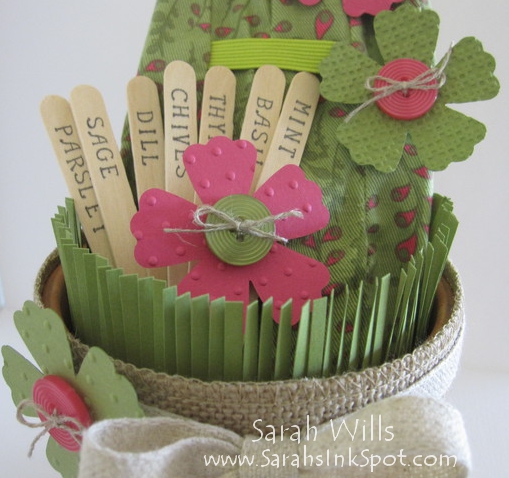
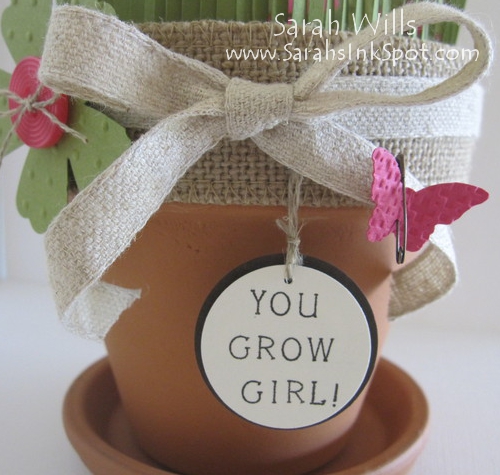
The herb names on the sticks are stamped using stamps from the Simply Serif Mini Alphabet Stamp Set and they are perfectly sized for the job…and I also used them to stamp my custom ‘You Grow Girl!’ tag – LOVE how that turned out!
Here is my tutorial so that you can make your own Flower Pot with Seed Sticks gift – at the end of this tutorial you will find a printable version too so that you can print it out and keep it for reference.
Supplies that I used to make this:
- 4″ flower pot with saucer
- 1 1/4″ Burlap Ribbon
- 7/16″ Natural Trim Ribbon
- Linen Thread
- Fringe Scissors
- Green & pink cardstocks
- Brights Designer Buttons
- Simply Serif Mini Alphabet Stamp Set
- Pansy, Bitty Butterfly & Circle Punches
- Perfect Polka Dots & Square Lattice Embossing Folders
- Craft Sticks, Gardening Gloves, Vintage Trinkets, Early Espresso Ink, Linen Thread
The grass inside the rim:
Take a piece of green 12″ x 12″ cardstock (I used the color Old Olive) and cut a strip to be 1 3/4″ x 12″…

This will fit perfectly in the inner rim of your 4″ flower pot as you can see below…
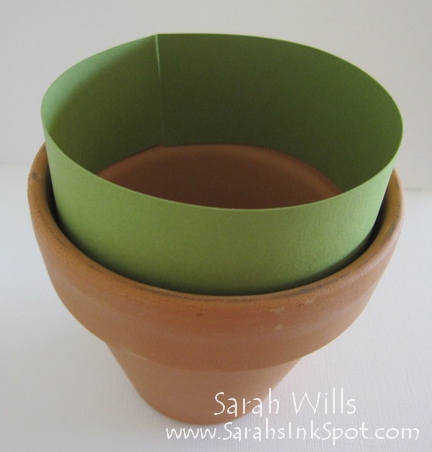
For a guide line, draw a pencil line 1/4″ in from one long edge – this is the line that you will cut up to, to make the grass…
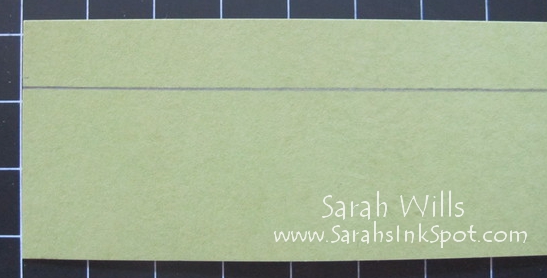
And using your Fringe Scissors, cut all the way along this strip, using that pencil line as a measure to cut to…

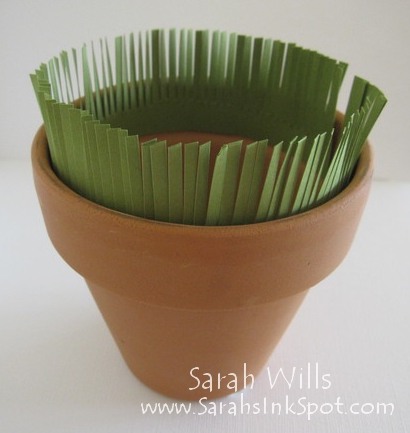
And when you are done, you will have a row of ‘grass’ that looks like this…
 Next you are going to adhere this strip to the inside rim of your flower pot – to do this, add a strip of very strong adhesive such as Sticky Strip to the solid edge..

Peel the backing tape off and then firmly adhere inside your pot – once done, this is what you will have…
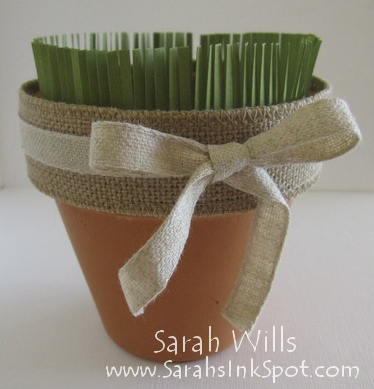
The outside decor:
Cut a 15″ piece of 1 1/4″ Burlap Ribbon…
![]()
And wrap it around the outside rim of your flower pot, securing it in place with strong adhesive tape such as Sticky Strip at the join at the back – isn’t this beginning to look cute?!
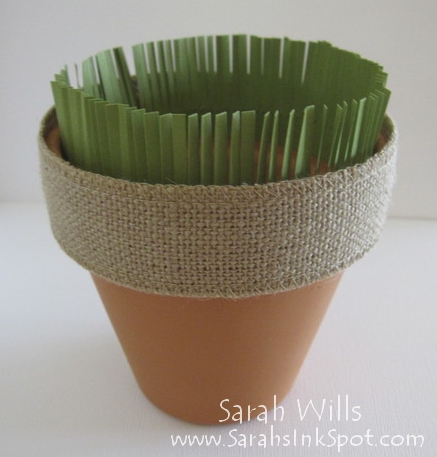
The next step is optional – I chose to wrap around a narrower piece of ribbon onto the Burlap and choose a piece of 7/16″ Natural Trim Ribbon and tied a bow in front…
Pop your gardening gloves into the pot and it’s really beginning to take shape!
The Seed Sticks:
For this you will need some craft/popsicle sticks that you can get from any craft store and the Simply Serif Mini Alphabet Stamp Set plus ink of your choice – I chose to use Early Espresso – and then decide what words you want to stamp on your sticks.
I choose to use the names of herbs but if your gardener prefers flowers, stamp whatever their favorite blooms are…
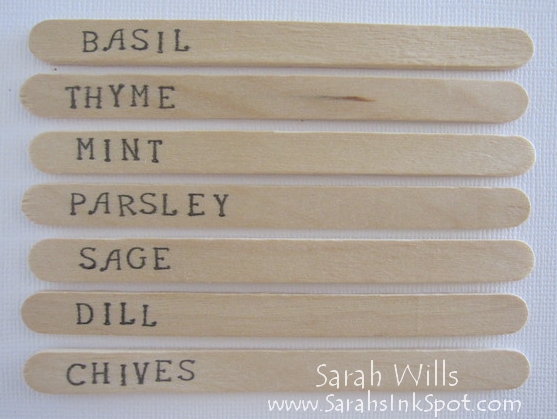
After you have stamped them, you can choose to use a waterpr0of sealant to ensure that the ink will be weatherproof.
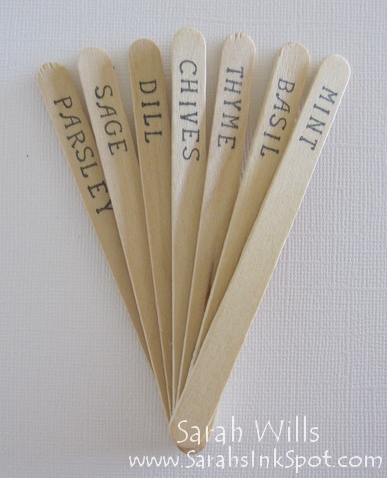
To gather them for display in the pot, I used a Mini Glue Dot on the bottom of each to adhere them together in a fan like fashion…
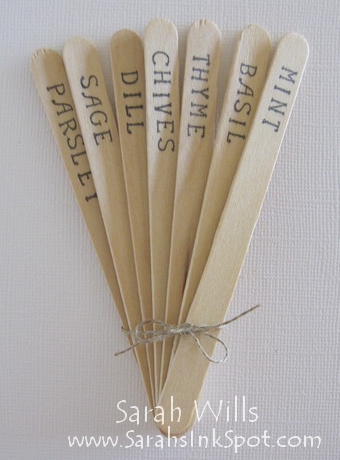
And then tied a piece of Linen Thread around the bottom for a cute touch…
The flowers:
I used the Pansy Punch to cut my flower shapes from Melon Mambo and Old Olive cardstocks – I then textured the flowers using the Perfect Polka Dots & Square Lattice Embossing Folders and for finishing touches, added a button from Brights Designer Buttons to the center of each through which I threaded a piece of Linen Thread and finished with a cute bow…
I then attached my flowers using Dimensionals across the gloves, sticks & pot…
I made my custom phrase ‘Go Grow Girl!’ tag using stamps from Simply Serif Mini Alphabet Stamp Set and punched it out using the 1 3/8″ Circle Punch and then layered it onto a 1 1/4″ circle of Early Espresso and tied it to my ribbon using Linen Thread.
The butterfly was a cute finishing touch and easy to make with the Bitty Butterfly Punch and a pin from Vintage Trinkets…
I think this turned out super cute and that any gardener would love to receive it – you could also add some seed packets to your gift so that they can get to growing asap!
WANT TO PRINT OUT THIS TUTORIAL? PLEASE CLICK HERE FOR A PRINTABLE VERSION WHICH WILL OPEN IN A NEW BROWSER WINDOW
Please click HERE to view my other Project Tutorials