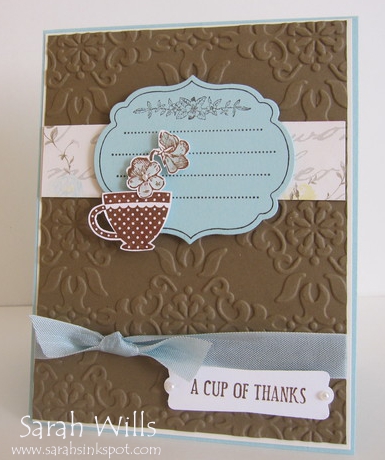
Did you come here because you received this Cardfront Kit from me in the mail?
Then this is where you will find out how to put it together! This card showcases some beautiful new products available in the Occasions Mini Catalog – a full list of supplies I used can be found at the bottom of this tutorial to make easy for you to find them.
You will notice that there is no card base included – this is so that you can choose your own color of card base. Simply put your cardfront together which I have sized to be 5 1/4″ x 4″ and then mount it onto a standard A2 sized card base – this will give you a nice 1/4″ margin all around your cardfront.
What colors will look good as the base? Pool Party, Very Vanilla, Soft Suede – you can even double mat it like I did to mine below…the choice is yours!
A Cup of Thanks Card
Take out all the components of your A Cup of Thanks Cardfront Kit -you have all cardstock, paper, embellishment & ribbon supplies that you need to make it – just add your time, adhesives & dimensionals to complete it!
Let’s assemble your Card:
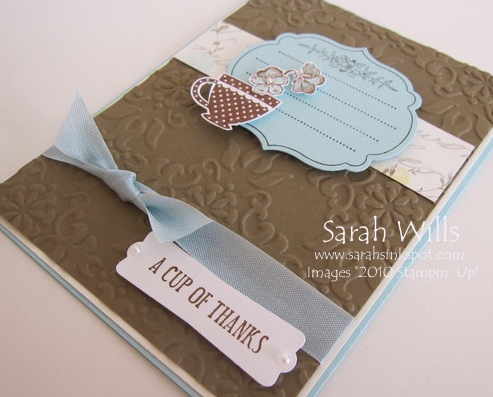
Take your Vintage Wallpaper Embossed piece of Soft Suede Cardstock and lay on your work surface – lay on the longest piece of Pool Party Seam Binding Ribbon across it and adhere each end to the back of your cardstock. Turn over and using the smaller piece of ribbon, tie a knot around the ribbon on the front and trim the ends to size.
Take your card base in the color of your choice and adhere this layer onto it.
Take your strip of patterned paper from Attic Boutique DSP and adhere it across the card.
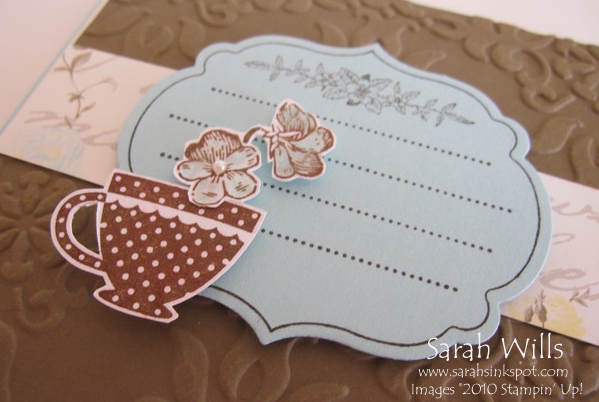
Next take your die cut accent piece – this is a piece of Pool Party cardstock that I stamped using a stamp from Apothecary Art – I then die cut this out using a Framelit Die from the Labels Collection – these dies co-ordinate perfectly with the stamps in Apothecary Art making it super easy to get great professional results.
Using Dimensionals adhere this accent just centered on top of the strip of patterned paper.
Take your stamped Tea Cup image – this was stamped using a stamp from the set Tea Shoppe – and cut around it using very sharp scissors such as Paper Snips – and adhere into place on your card using a Dimensional.
Take your flowers and you can either cut them out or use a punch to shape them if you prefer and color them in using Markers – and adhere just inside the tea cup…click on the photo below for a closer look…
Lastly take your sentiment tag – this was stamped using another stamp from Tea Shoppe and punched out using the Modern Label Punch – and adhere to your card using Dimensionals.
If you wish you can embellish this tag – I used a small Pearl at each end of mine – you could also use Rhinestones or Brads which would give a similar great look…
I hope you enjoy making your card – have fun!
Supplies used and where to find them in the Catalogs:
Occasions Mini Catalog:
125525 Apothecary Art Stamp Set Wood Mount (pgs 24&25)
125527 Apothecary Art Stamp Set Clear Mount
125598 Framelits Dies – Labels Collection (pg 6)
125545 Tea Shoppe Stamp Set Wood Mount (pg 19)
125547 Tea Shoppe Stamp Set Clear Mount
125407 Attic Boutique DSP (pg 23)
125582 Pool Party Seam Binding (pg 23)
Idea Book & Catalog:
120175 Vintage Wallpaper Embossing Folder (pg 219)
113439 Big Shot (pg 215)
119849 Modern Label Punch (pg 209)
119247 Pearls (pg 198)
Cardstocks – Pool Party, Soft Suede
Got questions? Email them to me by clicking HERE


