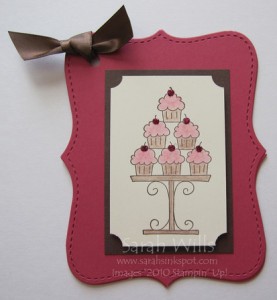
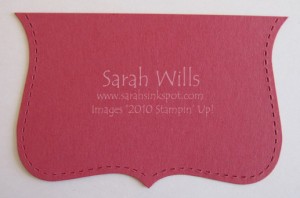
I absolutely love the Top Note die because of it’s versatility and it’s value for money and it is perfect for both cardmakers and scrapbookers alike…you can cut a piece of cardstock using this Die and there is no waste as you can use both shapes that this Die cuts.
It is exclusive to Stampin’ Up! and not available anywhere else – have you seen those quilt effect cards where you use it and scraps of your designer series papers to make beautiful cards? It is a fab way to use up bits of papers that you have lying around that otherwise would be wasted – it is the die that I reach for repeatedly and I have used it at least 1000 times…it just keeps cutting…

The shape is just beautiful and even better, you get to use the outer part of the cardstock that you have die cut – the outer part creates a beautiful frame for your cards or scrapbooking projects and is wonderful for framing photos and creating photo cards…
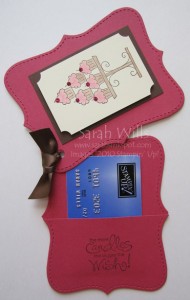
This tutorial shows you how you can use the Top Note Die to make a very cute gift card holder that you can adapt to use for any occasion simply by changing the colors of your cardstocks, ribbon and stamps.
I have examples in my gallery of the different ways you can use this wonderful Die – you can find my gallery by clicking here – I have a section there just for this die.
Simply choose your cardstock and using your Big Shot and Top Note Die cut three shapes. Take one of the die cut pieces and cut it in half – this will become the pocket that holds your gift card

Stamp a sentiment onto this piece and using a strong narrow adhesive tape such as Sticky Strip, tape along the bottom edge and the two sides and adhere to one of the larger Top Note pieces. Punch a circle in one corner of each of the large pieces and thread a piece of ribbon through and tie it loosely to be sure that the top piece can slide to one side so that the recipient can easily get to the gift card…I used a piece of Satin Ribbon but you could use a Jumbo Brad instead.
Stamp your image for the card front, layer it and add other embellishments or bling – I used the Ticket Corner Punch and sprinkled some fine Glitter onto the cherries to give a sparkle…add your gift card, and there you have a very cute way to give a gift.

WANT TO PRINT OUT THIS TUTORIAL? PLEASE CLICK HERE FOR A PRINTABLE VERSION WHICH WILL OPEN IN A NEW BROWSER WINDOW
Please click HERE to view my other Project Tutorials