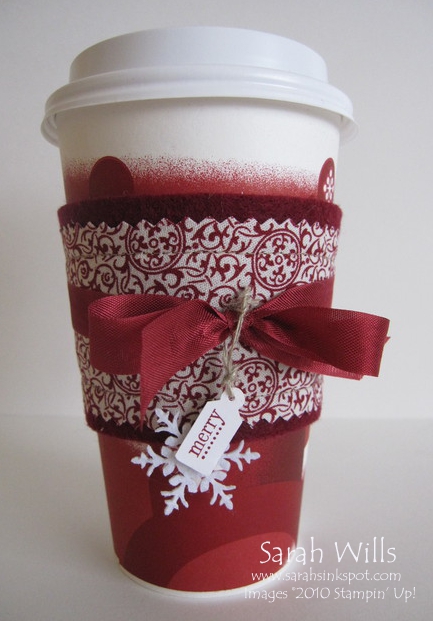
With a very sweet way to give the gift of a hot drink this cold winter season…a Fabric Sleeve to wrap around a cup of hot cocoa or coffee making it extra special for a friend or teacher one chilly morning…
And the best bit about these is that they feel so cozy to the touch and are re-usable too – they simply slide onto a coffee cup – it’s a little gift that keeps on giving! Please read on for details about how I made it plus a link to my printable tutorial so that you can make your own…
I AM OFFERING TWO BIG BLOG CANDIES THIS WEEK – you can read all about them in my post below – leave comments for your chance to win – PLUS EVERYONE who places an order with me from now through Dec 24th gets brand new FREE Ribbons!!!
I just LOVE how my Fabric Coffee Sleeve turned out – the base is simply made from a piece of felt that I purchased for just 29c at Walmart – you can find felt sheets for similar prices at all large craft stores…
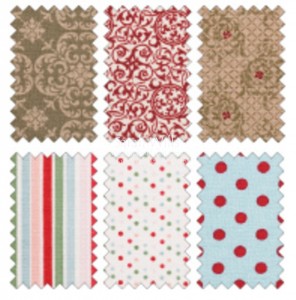
And then you layer on a piece of fabric of your choice – I used fabric from Deck the Halls which is on pg 16 of the Holiday Mini Catalog and I used my Pinking Shears to make a patterned edge.
It’s not too late to order fabric to make these in time for the holidays – you can place your order by clicking HERE – be sure to place your order VERY soon to get your fabric in time!
Then…get this…I used my sewing machine for the VERY FIRST TIME to stitch it on…yes, dear friends, I am no seamstress – I’ve had a sewing machine for around 3 years now gathering dust in my closet…I bought it during a clearance sale from Target and figured I would use it one day…everytime I think of using it I change my mind because, well, I can just about sew a button onto a shirt…
But TODAY was the day – out it came – it was still threaded up from whence my dear Mother in Law used it on her last visit here – so I plugged it in, sat down and got going – and was absolutely AMAZED at how well it went!!!
But if you don’t have a sewing machine or chose not to sew, there is a fabulous product just for you – iron-on Fabric Adhesive Roll that you can find in the Holiday Mini on pg 17
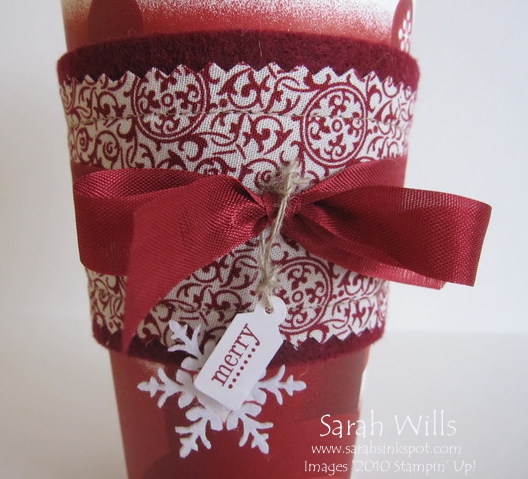
I managed a couple of pretty straight lines (don’t look too closely!) and was delighted with how it turned out…click on the photo for a closer look…
I trimmed my sleeve using Cherry Cobbler Seam Binding – find out how you can get 7 feet of this gorgeous ribbon in 7 different colors for FREE by clicking HERE
To make my sentiment I used a stamp from Tiny Tags and punched it out using the Medium Jewelry Punch – I layered this onto a beautiful white snowflake from Little Felt Flurries – these snowflakes are retired BUT you can purchase them right now in the Clearance Rack – but hurry before they are all gone for good…
I attached my tag to the ribbon using a piece of Linen Thread and there it is – all ready for giving!
WANT THE TUTORIAL SO THAT YOU CAN MAKE YOUR OWN FABRIC COFFEE SLEEVE? Click HERE to find it in my Project Tutorials section plus in that tutorial you will find a printable version too!
Enjoy making your own Fabric Coffee Sleeves – please enter for your chance to win one of my 4 items in this weeks Big Blog Candy…you can find details in my post below…
TO ORDER STAMPIN’ UP! SUPPLIES ONLINE CLICK HERE!


Sarah…thanks for the opportunity of blog candy. I really enjoy your blog and have followed since you did the sesame street punch characters. Keep up the great work. The cozy looks great..inspires me to go make a cup of hot chocolate!
These are really cute and they look like I could pull them off even without a sewing machine! : ) Someday, I will have one though! lol! Thanks for sharing the tutorial and the chance to win!
I think there are going to be lots of teachers getting hot coffee or cocoa delivered to their classrooms in the next few weeks!! And my daughters’ teachers will be two of them:)This, as are all of your projects, simply adorable. I have been working on my acetate treat holders from a few weeks ago to give during my 5 days of Christmas for the girls teachers:) Many thanks for the great ideas (AND DIRECTIONS!!).
Darling coffee sleeve. Thanks for sharing. This is such a cute idea for all those on my list who love! their coffee. {Hugs} Peggy
Love the idea. Great job on sewing & embellishing.
This is really neat. You have such great ideas!
God bless,
Bonnie S
Hi Sarah,
Wow, as I commented on SCS I think this is a fun gift idea and something I could maybe do :) Thank you so much for sharing and this is my first visit to your site, what a nice place :)
May you have a blessed and wonderful Christmas
I need to blow the dust off my machine and make some of these. I was an avid seamstress before I ‘found’ paper crafting. LOL
Love the coffee sleeve. I, too, have a sewing machine collecting dust. I have made two dresses for my daughter out of it (one she wore in a wedding!), and that is it! I now have a GREAT incentive to get it out! Great project for this weekend- Thanks!
This is so cute! I have to make some of these! Now to figure out if my sewing machine is threaded correctly!
So cute. I just got some extra fabric from the holiday extravaganza and now know what I can do with it.
Love this idea! I plan on making several for my “coffeeholic” friends for Xmas. Thanks.
What a great gift idea, I love the way this little cozy turned out, makes me want to make one right now so I can have a nice hot cup of cocoa.
Too pretty to wrap around the coffee/hot tea/hot cocoa cup, what if it spills? : )
Love it!!!
No sewing for me (either), I down’t even own a sewing machine….so I will have to try the fabric adhesive roll.
Thank you for the tutorial.
Love this idea, Sarah, and know just exactly some friends who would appreciate receiving one of these. They LOVE their coffee and lattes! Thanks for the tutorial and another chance to win your fabulous blog candy!
I love my coffee and this would make it extra special. It is gorgeous.
Very cute idea. Thanks so much for sharing your ideas and also for a chance at some blog candy.
Babe
Sarah, this is too sweet! I love it! Thanks so much for sharing!
Judy
This is awesome! I have several friends who buy coffee every week, and this would be perfect for them. Plus it means no more throw-away cardboard holders to waste. Thanks for the tutorial, and for the chance at some awesome blog candy. You’re the best!
Very cute and clever idea. Thanks for the tutorial and for the chance to win some blog candy.
Babe