WOW where does the time go? Please excuse my absence of late – we are in the final stages of building our house and life has become busy with all kinds of house stuff going on!!!
That plus the disappearance of my creative mojo = not a very productive Sarah of late…but last evening I dug out some ink, papers & fun stuff and got to creating…the girls wanted me to make cards for their teachers to take in today and so I got to work.
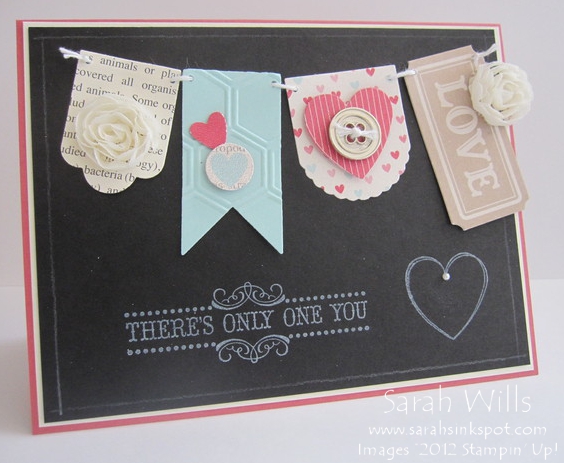
And this is the card that I made and wanted to share with you – it was so fun to make and it uses beautifully co-ordinating products from the Spring Catalog and I just love how it turned out…
My card base is Primrose Petals onto which I layered a piece of Very Vanilla…and onto that a piece of Basic Black making a very simple but striking background.
To give my card a bit of a chalkboard look I drew white lines around the edge simply by using a ruler and white pencil which I borrowed from the girls art supplies! You don’t have to be terribly accurate when doing this – it is more authentic when it doesn’t look perfect!
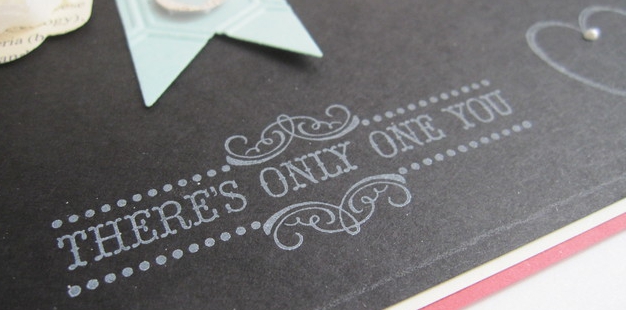
I then stamped the heart from the set Hearts a Flutter (pg 11 of the Spring Catalog) using White Ink and added a tiny Pearl…and then stamped that beautiful sentiment which is a stamp from the exclusive Sale-a-bration set Vintage Verses – LOVE this set and you can get it for FREE right now!
Please click here to find out more about Sale-a-bration…
I love the chalkboard look that you get when you stamp white ink onto black cardstock…you can also add chalk ‘smudges’ by inking up a sponge or dauber and rubbing it on…
Now onto the fun of making that beautiful banner…
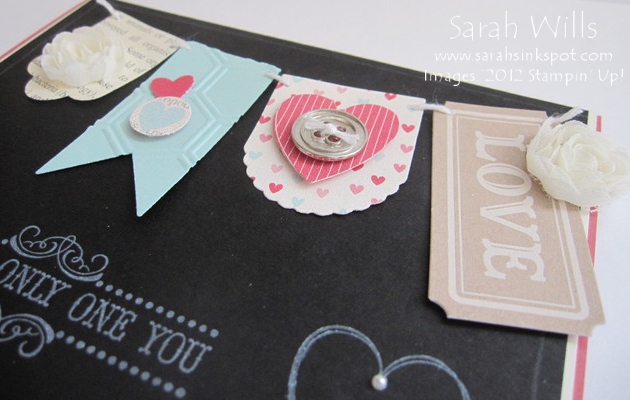
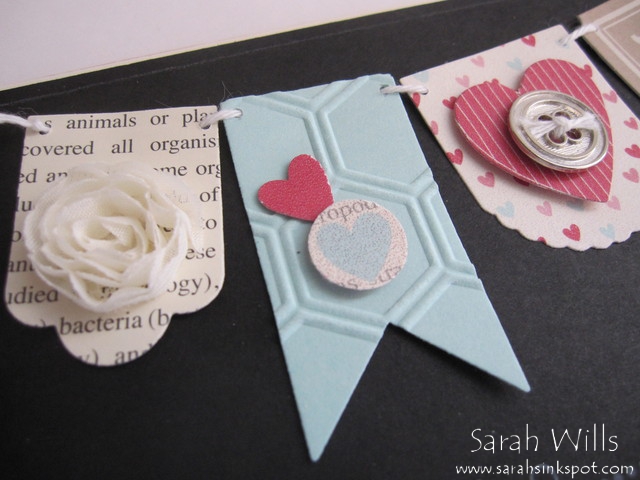
I die cut those banner flags using dies from Hearts a Flutter Framelits (pg 11 of the Spring Catalog) and various cardstock & designer series papers…click on the photo below for a closer look…
So those flags…
For the first I die cut my flag from Limited Edition Specialty DSP (pg 162) and attached a cute flower from Flower Trim (pg 5 Spring Catalog)…
For the second I die cut my flag from Pool Party cardstock and then textured it using my Big Shot and Honeycomb embossing folder (pg 6) – I punched out hearts from a sheet of More Amore DSP (pg 10 Spring Catalog) and added them to it…
For the third I die cut my flag from a piece of More Amore DSP and added a heart – I used the heart shaped framelit in Hearts a Flutter Framelits to cut it out of DSP – and added a silver button from Basics Designer Buttons (pg 20 Spring Catalog) to it…
For the fourth I used a ticket tag from the Artisan Embellishments Kits (pg 10 Spring Catalog) and added a flower from Flower Trim to it…
To string them together I simply made small holes in the tops of each – for accuracy make a small pencil mark where you want each hole to be to guide you – and I used my 1/16th” Circle Handheld Punch to do this (pg 184) and threaded through White Bakers Twine (pg 172).
I just LOVE how this card turned out…and hope that the teachers will like it too!
CLICK HERE TO ORDER YOUR STAMPIN UP SUPPLIES ONLINE!


