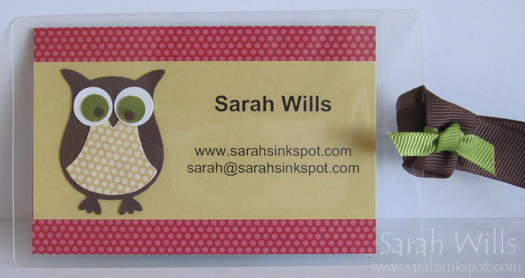
If you have been following me for a while, you know that I LOVE the Owl Punch…I just can’t resist using him…he is sooo cute! Whilst I have been volunteering in school I have noticed that cute luggage tags on backpacks have gotten very popular, especially with the girls…
And so I was asked to make some by my own girls and I set off on a quest to do so and to find suitable tag holders…and you guessed it, that little owl character immediately sprang to mind to fit onto their tags…
You might have noticed that the above tag has my info on instead…well I decided that my prototype would be for me for my stampin’ tote and I think it turned out cute!
I used Designer Series Papers from Play Date (pg 175) for my base – sized 4″ x 2 1/2″ – and because Stampin’ Up!’s patterned papers are double sided, they are just perfect for this project since the paper on the reverse shows from the other side. I punched out my Owl using the Two Step Owl Punch (pg 200) and used Chocolate Chip for his body, DSP for his belly and Old Olive & Whisper White for his eyes – I have found that the easiest way to adhere the eyes is to use Mini Glue Dots (pg 197) and for the teeny tiny ones I just use a dab of glue from my Two-way Glue Pen.
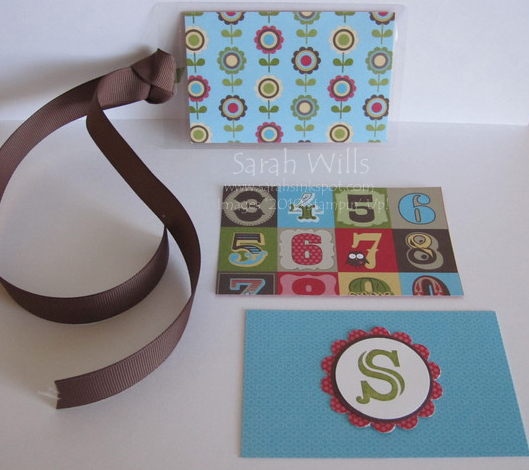
Using my PC, I printed out the info that I wanted onto a sheet of So Saffron cardstock, trimmed it to size and attached my owl…I finally layered it onto the base and it really is as easy as that! Here is the reverse side of my finished tag along with a couple of pieces that I started working on for one of my girls tag…the other wants a monkey on hers so I need to start figuring out how to make a monkey using punches – wish me luck!
I hunted high and low to find the Self-Laminating Luggage Tags with loop slot that I had seen on school backpacks because they give such a clean & neat look – I searched the big box stores to no avail although they do carry a different type, just not what I was looking for – and finally I found them at the Container Store and they are fabulous…to save you spending hours hunting around like I did, HERE is the link where you will find them.
They are super easy to use and give such a professional look – no need for a laminating machine – you simply position your cardstock in place, peel off the backing of the tag and adhere – these tags also have a pre-cut slot to thread a hanging loop through- the hanging loops are included but I decided to make my own using 5/8″ Grosgrain Ribbon.
Don’t forget to come back and visit me tomorrow to continue the Holiday countdown with Festive Friday!

