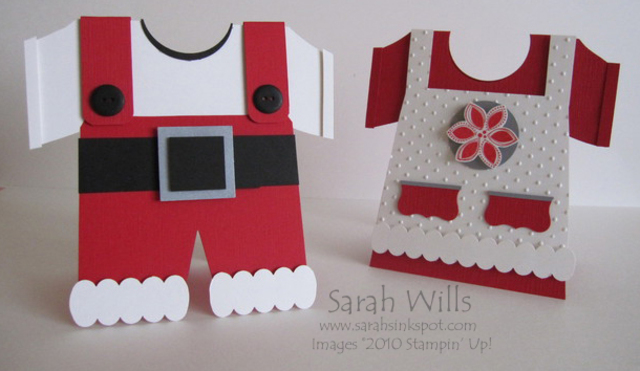
Santa & Mrs Clause! Aren’t they cute? I had such fun designing them and working out how to make these cards and hope you will enjoy them too…
With only 10 weeks until Christmas Eve (can you believe it?!) it’s really time to get started on those cards so that they are a joy to make and not a last minute stressful rush…do you like these cute cards? I designed them with my girls in mind and I think that they are going to love them!
Please read on to find out how I made Santa & Mrs Clause along with details about the tutorial to make them plus this week’s blog candy winner…
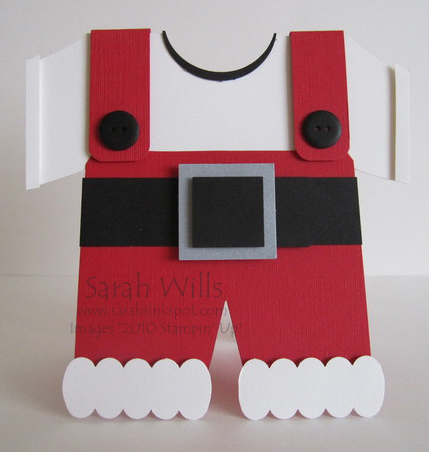
I used the cardstock colors Textured Real Red, Basic Black, Shimmery White and Brushed Silver for both Santa & Mrs Clause – if you prefer a more muted red, then Cherry Cobbler would be a great choice. All Punches that I used to make these cards can be found on pgs 200-203 of the Catalog…
About Santa…well, he sports a 1″ wide Black Belt and I made the buckle using Square Punches…I added the buckle and the little pointy belt bit using Dimensionals to make them stand out…I layered shoulder straps and rounded the corners using my Corner Punch and added some Black Buttons (pg 186) to finish the straps off…
For the furry bits at the bottom I simply cut a piece of white cardstock to be 1 1/2″ wide and used my Scallop Edge Punch to trim both edges – I cut my strips to size and attached them using Dimensionals…cute, eh? You could also use some cotton wool balls to make them look extra furry…or add Dazzling Diamonds Glitter for some bling…
His shirt is Shimmery White and I layered some narrow strips to the end of each sleeve using Dimensionals and trimmed his collar using a little piece of Black cardstock that I cut using my 1 3/4″ Circle Punch.
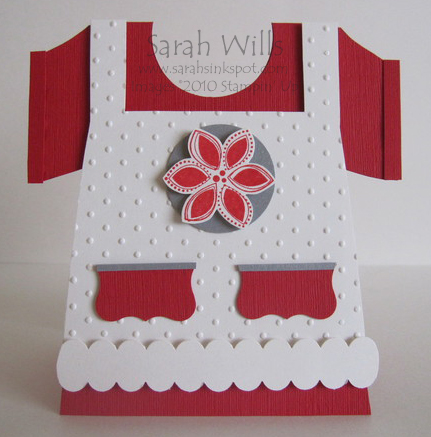
About Mrs Clause…she sports a dress of Textured Real Red and her apron is made of Shimmery White that I textured by running it through my Big Shot using the Perfect Polka Dots Embossing Folder (pg 214) – I attached her apron to her dress using Dimensionals…her furry trim is made the same way as Santa’s and her sleeves are trimmed with red strips.
Her pockets? Made using the Curly Label Punch – I punched out my cardstock which I then cut in half and trimmed with thin strips of Brushed Silver. I finally gave her a floral finishing touch – after all, she is a girl and needs to have flowers in her life with all those elves around! I stamped the flower using Real Red ink – the stamp is from the set Season of Joy (pg 33) and I cut it out and attached it to a Brushed Silver Circle and then to her apron…
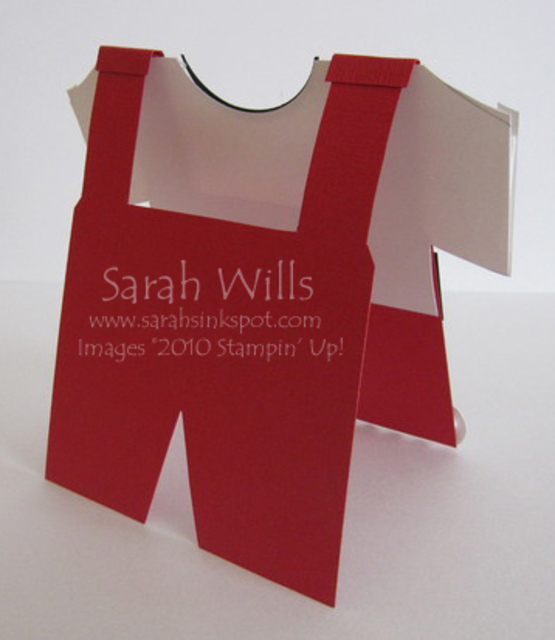
And this is what Santa looks like from behind…you could add a shirt to his back as well but I decided to leave him without one…
These cards are so much fun to make and little people especially are going to love receiving them…
TUTORIAL – thanks so much for returning to find my tutorial – you can find it by clicking HERE – and at the bottom of that tutorial you will find a link to a printable version for you to print out and keep – enjoy!
And lastly announcing the winner of my Blog Candy from this week’s Tutorial Tuesday…the lucky winner will be receiving a kit containing cardstocks, papers & ribbons to make their own cute Monster Treat Bags…and the lucky winner is comment no. 14 – Karen C – who said…
“Super cute!!!! Will definitely make these in the near future! I love them both!!!! : )” – congrats Karen – your kits will be on their way to you soon…
Quick note – if you are planning to use red cardstock in your holiday cardmaking this year, be sure to order now – Real Red cardstock goes into backorder most years during November and can hold up your cardmaking for a few weeks – I would advise you to order reds now to get what you want in your hands so this doesn’t happen to you!
Have a wonderful weekend!
ORDER STAMPIN’ UP! PRODUCTS ON-LINE BY CLICKING HERE & THEN ON SHOP NOW!


Sarah these are just adorable!
Oh my golly–these are two cute for words!
Love your Santa and Mrs. Santa cards. I can’t wait to see the tutorial online so I can make them. I love making different Christmas cards early and then choosing cards that suit the person I am sending them to.
Thanks so much for sharing!
These are absolutely adorable! You are very talented. Thanks for sharing!