Firstly, apologies for slipping Tutorial Tuesday into Wednesday this week…the kids are home from school and with Thanksgiving ahead the time has flown by!
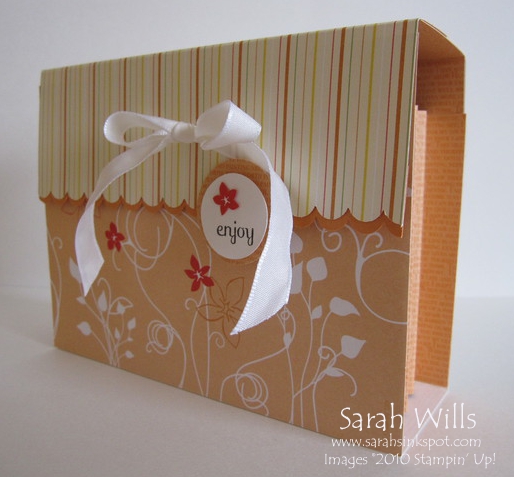
This week I am going to show you a cute way to package some cards to give as a gift – it’s a Concertina Card Holder and is perfect for almost anyone – you can create cards for a few occasions and give them in a functional but beautiful case. The case features 3 dividers to keep each card type separate and it is very easy and fun to make…
Please read on for more details plus the link to the printable tutorial showing you how to make this and details of this week’s Blog Candy…

My base colors that I used for my Card Holder are Whisper White and Peach Parfait…the Designer Series Papers that you can see on the front and lid are from the beautiful pack Sunny Garden. The lid is attached to the base by a piece of ribbon – I used Whisper White Taffeta – but you could also use a magnetic closure or velcro if you prefer.
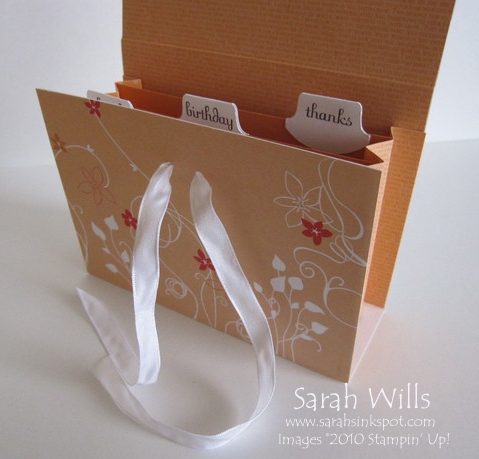
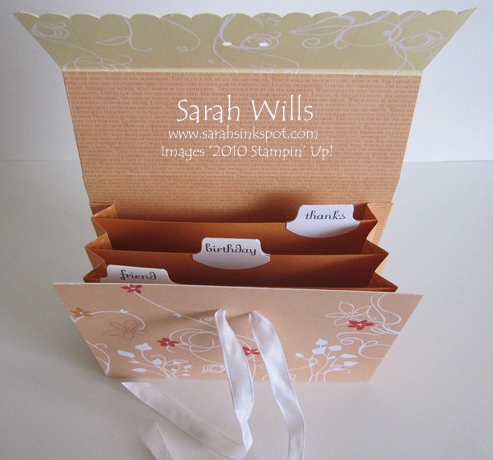
Un-tie the ribbon and the lid opens up to reveal the inside – there are actually 4 compartments there each separated by a cardstock divider. I stamped my card categories using stamps from the set Fabulous Phrases and punched each out using my Round Tab Punch.

The inside and side panels are made using DSP from the In Color Patterns DSP Stack – again, in co-ordinating Peach Parfait…you simply fill your compartments with a few handmade cards and there is one beautiful gift for a lucky recipient…
WANT THIS TUTORIAL SHOWING YOU HOW TO MAKE THIS SWEET CONCERTINA CARD HOLDER? Click HERE to find my Project Tutorials where it is at the top of the list – in that tutorial you will find a printable version too!
Onto this week’s Blog Candy…leave me a comment to let me know what you think and you will be entered into a drawing where one lucky winner will be drawn this Friday morning – that lucky winner will receive a kit containing all the consumables they need to make their own Concertina Card Holder plus a set of 4 handmade cards made by yours truely!
So come back and visit me on Friday to see if you won and to check out my Festive Friday item for this week!
*** FOR 3 DAYS ONLY – I WILL HAVE MY VERY OWN BLACK FRIDAY DEAL SO BE SURE TO COME VISIT ME FIRST THING FRIDAY MORNING TO FIND OUT WHAT IT IS! ***
TO ORDER STAMPIN’ UP! SUPPLIES ONLINE CLICK HERE!

This is a fabulous idea and will make a wonderful gift for some of my friends. Thanks for sharing all the tutorials
Janet
Once again thanks for giving all of your wonderful ideas and this one for sure doesn’t diappoint. What an easy and great gift this will make. Thank you!
Love this! And I can’t wait to see what deals you have (maybe a deal on the Big shot:) )
Great gift idea for that special friend who appreciates the hand made items. Will be making some of these for Chriatmas. Thanks for sharing.
Happy Thanksgiving.
Seletta
what an absolutely darling idea. I have so many cards, what a great way for me to just give them away…. thank you for sharing your wonderful creativity & thank you for sharing the tutorial for free…. Happy Thanksgiving to you & yours….
Thanks for sharing the tutorial for this neat and very useful card holder. Would love to see your coordinated cards. Have several friends who would love a gift like this, including my hairdresser. Happy Thanksgiving!
Sarah, since it is Thanksgiving Eve, I wanted to take time to thank you for not just this tutorial, but for the many that you share throughout the year. It is so kind of you to freely offer your great ideas to us, and in a printable format! I know that you have made life much easier for many, many of us who are perhaps less creative or less math/tech savvy than you. So, THANK YOU, SARAH!! May your blessings be many.. today and always.
What a great project. Would make fabulous gifts.
As the cold reaches us in Ohio, this is certainly a great project to put a little “sunny garden” back in our lives! The colors are beautiful and go wonderfully with yet another awesome project from you. I hope you and your family have a very Blessed and Happy Thanksgiving.
Shelly
What an awesome presentation for a gift of cards. I love this idea. Thanks for sharing!
I greatly appreciate you making your tutorials ready for print out. Love all of them!!! A huge thanks!! Happy Thanksgiving!!!!
I’ve always wanted to know how to do something like this! It’s adorable, and so practical, one of the best ideas for gift giving. Thank you so much, Sarah, for this free tutorial, and all the others I’ve enjoyed!! Happy Thanksgiving!
This is perfect idea for the card sets that I want to make for Christmas gifts.
This is a great gift idea. Thank you for sharing. I hope you and your family have a wonderful Thanksgiving!
What a wonderful card holder! The color is so pretty.
Thank you so much for sharing your tutorials!
I’d like to wish you and your family a very Happy Thanksgiving!
hugs Regina
This is so nice…what a great gift this would make! Love all your tutorials thanks so much!
Sarah, once again you have created a jaw-dropping project that I cannot wait to try! Happy Thanksgiving!
i love it!!!you could fill this baby with some hand made cades and give it as a gift.
Or with the holidays here i thought this would be a fun way to give the family holiday recipes to a granddaughter who is now doing her own thanksgiving or a new daughter-in-law ect. you could label them desserts,side dishes,ect. how fun:)
thanx so much
Great project!!!
I absolutely love this. It is such a great idea for a gift. I love making boxes so I am definatley going to try this one. Thank you so much for sharing your wonderful ideas.
WOW ! I was so thrilled to see this great card holder. I made a set of cards for each of my “Cruise Girls” friends for Christmas, but hadn’t come up with anything I liked to put them in. This fits the bill perfectly ! Thank you so much for sharing your talents !
Just got back into town (ahh, having access to the internet again is a good thing!). This is a wonderful idea – I’m always looking for clever handmade gift ideas (plus the added bonus of organization with this one!). Thanks for sharing!