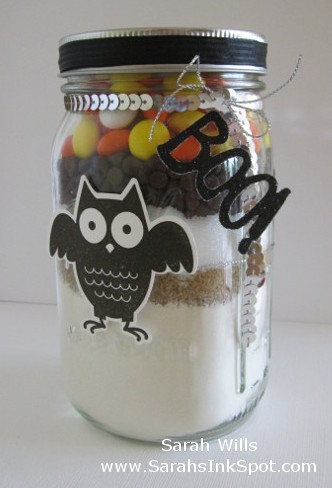
Here is a quick and easy little treat for last minute gifting…a mason jar filled with all the dry ingredients already measured out to make a batch of homemade cookies!
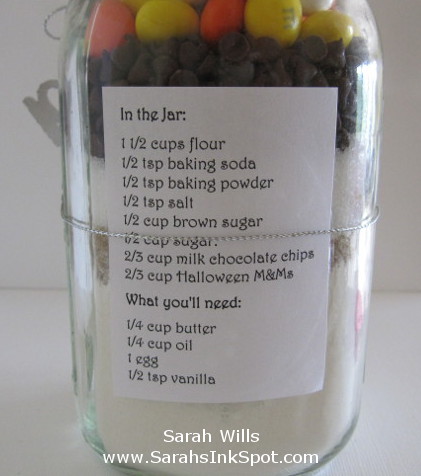
And on the back of the jar is a recipe card so that it is easy for the gift recipient to make their batch of delicious cookies using this pre-measured mix!
Here is my tutorial so that you can make your own Mason Jar gift – at the end of this tutorial you will find a printable version too so that you can print it out and keep it for reference along with the recipe card.
Supplies that I used to make this project:
- 1 Quart sized Wide-Mouth Mason Jar with band & lid
- Dry pantry ingredients as listed below
- Howl-O-ween Treats Stamp Set
- Boo to You Framelits Dies
- Happy Haunting DSP
- Basic Black 3/8″ Stitched Satin Ribbon
- Silver Sequin Trim
- Silver Cording Trim
- 2 1/2″ Circle Punch
Fill the jar:
First you are going to fill your jars in layers with the dry ingredients – I use a canning funnel to make this easy – layer as follows:
- 1 1/2 cups all purpose flour
- 1/2 tsp baking soda
- 1/2 tsp baking powder
- 1/2 tsp salt
- 1/2 cup brown sugar
- 1/2 cup white sugar
- 2/3 cup chocolate chips
- 2/3 cup M&Ms or Reeses Minis
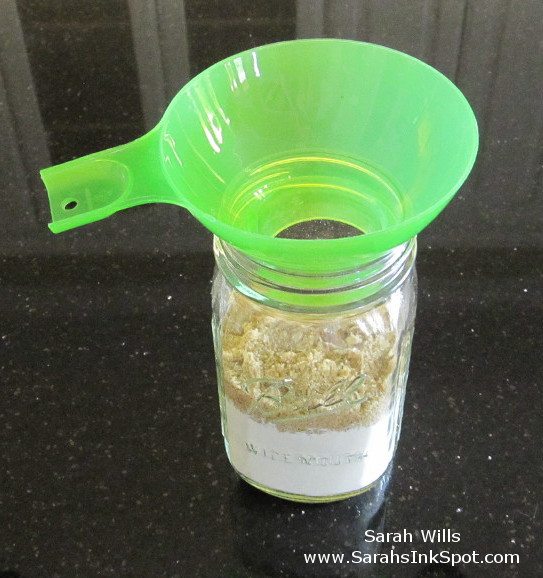
And then screw on the lid.
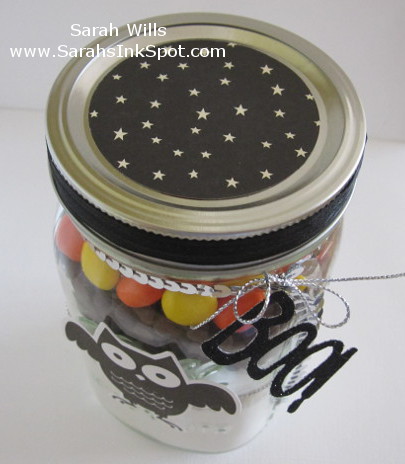
The lid:
Cut out a circle of designer series paper using a 2 1/2″ Circle Punch and adhere it to the lid.
Adhere a piece of ribbon to the band of the lid to pull your theme together.
The recipe card:
Print out the recipe card on a piece of cardstock, trim to size & fold in half – I found this recipe on the website www.lilluna.com – click HERE to find that Recipe Card
Hold it on the back of the jar and tie around a piece of Silver Cording Trim to hold it in place – secure with a knot at the front of the jar – if you want this card to be held more securely, use a small piece of tape to hold it there…
Decorate the jar:
Tie a piece of Silver Sequin Trim and secure with a bow tied using Silver Cording Trim around the neck of the jar
Stamp & die cut an image – I used an owl – and attach it to the front of your jar using Dimensionals to cover the knot of the cording trim
Finally I added that BOO! wording just to the top for a cute finishing touch…
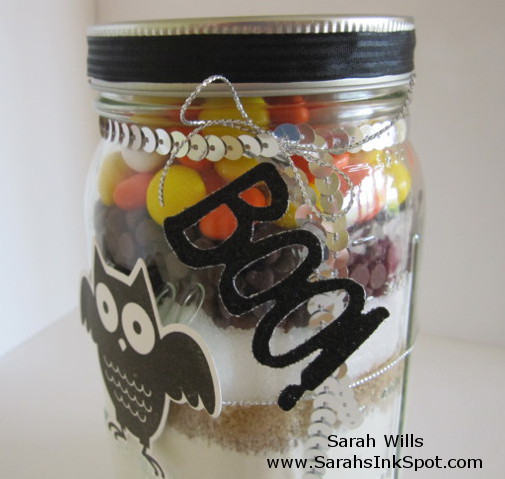
And there is your finished jar ready for giving…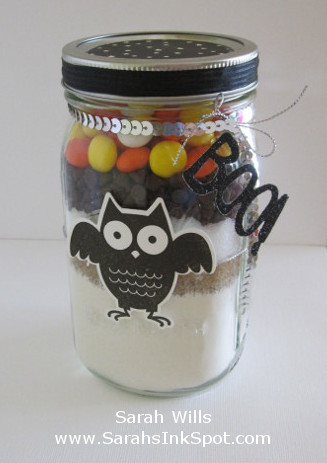
WANT TO PRINT OUT THIS TUTORIAL? PLEASE CLICK HERE FOR A PRINTABLE VERSION WHICH WILL OPEN IN A NEW BROWSER WINDOW
Please click HERE to view my other Project Tutorials