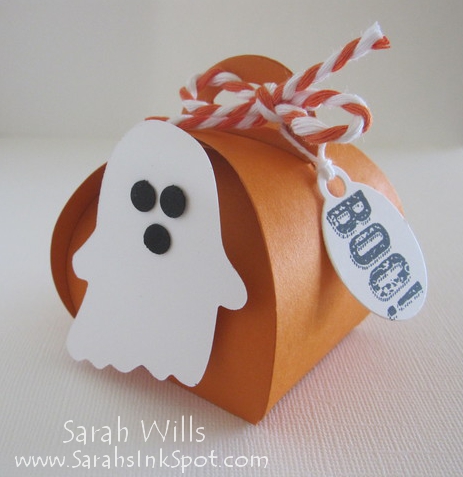
If you received this cute Ghost Curvy Keepsake Box Treat Kit in the mail from me, here is where you will find how to put it together…
In your Kit you will find all of the die cut shapes and twine that you need to put it together – just add the face of the ghost, stamp your tag and fill your box – and then it’s ready for gifting!
To assemble your Box:
Take your two orange die cut box pieces…
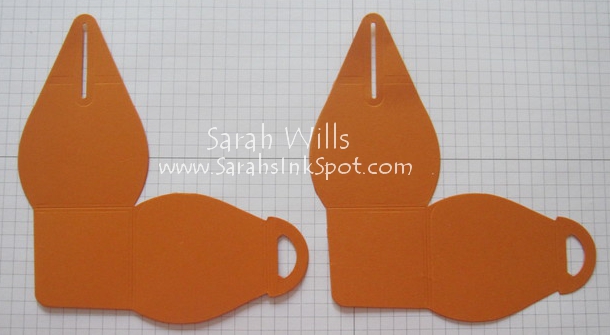
And turn them over so that the reverse side is facing up…place a strong adhesive tape such as Sticky Strip to the center square panel of one of the pieces…

Place the second piece on top making sure that the two center square panels are lined up – the top one directly over the bottom one – and push down to adhere in place…
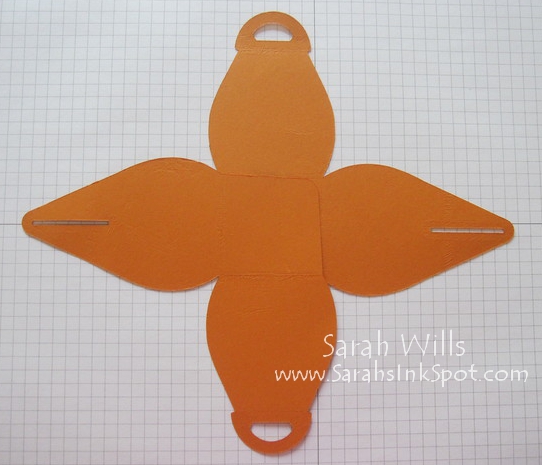
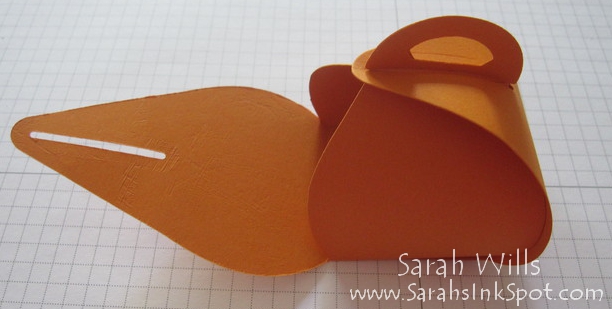
Then gently pull the four flaps up towards you…
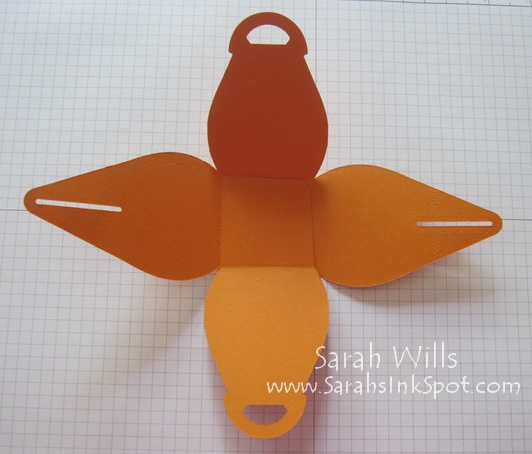
And then pull the two ‘D’ shaped pieces together so that they are touching, and gently pull one of the side ‘slit’ pieces up and then over those two ‘D’ pieces which will hold them together…
And do the same to the other side…

And your box is ready for filling & decorating – I love this project – it is simple, easy & fun!
The Ghost:
Add any facial features that you want to him – for mine, I used a 1/4″ Circle Punch to make his eyes & mouth out of black cardstock and stuck them in place using perfectly sized Glue Dots…
OR you can use googly eyes…
OR you can also use a spooky face stamp (you can find a variety of those in the stamp set Fall Fest (pg 46 Holiday Catalog or find it online HERE) – here are examples of faces that you can make using stamps in that stamp set…

When done, you simply add your die cut Ghost to a side panel – I like to use Dimensionals to do this so that he ‘pops’ out a little…

The twine & tag:
Tie a bow onto the handle using the piece of Tangerine and White Two-Tone Twine and then stamp & add your tag – and your treat is done!
Sarah’s Note: Be sure to fill your box with goodies before you tie the twine onto the handle!
THERE ARE SO MANY CUTE BOXES YOU CAN MAKE USING THE CURVY KEEPSAKE BOX DIE!!!
I am compiling a collection of ideas for you and will post a link to them here tomorrow so be sure to check back!
Want to make some more cute box treats like this?
You make the box shapes – using the Curvy Keepsake Box Die that you can find on pg 11 of the Holiday Catalog – or online by clicking HERE – the tag shape used in this project also comes in that die pack.
The Ghost – is made using one of the cute dies from Fun Fall Framelits that you can find on pg 46 Holiday Catalog – or online by clicking HERE
The twine – is called White & Tangerine Two Tone Twine that you can find on pg 45 of the Holiday Catalog – or online by clicking HERE – it is a great deal at just $4.95 for 10 yards – this is more than enough for many many treats!
Card stock colors that work well for this project are – Tangelo Twist, Pumpkin Pie and Tangerine Tango – they all match well with the Tangerine & White Bakers Twine – but I have to say, my personal favorite Halloween color right now is Tangelo Twist…
Stamps for the tag – you can use whatever halloweeny stamps you have to hand – I used the ‘boo’ stamp from the online-only photopolymer stamp set called Bite Me – you can find that set online by clicking HERE
Supply list for this box:
Cardstocks: Tangelo Twist (133677), Whisper White (100730), Basic Black (121045)
Box Die: Curvy Keepsake Box Thinlits Dies (135853)
Ghost Die: Fun Fall Framelits (135856)
Punch: 1/4″ Circle (134364)
Stamp: Bite Me (134622)
Ink: Memento Black (132708)
Misc: White & Tangerine Tango Two Tone Twine (135838), White Bakers Twine (124262), Glue Dots (103683)