How to create the effect of Dancing or Moving Characters on a Film Strip
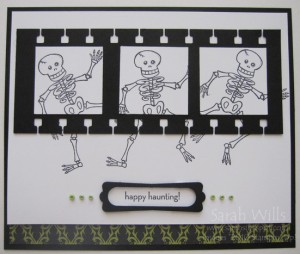
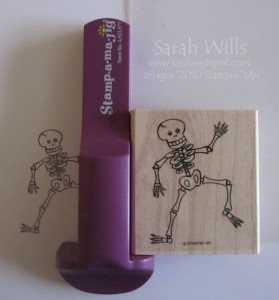
This is oh so simple and looks so cool – you simply need a stamp, some ink, punches and a Stamp-a-majig (SAMJ) – never used a Stamp-a-majig before? It is one of the best investments you will make and you will wish you had gotten one ages ago – you can find it on pg 191 of the Catalog and priced at just $11.95, it is well worth investing in one…
If you want to know how to use a SAMJ, I have a downloadable and printable tutorial for you which shows you how easy it is to use – you can find my tutorial by clicking HERE – it will open up in a new browser window.
Firstly, create your film strip which is easy and fun to make – simply take the Spiral Punch (pg 187) and punch all the way down the edge of a piece of black cardstock – work out how wide you want your strip to be and cut to size and then turn it over and punch all the way down the other edge – and there you have a film strip…
Next take your character stamp and punch the images in your ink color of choice – punch them out using a Square Punch and adhere to the film strip – I chose to use a Skeleton image and used my 1 1/4″ Square Punch to punch him out. Here begins the fun bit…
Stamp your character onto a piece of cardstock – I chose to stamp my skeleton in black ink onto white cardstock as follows…
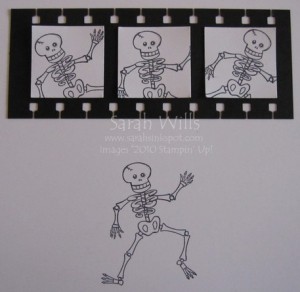
Then using your Stamp-a-majig, ink up your character stamp and stamp the image onto the imaging sheet…
Now to find out where to stamp the next character onto your cardstock, place the film strip over the image you just stamped onto the cardstock as follows…
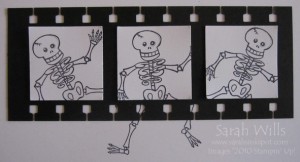 Slide your imaging sheet beneath the film strip and work out where you want to position the next set of hands/feet…when you are happy with the position, remove the film strip whilst leaving the imaging sheet in place and place the Stamp-a-majig tool into place in the corner of the imaging sheet – remove the imaging sheet and stamp your image…
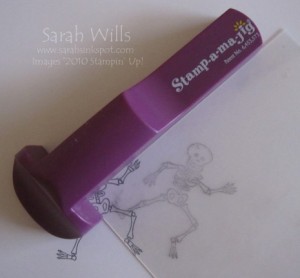 And there you will have the second character stamped…
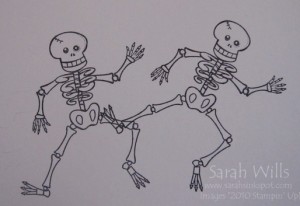
And repeat the process for how ever many characters you want on your film strip…for me it is 3…so place the film strip over the base and slide in the imaging sheet to find the position of where you want the next character’s hands and feet to be…
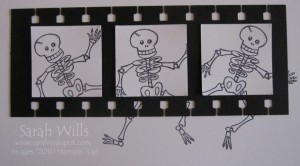
Remove the film strip and add the SAMJ tool…
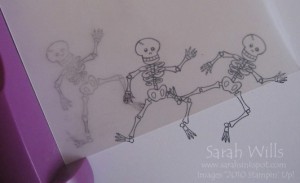
And remove the imaging sheet and stamp your image onto the base cardstock…
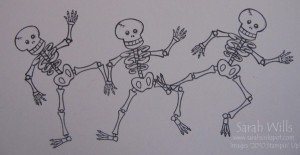
When you have stamped your final character, position your film strip in place and adhere using SNAIL…
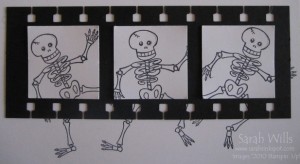
And there you have a fun effect which is very easy to make with the use of that fabulous and affordably priced little tool which I use almost everytime I stamp.
Clean-up – if you have used dye based ink then you can simply use a baby wipe or paper towel and water to wipe the image off. If you use Stazon then simply use Stazon Cleaner to wipe the sheet clean.
Great Tip – you can make permanent imaging sheets for your stamp sets – I have done this for all my sets to allow me to stamp fast and get perfect placement every time – you can use translucent papers such as vellum – cut an 8 1/2″ x 11″ piece into 4 – use the pieces as you would an imaging sheet and stamp 4 images using dark ink onto each piece – 1 image in each corner -I use dark ink so that it shows up well when I am placing my image – keep your permanent imaging sheet with it’s stamp set and you are good to go!
WANT TO PRINT OUT THIS TUTORIAL? PLEASE CLICK HERE FOR A PRINTABLE VERSION WHICH WILL OPEN IN A NEW BROWSER WINDOW
Please click HERE to view my other Project Tutorials