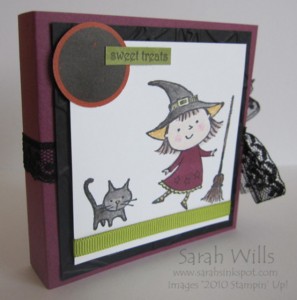
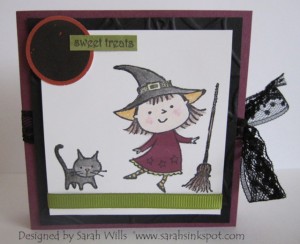
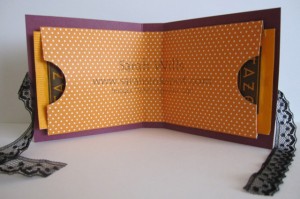
When I was thinking about halloween treats for teachers I wanted something without candy…one of my girl’s had a teacher who loves herbal tea and a little while ago my wonderful downline Janet mailed me a card that contained tea bags and so I decided to adapt that design to make a grown up gift…a Tea Bag Holding Card…
This card holds 2 tea bags inside a folder – you can make the folder using any Designer Series Papers to suit your theme or use blank paper and stamp your images onto it – my card is halloween themed and I found a fun paper for the inside which suits it perfectly – like the lace ribbon I used to tie my card? That is featured in the Holiday Mini and is called Raven Lace Trim…it is gorgeous…
To make this card choose a piece of cardstock for the outside and a piece of Designer Series Paper for the inside.
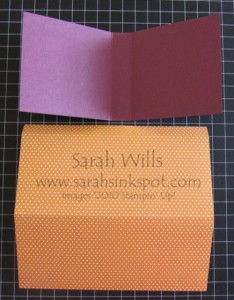
Cut your outer cardstock to be 3 1/2″ x 7 3/4″ – score this at 3 1/2″ and 4 1/4″ and fold along those score lines.
Cut your Designer Series Paper to be 6 1/2″ x 7″ – score this at 1/2″ and 3 1/2″ and fold along those score lines – your papers will look like this…
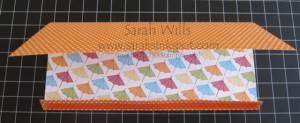
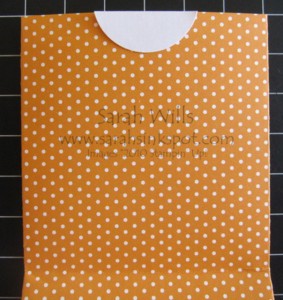
Apply strong adhesive such as Sticky Strip to the 1/2″ flap and fold the larger flap over and stick them together.
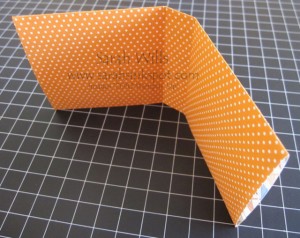
If using a Score Pal or Buddy, align one end at the 1/2″ mark and then make a score line at 3 5/8″ – flip over 180 degrees, repeat and fold. If not using one of those tools, measure in from each end 3 3/16″ and score along those marks so you end up with this…
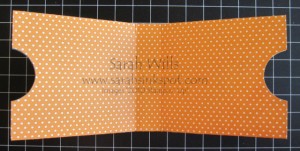
Next you need to make tabs to get the tea bags out easy – take a 1 1/4″ Circle Punch and punch out a circle from a piece of scrap paper – use this to perfectly position your tabs – position it partially over one end and draw around the shape with a pencil – repeat at the other end and use your circle punch to punch out your shape and then erase any pencil marks…
And this is what you will get…
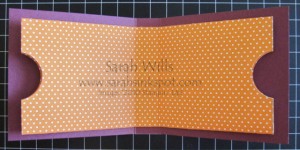
Use strong adhesive such as Sticky Strip along the spine of your folder and stick it to your card base like so…you can adhere the flaps to the card base as well or you can leave them loose – whatever you prefer…
Take a piece of ribbon – 24″ in length – and attach it to your card and tie on the side – I used Raven Lace Trim from the Holiday Mini Catalog.
And then decorate the front of your card as wished – I used various products from the Holiday Mini including the stamp set Fang-tastic and the Spider Web Embossing Folder which is just stunning…
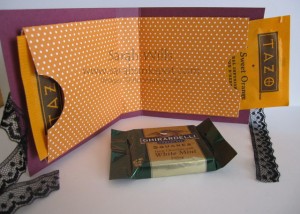
When finished, open it up and insert the tea bags of your choice…
And you know what would also fit in there nicely? A Ghiradelli chocolate square…mmm…what a fabulous treat…
You can adapt this for many occasions from holidays to simple thank yous…I would love to see your creations using this template – if you email them to me, I will feature them on my blog…happy creating!
WANT TO PRINT OUT THIS TUTORIAL? PLEASE CLICK HERE FOR A PRINTABLE VERSION WHICH WILL OPEN IN A NEW BROWSER WINDOW
Please click HERE to view my other Project Tutorials
