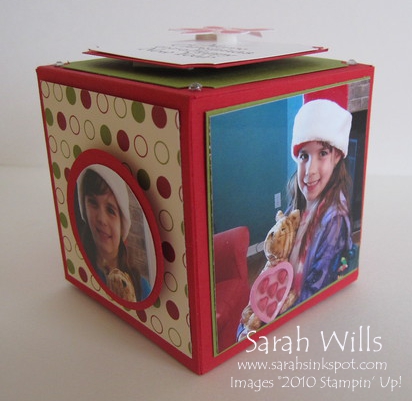
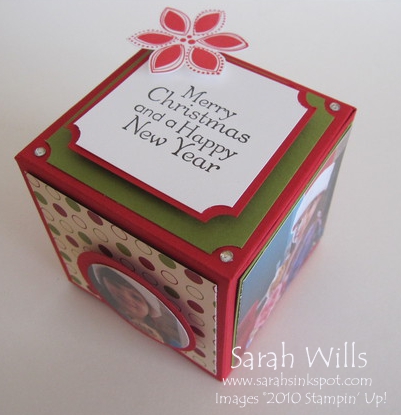
…in a 3 dimensional way! Here is a Cube that you can theme for any occasion – you make it from just one sheet of 12×12 card stock and can use patterned papers, photos and embellishments to decorate it however you wish…
You can also easily mail it – you simply put it together placing Sticky Strip on the tabs but you don’t remove the film to expose the adhesive – you mail it flat and the recipient can assemble the decorated cube very easily by simply removing that film from the tape and adhering the tabs in place.
Please read on for details about how I made it plus a link to my printable tutorial so that you can make your own…
I absolutely loved making this Cube project – it goes together easily and whenever I get to play with photos of my girls, it always makes me happy…
My box is made using a sheet of 12×12 Real Red card stock and I decorated it using Designer Series Papers from the Jolly Holiday pack that you can find on pg 174 of the Catalog. I used Old Olive to mat my bigger photos and used my Circle Punches to cut out and mat smaller photos…this worked well in keeping with the circular theme of this pack of DSP…
On the top of my Cube I used stamps – the poinsettia is a stamp from Season of Joy and the sentiment is from the Hostess set Occasional Quotes…I used my Ticket Corner Punch to shape the edges of my cardstock mats and used Dimensionals to give a 3-d look to the top…
I finally added a cute little detail on the corners by using some sparkly Rhinestones…love those…they are very inexpensive at $4.95 for a pack of 150 and give a gorgeous finishing touch – you can find them on pg 188 of the Catalog…
WANT THE TUTORIAL SO THAT YOU CAN MAKE YOUR OWN CUBE? Click HERE to find it in my Project Tutorials section plus in that tutorial you will find a printable version too!
TO ORDER YOUR STAMPIN’ UP! SUPPLIES ONLINE CLICK HERE!


This is awesome
I like the way you decorated the top. This is a great gift and decorative idea.
Super cute!
THank you so much for sharing your tutorial on the lil box! I plan on trying thise!
Happy Holidays!!
Thank you so much for all your awesome tutorials! Merry Christmas!