I hope you enjoyed this weekend’s Birthday Technique Blog Hop and that you came away with lots of fresh and new ideas for birthday cards and projects…
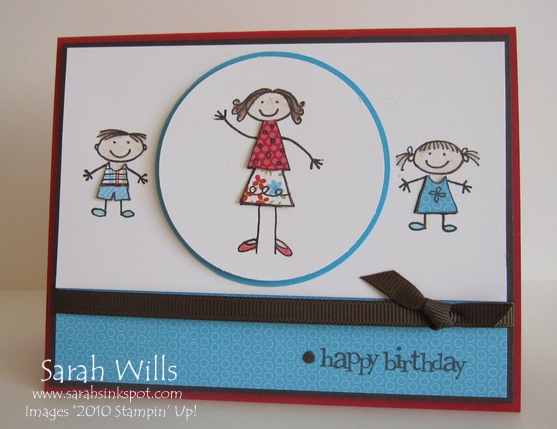
I used the Paper Piecing technique which is a great way to fill in those images you otherwise would need to color and also a great way to use up scraps of patterned papers…this is a great technique to use if, like me, your coloring skills could use a little work…
My original blog hop post is below this one and in it I promised to post more details, photos, tutorials and my blog candy winner today…please read on to find out more…
Sooo…Paper Piecing? To make this easy you need to have some very sharp little scissors – Stampin’ Up!’s Paper Snips that you can find on pg 199 of the Catalog are just perfect for this technique – they are small with a very sharp sculpted tip meaning that you can easily get into the little corners – trust me, you need these scissors for easy Paper Piecing cutting!
Sooo…how do you Paper Piece? Here are step by step directions…
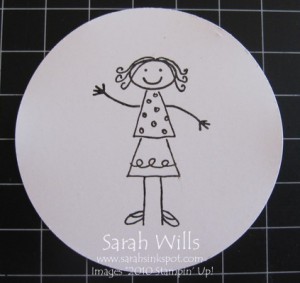
Firstly stamp your image onto your base cardstock…I used stamps from All in the Family (pg 91) and used my Stamp-a-majig to perfectly position all the body & clothing pieces…
Not sure what a Stamp-a-majig is or how to use one? You can find my free tutorial showing you how to use one in easy steps by clicking HERE
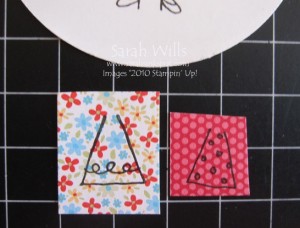
Then you stamp the pieces that you want to use to fill in your image onto patterned papers or colored cardstocks…in my case, I stamped my dress images onto patterned papers…
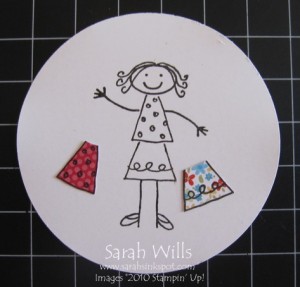
Cut these pieces out using your Paper Snips – I like to cut around just outside the lines…
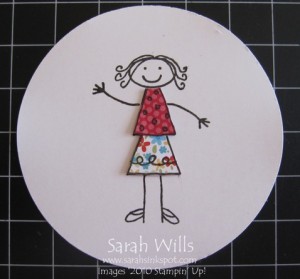
And then adhere your pieces in place – I find that Mini Glue Dots (pg 197) are great for this as they are so small and manageable…
You will notice that I stuck down my bottom piece first and then my top piece above it to get that nice realistic look of a shirt over the skirt…
WANT TO PRINT OUT AND KEEP THESE DIRECTIONS? Click HERE to find my Paper Piecing tutorial in my Technique Tutorials section!
And here is my finished card…what colors & papers did I use?
I used the colors Real Red, Early Espresso and Tempting Turquoise – the patterned papers are from Build a Bear Workshop DSP (pg 175) – this pack of papers features designs sized perfectly for making clothing for these types of stamps…including those cute Build a Bears…
I colored in the faces and feet using my Blender Pen and Watercolor Wonder Crayons…I made my circle using my Circle Scissors Plus & Glass Mat and added a piece of ribbon to finish it off…
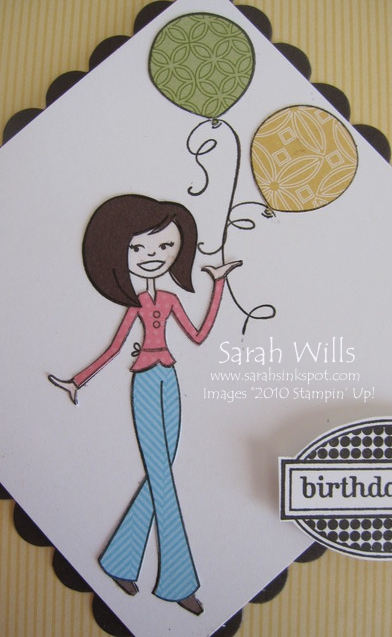
And there is another stamp that is FUN to use this technique with…the beautiful Tess stamp from Tote-ally Tess…
You can see my full card in my blog hop post below and you can find the set Tote-ally Tess on pg 60 of the catalog…it is so much fun kitting her out in cute outfits using Paper Piecing.
I again used papers from Build a Bear DSP and for my balloons I used papers from Playdate DSP (pg 175). Like Tess’s hair? Cute haircut, eh? I am not good at coloring hair and so this was EASY to create – I simply stamped onto a piece of Chocolate Chip cardstock and cut it out…Paper Piecing is such a great way to use up those scraps whilst creating beautiful cards…
Those balloons? I used the balloon stamp from Crazy for Cupcakes (pg 56) and my Early Espresso Marker to color in the parts of the string that I wanted to use – I again used my Stamp-a-majig to get them positioned just where I wanted them…cute!
My birthday stamp is from the set Birthday Bliss (pg 57) and I used a piece of patterned paper from Build a Bear for my yellow striped background. My scallop square was made using my Big Shot and exclusive Stampin Up Scallop Square Die (pg 207)…
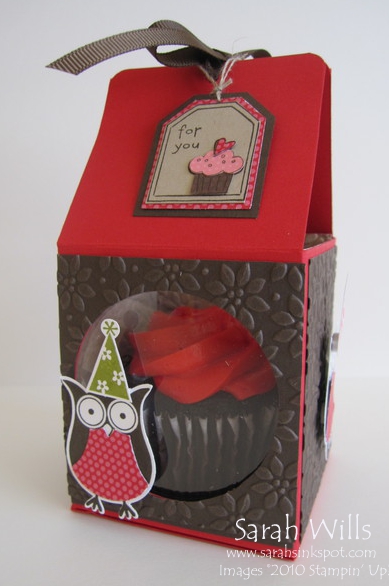
Now onto my last and most popular blog hop items…my Cup Cake Box and Cup Cake Pick!
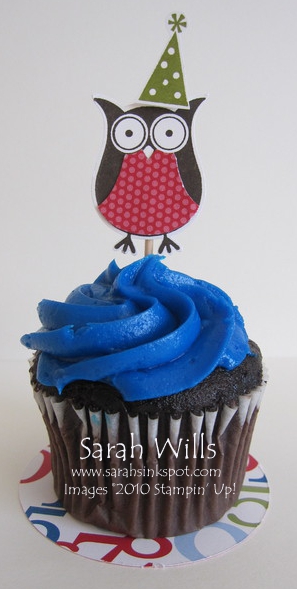
Don’t you just LOVE that owl? SO cute and SO easy to make – he is a stamp in the Sale-a-bration set Punch Bunch that you can get for FREE right now with a $50 order!
Click HERE to find out more information about Sale-a-bration and to view the Catalog online…
To make him you simply stamp the owl using that cute stamp from Punch Bunch, punch him out using the Two-step Owl Punch (pg 200), paper piece a bit of patterned paper onto his belly and add a hat if desired…I used a stamp from Party Hearty to stamp my hats…
To add him to a cake, simply tape a cocktail stick onto his back and there is one cute cake decoration…underneath my cake is a little circle mat that I made using paper from Celebrations DSP (pg 173) – you could use a Scallop Die to make this more girly…
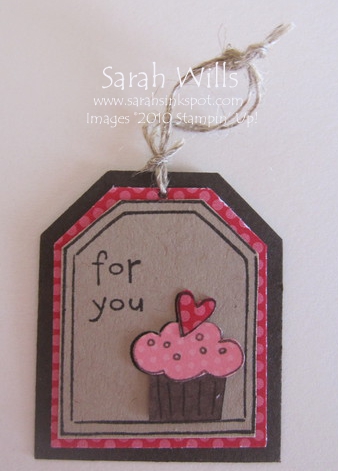
The tag on top of my Cup Cake Box? Made using a stamp from the Level 1 Hostess set Birthday Bakery – I simply punched it out and use the Large & Small Tag Punches (pg 202) for my base – I paper pieced that cute cake, added Linen Thread to the top and LOVE how it turned out…
Sooo that Cup Cake Box…want to know how I made it?
I used Real Red and Early Espresso card stocks and textured my espresso pieces using the Big Shot and Petals-a-Plenty Embossing Folder…
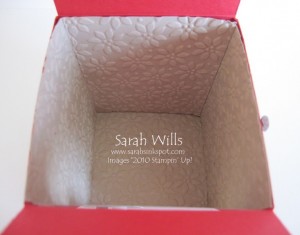
For a professional look I decided to line my box and used Crumb Cake card stock that I again textured using the same embossing folder…
NOW DO YOU WANT MY FREE PRINTABLE TUTORIAL TO MAKE YOUR OWN CUTE CUP CAKE BOX? You can find it by clicking HERE where it is in my Project Tutorials section!
And finally onto the winner of my Blog Candy – a roll of 1/4″ Grosgrain Ribbon and a pack of handmade cards – drawn using random.org the winning comment is no. 26:
Marisol Gutierrez who said…
“I have to go with the cupcake box…Totally ADORABLE…Love how you coordinated the cupcake colors and the owl pick …What a HOOT! Thank you for a chance to win some Yummy Blog Candy”
Congrats Marisol – drop me an email with your mailing address and what color Ribbon you’d like and I’ll get it ordered and on it’s way to you!
Thank you SO much for returning to visit me…you can subscribe to me so that you will be notified by email every time I post new ideas – which is usually every day – you will find my subscription box at the top of my blog in the right side bar – come back and see me soon!
Thanks for the cupcake box tutorial.
OMGosh…I am such a FAN! I get all your updates in my mailbox and was so excited about the free tutorial that didnt read all the way thru and see I am the winner…THANK YOU SO MUCH! Looking forward to your handmade cards! WOO HOO!
These are SO cute! Love all of the wonderful details you added, too. Thanks for sharing your tutorial. Can’t wait to give these a try soon! Hooray for an excuse to make cupcakes, too. Haha! Have a great day! :)