Here in Central Texas it is BACK TO SCHOOL DAY – YAY!!! After a very long hot 3 months we were all ready for it!
Once home from dropping the girls off, I got to work and being in a festive mood, decided to use some new toys to make a card reflective of my mood, and here it is…
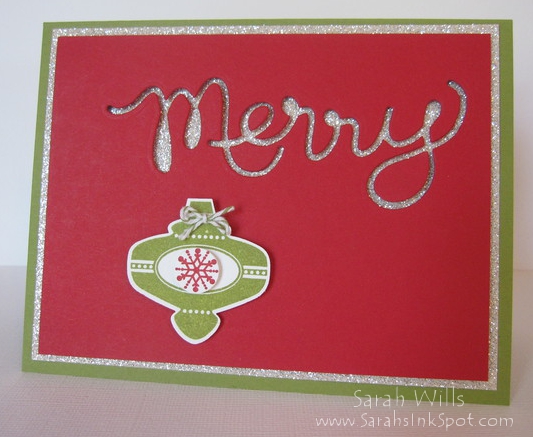
Isn’t that a great look? Super fun & easy to make using one of my favorite new tools in the Holiday Catalog – the Expressions Thinlits Dies that you can find on pg 36 or in the online store by clicking HERE
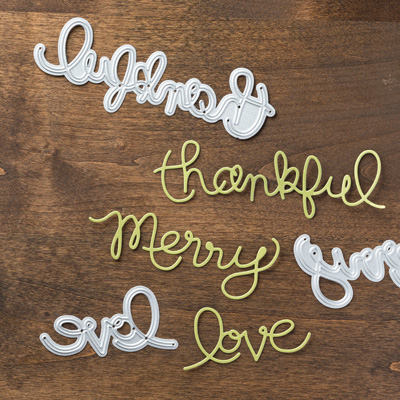
And you get three dies in Expressions Thinlits – one for each of the upcoming Holidays…
The card base…is simply Old Olive cardstock onto which I layered a piece of the fabulously sparkly Silver Glimmer Paper (pg 156) – that alone is a great start to a holiday card…
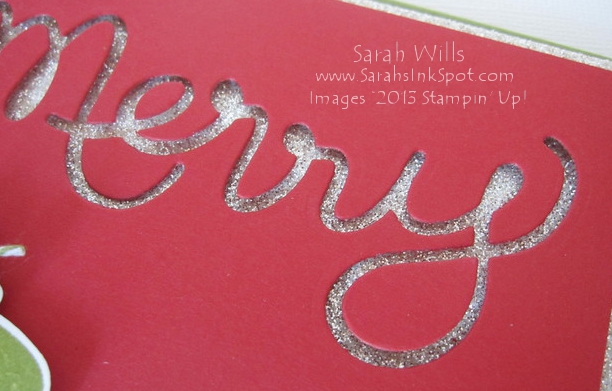
The die cut sentiment…is made using the Merry die from Expressions Thinlits (pg 36)…check out how that glittery silver peeks through from below…
I simply cut my Real Red layer to size and then positioned the Merry die onto it and then carefully ran it through the Big Shot – take the die off and voila – you will have TWO useable die cut items! The piece that you cut the sentiment out of AND the scrolly word bit that it is left in the die – like this…
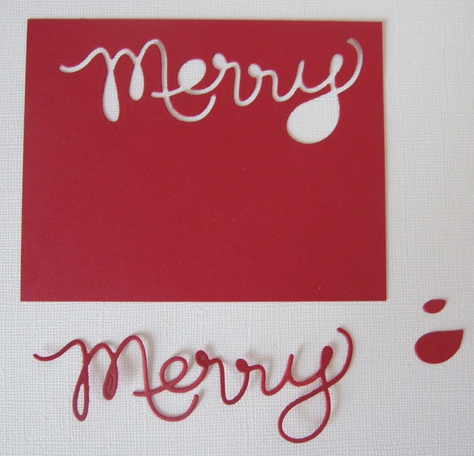
Isn’t that cool? So my card above uses the red sheet and I have that Merry die cut word left over to use on another card later…LOVE getting 2 for 1!!!
Sarah’s Tip: when using the Expressions Thinlits dies be sure to use a piece of Wax Paper to make it easy to get your wordy sentiment out of the die – simply pop the wax paper between your cardstock and your die and it works like a charm!
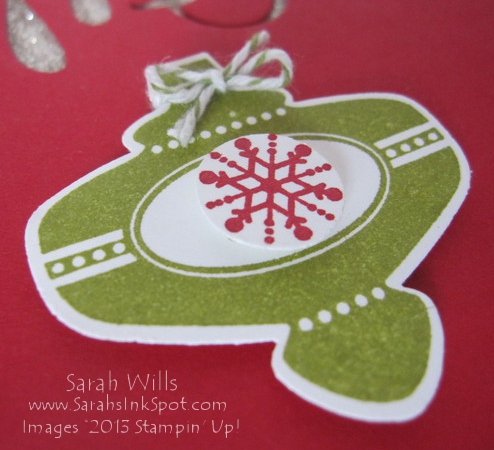
Moving on to the ornament…super easy to make using the Christmas Collectibles Stamp Set AND co-ordinating Christmas Ornament Punch that you can find on pg 35 of the Holiday Catalog…
I stamped my ornament using Old Olive ink and punched it out – I tied around a piece of Old Olive bakers twine at the top (that I found in the Stamp a Tag Kit on pg 36) and then stamped the ornament again but this time in Real Red ink and used my 1/2″ Circle Punch to punch out that snowflake center…
BUNDLE UP AND SAVE WITH THE CHRISTMAS COLLECTIBLES BUNDLE!!!
That’s right stampers – purchase the Christmas Collectibles Bundle that contains BOTH the Stamp Set & Punch and get 15% off! Available in both Clear Mount and Wood Mount versions – click on the items below to find them in the store:
- 133283 Christmas Collectibles Bundle Clear Mount $27.95
- 133282 Christmas Collectibles Bundle Wood Mount $31.95
This is what you get in that Bundle:
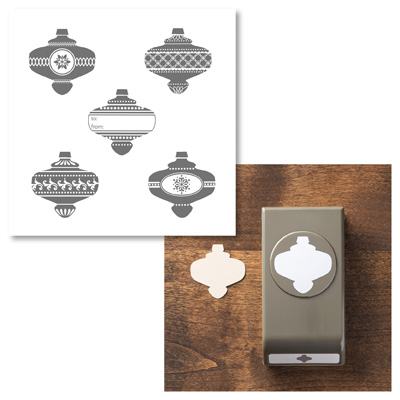
This is a bargain price for stamps & a punch that you are going to use over & over – and take a peek – one of those stamps is a tag – what a quick & easy way to make tags for your gifts this year!
These are the supplies I used to make today’s card:
Cardstocks: Real Red (102482), Old Olive (100702, Whisper White (100730)
Specialty Paper: Silver Glimmer Paper (124005)
Die Cutting: Expressions Thinlits (132171), Big Shot (113439)
Stamps: Christmas Collectibles (Clear Mount 131775/Wood Mount 131772), Snow Day (Clear Mount 131895/Wood Mount 131892)
Punch: Christmas Ornament (132152)
Inks: Real Red (126949), Old Olive (126953)
Twine: Old Olive Bakers Twine – in Stamp a Tag Kit (132806)
Misc: Dimensionals (104430)
CLICK HERE TO ORDER YOUR STAMPIN UP SUPPLIES ONLINE!