Did you enjoy the Blog Hop? I am so sad to see lots of those wonderful stamp sets go…remember that they are retiring and that after June 30th they will be gone forever so if you want any of them, buy them soon to avoid disappointment.
You can find a list of all the Retiring Stamp Sets by clicking HERE – it will open in a new window – if you want to see the images, titles & prices all in one place instead of cross-referencing the list with your catalog, I have compiled a document detailing this for you – it also has the wheels & images on there too – you can find it and print it off by clicking HERE
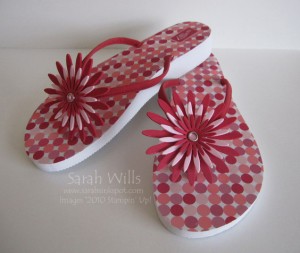
Want to know who won my blog candy which features flip flops that I embellished? They look alot like the flip flops below…cute, eh? I am giving more pairs away too…sign up and join my team for just $99 during June and I will be mailing YOU a pair PLUS a free stamp set of your choice as my gift to you…want to know more? Click HERE for all the details…
Onto the blog hop…I promised more details and some closeups of my projects plus announce the winner of my Blog Candy so please read on…the set I used for my projects was SCARY SKELETON that you can find on pg 24 of the Catalog – it is a great price at just $14.95 and this is what it looks like:
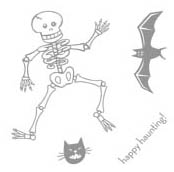 Isn’t that skeleton cool? It’s sooo easy to make him look fabulous especially with White Embossing Powder on Black Cardstock…did you like the haunted house? That was so much fun to make – I used Groom Specialty DSP* for the house which you can find on pg 158 and do you like the little Jack-o-lantern? He is simply a Pumpkin Pie Corduroy Brad* and his face is made out of scraps of cardstock that I trimmed to size…CUTE!!! You can find the corduroy embellies on pg 181.
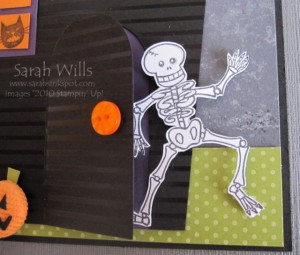
The roof section is separate and is attached to the card using Dimensionals – I used a double layer of dimensionals stacked on one another to make it pop up alot and look like the roof overhangs the house…
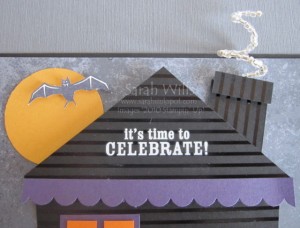
I edged the roof using the Scallop Edge Punch (pg 187) and made the chimney using some scraps – I angled the chimney to make it stand out a little and the rim of the chimney is also attached using Dimensionals to give it…well…dimension! The smoke? That is simply a piece of thin wire that I twisted around my finger and onto it I threaded some Silver and Clear Microbeads from Bead Duo* (pg 180) – isn’t it a cool effect?
Want to make your own Haunted House? You can find the template and dimensions to make it by clicking HERE
*All of the starred items in bold are on the Last Chance Accessories List – they are ONLY AVAILABLE WHILST STOCKS LAST so if there are any that you need, please order them NOW to avoid disappointment!
And now onto my Dancing Skeleton Card and the tutorial on how to create this neat effect…it is so simple and looks so cool – you simply need a stamp, some ink, punches and a Stamp-a-majig (SAMJ)…
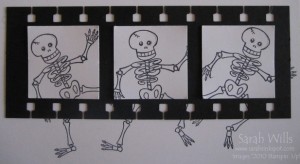
Never used a Stamp-a-majig before? It is one of the best investments you will make and you will wish you had gotten one ages ago – you can find it on pg 191 of the Catalog and priced at just $11.95, it is well worth investing in one…
If you want to know how to use the Stamp-a-majig, I have a downloadable and printable tutorial for you which shows you how easy it is to use – you can find my tutorial by clicking HERE and it will open up in a new browser window.
I loved making this card – the film strip is so easy to create using the Spiral Punch (pg 187) and this punch is one of my favorites as I have used it to make rolodex cards and also to create a cover for the On Board Journals on pg 185 – this punch is perfectly sized to fit the coils making it a breeze… And those dancing skeletons came out so well…
Want to make your own dancing characters? You can find the tutorial on how to do this by clicking HERE – you will also find a downloadable/printable version so that you can keep it for future reference too!
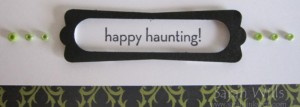
The sentiment? I simply stamped it onto the card base and I made a cute frame over it to make it stand out – I punched a shape out of black cardstock using my Word Window Punch and then took my Modern Label Punch (both on pg 187), positioned it over the top of my word window ‘hole’ and punched – this results in this cute frame that you add using Dimensionals for a cute touch…and again, I used beads from Bead Duo*…I’ll miss them when they are gone…
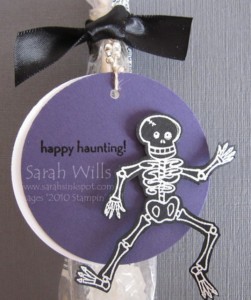
I almost forgot the details of my Party Favor…the favor is simply Rock Candy onto which I tied my embellishment – it is simply two circles of layered cardstock onto which I stamped my sentiment in Versamark and sprinkled on Black Embossing Powder and set it with my heat gun…I stamped my skeleton using White Embossing Powder onto black cardstock and cut him out – he is attached to the circles using Dimensionals to make him pop of…at the top I put through a piece of Linen Thread onto which I threaded some beads again from Bead Duo* (pg 180) and my finishing touch was a piece of Black Satin Ribbon from the Summer Mini Catalog…
You can find all of these Blog Hop projects and their close-up photos in my very own Gallery which you can find by clicking HERE – they are in the category marked ‘Blog Hops’…there is also a permanent link to my Gallery that you can find in my left side bar which you can bookmark so that you can easily find it and my projects again for easy reference…
And lastly…announcing the winner of my Blog Candy…the lucky winner will be receiving a pair of embellishment Flip Flops just perfect for the 4th July PLUS the item that they liked the most…
And the lucky winner chosen by random number generator is…
Comment no.9 – on June 12th, 2010 at 8:38 pm – by Kay Drenth who said ‘OMWord! That house is awesome and that film strip is too cute’
A BIG congrats Kay – please email me with your mailing address and I will get your goodies on their way to you…enjoy :-)