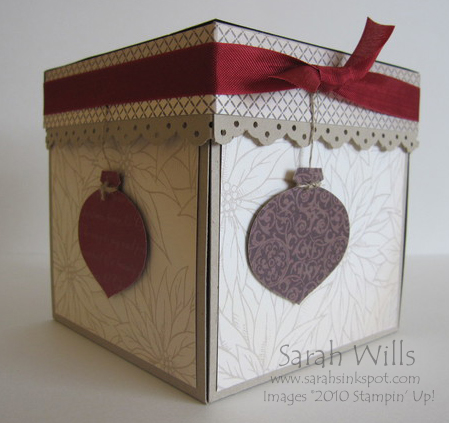
Well, not quite literally LOL but today I am going to show you how to make a box with a hidden secret…it is called an Explosion Box and it is a whole lot of fun to make!
You can find the simple tutorial on how to make this amazing Explosion Box by clicking on the Free Tutorials tab at the very top of my blog – you will find it in my Project Tutorials section at the top and you will also find the link to it at the end of my blog post here PLUS I am offering the chance to win some Blog Candy…please read on for details…
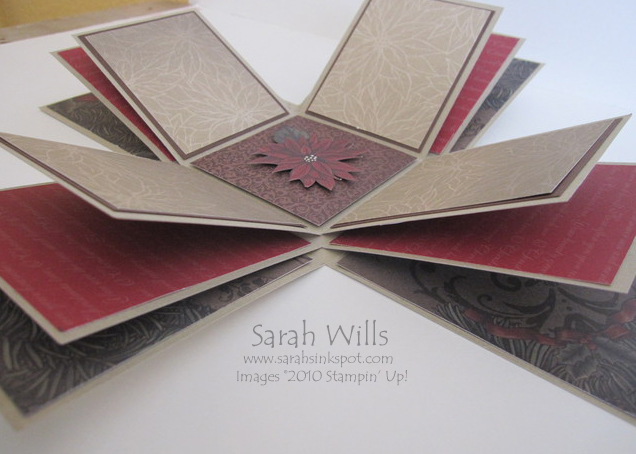
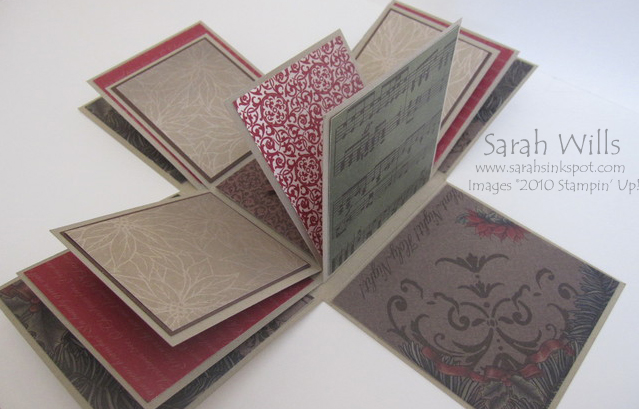
What’s so special about this innocent looking box? Well, once the lid is pulled off the sides of the box fall away revealing…20 mini pages to add patterned papers, photos and embellishments to! You can even put a 3-D object in the center square if you choose – this makes a cool and unusual scrapbook gift for a special someone and is just perfect for the upcoming Holidays…
It is the perfect project to make several of for family members (it would be fab for Thanksgiving gifts) because it is so affordable – it uses just 3 sheets of 12×12 cardstock plus half a sheet more for the lid & patterned papers – mine has a bit of a festive theme due to my holiday season prep and so I have used papers from the Deck the Halls pack that you can find on pg 18 of the Holiday Mini Catalog and covered both sides of all the little pages – using a pack of co-ordinating papers makes it so quick & easy to make something like this because the hard work of matching colors is already done for you…
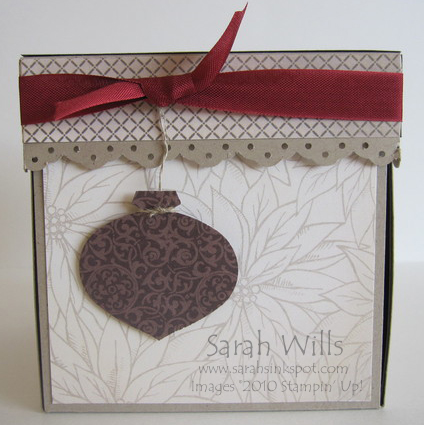
I used Crumb Cake for my base, edged my lid using my Eyelet Border Punch (pg 200) and wrapped around a piece of Cherry Cobbler Seam Binding (pg 21 of the Holiday Mini)…my ornaments were so simple to make using the Ornament Punch (pg 202) and a piece of Linen Thread to hang them with.
You can also keep this box more simple to make a very cool card by simply having one layer that falls open to reveal 5 surfaces to decorate…
I’ve been wanting to make one of these boxes for ages but was deterred because I could only find complicated instructions, so for today I decided to get down to make one and produce simple instructions…WANT THIS TUTORIAL SO YOU CAN MAKE ONE OF THESE AMAZING EXPLOSION BOXES? Click HERE to find my Project Tutorials where it is at the top of the list – in that tutorial you will also find a printable version too!
And you know what would be perfect for making these boxes? Some of the fabulous packs of 12×12 cardstocks that you can find in the Clearance Rack right now – in these packs you get 24 sheets for JUST $3.99 – making each sheet ONLY 17 cents!!! Decorate your box with some Designer Series Papers also available there for JUST $3.49 – and wrap your box up with a piece of ribbon also there starting at JUST $1.99!!!
By using Clearance Rack bargains you could make 24 simple or 8 three level boxes for less than $10 – what a sweet deal! Make them as holiday gifts for your family and everyone will be thrilled!
Need to visit the Clearance Rack to order supplies? Simply click HERE and then click on Shop Now in the top right corner…you will find it on the left side of the store…if you have any questions email me by clicking here and I will be very happy to help.
Now onto the Tutorial Tuesday Blog Candy…leave me a comment to let me know what you would use this box for and you will be entered into a drawing where one lucky winner will be drawn this Friday morning – that lucky winner will win a kit containing pre-cut cardstocks, Designer Series Papers and Ribbon – everything needed to make an Explosion Box!
And you can get more chances to win – place an order with me before 9 am on Friday and you will get an extra ticket in the hat too!
Come back and visit Friday to see if you won and to check out my Festive Friday item for this week…it’s a frosty one!


Wow…thanks for the tutorial!!!
I think I may use this idea for my son’s birthday invites…it’s so hard to impress boys!!
Or maybe at Christmas to hold some money or the small keychain gift cards (Starbucks has one) and decorate up the inside with pictures and a note or two.
Karey
Love the box. What a great idea for that little something gift for someone who has everything but never enough places for the pics of the grandkids.
Will be making these to give at Thanksgiving to the other grandparents.
Thanks for your time and sharing.
First thought came to mind is a fabulous gift for my sister with some pictures of her grandchildren and empty spaces for her to add more current pictures of them. They are the love of her life and keep her going during tough situations she’s had to deal with, especially over the past year. Great choice of DSP, Sarah! I’m saying a little prayer that I win this! Thanks for the blog candy offer.
I love your explosion box; I’ve been intimidated to make one because they look so complicated to pull together. I would love to win this kit! The first thing I thought of would be to use it as an ornament gift box for a cookie exchange in December. The box itself would be a great gift exchange at this event as well. Pick me, Pick me!!! Kelli
I love making exploding boxes. You did a great job on your first box. Looks so pretty with the Christmas patterns.
I would take pictures of all the kids and grandkids put them in this and give it as a gift for my mother inlaw for Christmas who is in a nursing home.
This is a super cool idea!
Love these boxes and I will make one for Halloween and for Christmas to put family photos in. My grandson will be making his Communion in the spring and this would make a great remembrance for that special day. Wonderful to capture a school year in one of these. TFS!
What would I use this box for? To hold all the love I have for you in it!!!!!!! xoxoxoxxo
i dunno if i can be lucky twice:)))
but, i love love love this box! it looks so amazing. if i won this box kit i would send it to my gramma in TX for xmas. we will be spending our first christmas away from her in PA in my entire life! i have four daughters that she has only seen twice in the last year and a half so i would fill it with photos of them!!! she would love it:)it would be something to cherish forever!
good luck everybody!
If I had this one you made? Treasure it and put it on prominent display! It is simply gorgeous. I would like to think I could make one and give it as a present to someone special or for a special occasion. Actually, a coworker’s father died this morning and this would be a great idea for him to put some photos in etc. He also has a new grandchild too. Ummmm! Thanks for the tutorial, I might need a little help with it, but I am willing to give it a try! Plus, thanks for a chance to win!
This box looks like an explosion of FUN!!! It is gorgeous and will make a super clever gift for the person who has everything!! Your creativity continues to amaze me Sarah!! Hope I can win this one!! Thanks and keep up the good work. You are making us all look good!!
I love this box! The papers make it look so elegant! SU!
always manages to come out with fabulous dp’s and I buy them all the time! I would love to win this kit! I plan to make these for a church craft fair. (of which I am the only crafter!)The money goes back to the church for
funds to help families at Christmas. This would be a big seller!
This is absolutely beautiful! I would love to win it. Now to go look at the tutorial. I love that you do these tutorials. So very generous of you.
You are amazing. You have the most wonderful projects. I think that I would cut out a picture of my kids most wanted Christmas present and put it in there. Then after they open it and see their treasured present (hiding the real one elsewhere), I will fill up the box with pictures taken that Christmas.
thanks again!!!
I would make this for special presents as everyone could use one for those special occasions, thanks for sharing
Eileen