I hope you enjoyed this weekend’s Holiday Mini Catalog Blog Hop and that you came away with lots of things on your wish-list…
Just a few days to go…you can purchase items from that beautiful Holiday Mini Catalog starting on Thursday September 1st – and there are some gorgeous things in it!
For my projects I used the brand new Christmas Lane Simply Scrappin’ Kit that you can find on pg 26 of that Mini Catalog – it features beautiful holiday themed patterned Designer Series Papers, sheets of Textured 12×12 Cardstocks in 4 co-ordinating colors and lots of beautiful die cut stickers and borders – ample for any project that you can think of…
My original blog hop post is below this one so that you can refer to it and the main photos of my project and in it I promised to post more details, photos, tutorials and my blog candy winner today so please read on to find out more…and remember that you can click on any photo to get a larger view…
Well lots of you loved my Lip Balm Card…
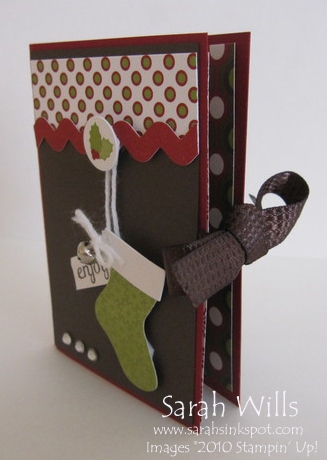
It is so much fun to make and what a great card with a little gift inside…here is a side view of it so that you can see that GORGEOUS brand new Quilted Espresso Ribbon – it is so lovely to work with and adds a touch of real elegance…
Almost everything decorating the front is a self-adhesive Die Cut Sticker from Christmas Lane – the stocking, the ric rac, the polka dotted border & the holly decal – ALL part of this kit.
I added a bit of White Bakers Twine to ‘hang’ my stocking and also added one of my new favorite embellies – the adorable little Jingle Bells that you can find on pg 30 of the Holiday Mini – and they are a bit of a bargain at just $2.95 for a pot of 48 – what a great deal!
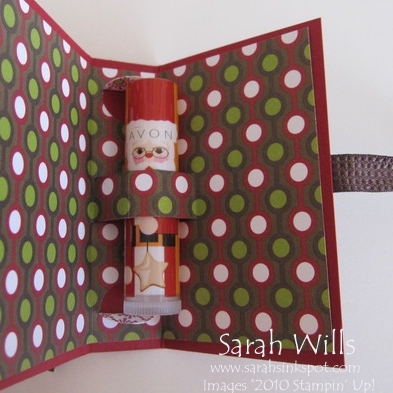
So when you un-do that bow on the side this is what you get inside…
It is decorated with some fun Designer Series Paper from Christmas Lane and check out that cute Santa lip balm – I found him at Avon – they have lip balms available for all the seasons and you can theme your projects around them.
WANT MY FREE TUTORIAL SO THAT YOU CAN MAKE YOUR OWN LIP BALM CARD ? Click HERE to find it in my Project Tutorials section where you will find a printable version too!
And remember I promised to show you a trick about how to use your stickers as embellishments?
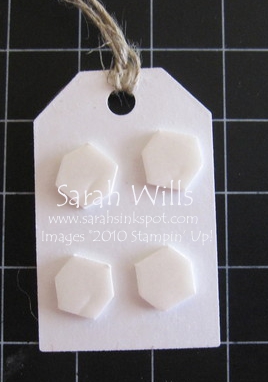
I often want to add dimension to stickers to jazz them up a bit and there is a really neat easy trick to do this to avoid other bits of your sticker sticking to the page or card…so grab your self-adhesive sticker and attach your dimensionals to the back of it…be sure to leave the backing paper on those dimensionals as you don’t want to expose the adhesive yet…
Grab some talcum powder and sprinkle it on the back of your stick…move it around, blow it away and TA DAH! One none sticky sticker! Peel off those bits of backing paper and adhere to your project!
And if you dont want to add dimension but do want to use a sticker, for example, to hang from something and lose the stickiness, simply sprinkle on the talc – sticky is gone – cool, eh?
But judging by your comments, even more of you liked the next one – THE most popular item in my post…my Holiday Gift Album with a Twirl!
It is a beautiful Album that would make a fabulous Holiday gift for family members – especially for Grandma & Grandpa…it is made using 3 CD Folders along with solid & textured cardstocks, Designer Series Papers & Die Cut Stickers featured in the Christmas Lane Simply Scrappin’ Kit.
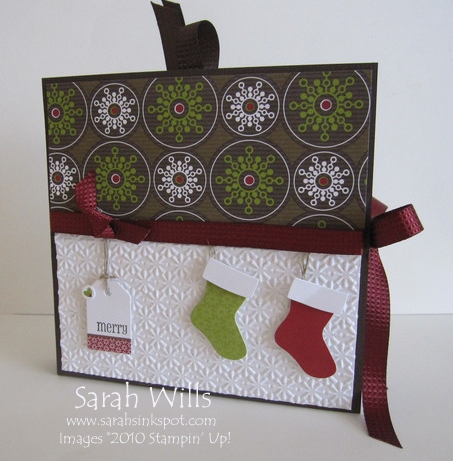
Here is the front cover with that gorgeous Cherry Cobbler Quilted Satin Ribbon tied in a bow at the side…that gorgeous Ribbon also comes in Early Espresso and you can find it on pg 30 of the Holiday Mini Catalog…
The front cover was made using Designer Series Paper from Christmas Lane and check out that beautiful piece of White textured cardstock – made using a BRAND NEW EMBOSSING FOLDER called Snow Burst that you can find on pg 33 – isn’t it stunning? And aren’t those stockings just adorable? Again, die cut stickers – CUTE!!!
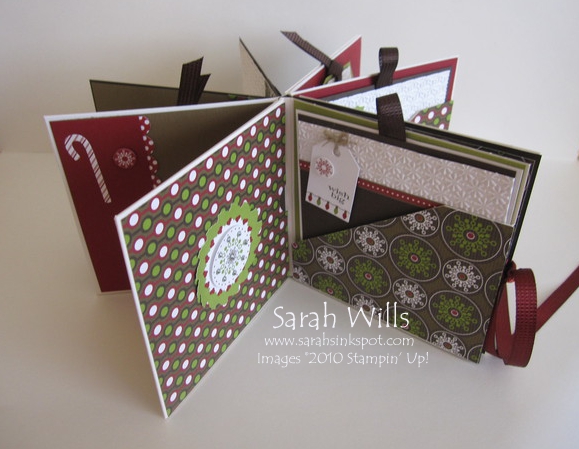
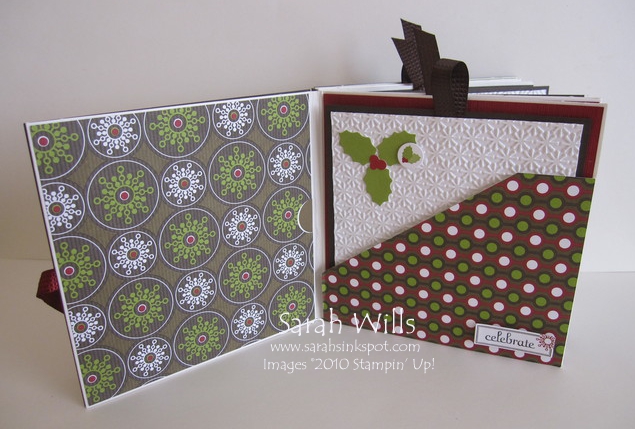
Undo that bow and revealed are lots & lots of pages and also lots of slide up or slide out pages from pockets – 20 IN ALL – this gives you LOTS of room to add photographs, journaling or even a gift card…now you saw the photo of it half open…
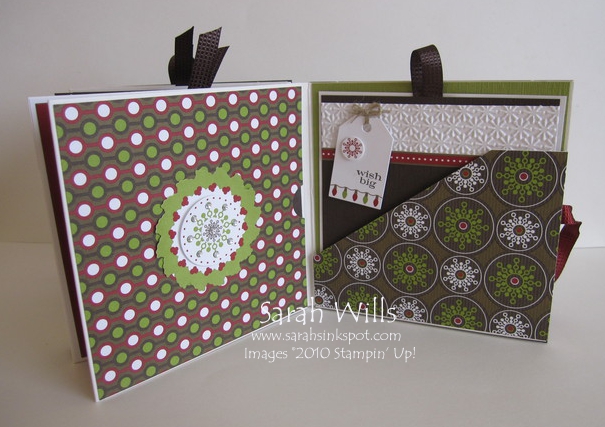
Now here is the photo of it fully open and secured…imagine it filled with photos…what a great Holiday Display…I decided to call it my Carousel Album! Those ribbon tabs all slide-up to reveal more pages to decorate…
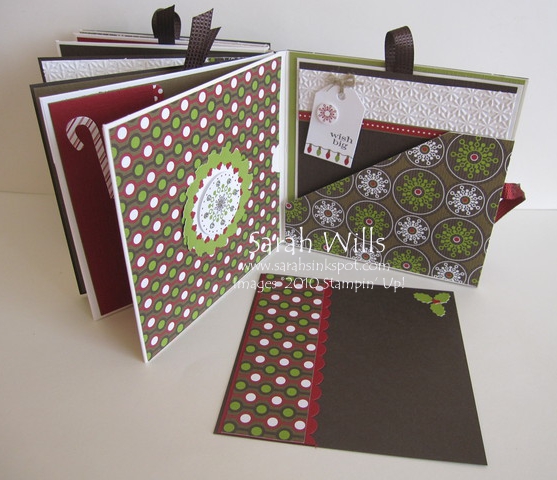
Here is examples of the pages found inside…
The one with the ribbon tab simply pulls up and out – and the brown one with the holly leaves is one that slides out from a side pocket…
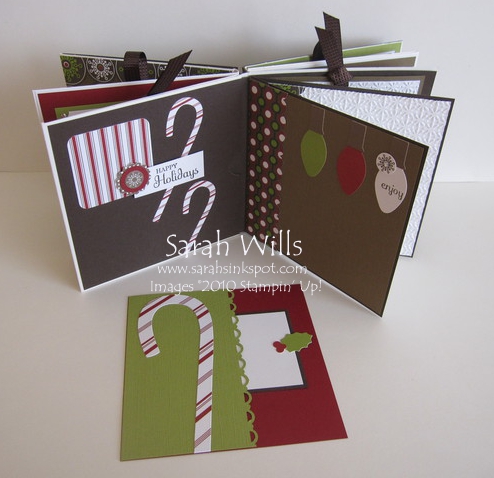
Here is another set of pages complete with a pull-out one – and see that little tab with the holly leaves on it? The perfect size to house a gift card…
And another set…aren’t they adorable?
WANT MY FREE TUTORIAL SO THAT YOU CAN MAKE YOUR OWN CD FILE FOLDER CAROUSEL ALBUM ? Click HERE to find it in my Project Tutorials section where you will find a printable version too!
TO MAKE IT EASY FOR YOU TO MAKE YOUR OWN CAROUSEL ALBUM:
I have put together a Carousel Album Kit!
My Kit contains everything that you will need to make an album the same as mine – included in each kit are the following:
- 3 CD Folders
- Pre-cut Cardstock Pages
- Pre-cut & Scored Center Panel
- 4 sheets of 12×12 Textured Solid Cardstocks
- 3 sheets of 12×12 Christmas Lane Designer Series Papers
- 3 sheets of 6×12 self-adhesive Die Cut Stickers & Borders
- Pre-cut cardstock Mats
- Pre-cut cardstock Pull-out & Slide-out Inserts
- Quilted Early Espresso & Cherry Cobbler Ribbons
- Linen Thread
- Whisper White Cardstock pieces textured with the new Snowburst Embossing Folder
- Sparkly Rhinestones
- Pre-punched border strips
Additionally you will receive my very detailed step-by-step instructions showing you how to complete your album:
- These are different from the free tutorial below – you will be shown how to replicate my album exactly!
- They are easy to follow & a step-by-step guide to assembling your album to be just like mine
- They are complete with photographs of every page & insert making it easy for your re-create what I did
- These instructions will be emailed to you
Please note that you will need to supply your own Stamps, Adhesive Tape, Sticky Strip & Dimensionals.
And of course if you choose to decorate yours differently you can – you will have lots of supplies in this Kit to be creative with!
HOW DO YOU ORDER YOUR KIT?
Click on the ‘Buy Now’ button below…the price INCLUDES shipping to you – please note that I can mail this kit to residents of the US only.
Would you like to purchase the step-by-step instructions/3 CD Folders only, with or without the 3 CD Folders? You have those options below too!
Perfect for demonstrators who are planning a class or for those who already have supplies…click on the ‘instructions only’ option below to purchase your copy and they will be emailed to you within 24 hours – the ‘instructions only’ option is also available to my international visitors too!
Sooo onto my final project which was making 32 cards using half of a Christmas Lane Simply Scrappin Kit…
Because I want to show you quite a few photos of those cards I have decided to carry it over to tomorrow to avoid confusion & a very lengthy post with lots & lots of photos…I hope you don’t mind coming back to visit me to see them…
QUICK UPDATE – the photos are coming! I have camera issues and until that is fixed or I have to purchase a new one, I am not able to upload my photos of the cards…stay tuned!!!
And finally onto the winner of my Blog Candy who wins their choice of my own retiring stamp sets! Drawn using random.org the winning comment is no. 6 by:
Kathy T – August 28, 2011 at 5:16 am – who said:
“Well, the album is very special, but I love the little lip balm card”
A BIG congrats Kathy– drop me an email with your mailing address and your goodies will be on their way to you!
Thank you SO much for returning to visit me…you can subscribe to me so that you will be notified by email every time I post new ideas – you will find my subscription box at the top of my blog in the right side bar…
ORDER YOUR STAMPIN’ UP SUPPLIES ONLINE BY CLICKING HERE!
HI Sarah! I love your cd photo album.. how darn cute!! I have a question for you. I am also a demonstrator.. I just ordered this kit.. then seen this on your blog.. if I wanted to order the detailed instructions.. i seen how to do that.. but what if I ordered the kit… where do you find the cd holders like you have shown? Or, is it possible to buy the detailed instructions and cd holders from you together? Thank you so much!
Dawn
Stunning projects! Thanks for the tutorial. Great tip!
Love the album! Thanks for the directions! Can’t wait to try it myself!