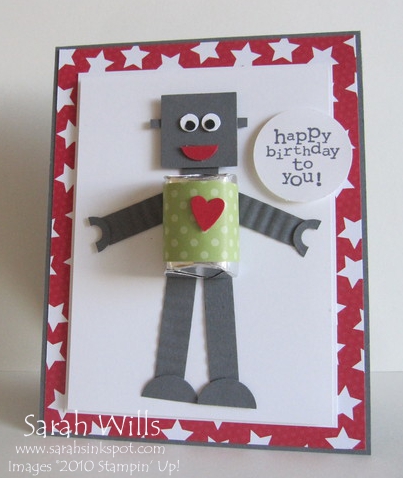
Now this is one CUTE card for the kids…and they might even enjoy making this cool robot…
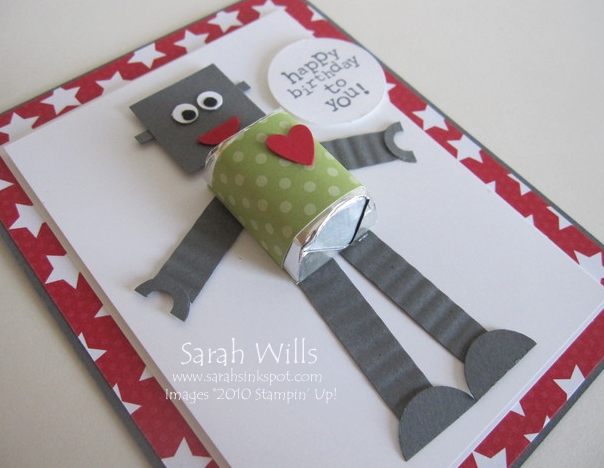
He is made simply by using various Paper Punches and strips of cardstock – isn’t he cool? And his ‘belly’ features a delicious removable Hershey Chocolate Nugget…yum!
Now I must add that I found the idea for this in one of the paper crafting magazines that I receive and I snipped the piccy out to save it for a later date…but of course now I dont know what magazine he came from…if you know, please email me to let me know so that I can give credit where credit is due…thank you!
This is my spin on him…what do you think? I love how he turned out – and what a FUN card to make! How did I make him? Here are the details…and I put together a quick free printable tutorial too that you can find by scrolling down to the bottom of this post…
So my card base is Basic Gray onto which I attached a piece of patterned Designer Series Paper from the pack Big Top Birthday (pg 186) – LOVE that fun bright print…
So that Robot…I made him using Basic Gray cardstock – which just seems a perfect color for him which you can find in the Neutrals color family – and a variety of Punches:
- 1 1/4″ Square Punch – for his head
- 1/8″, 1/4″, 1/2″ & 3/4″ Circle Punches – for his feet, hands, smile & eyes
- Heart to Heart Punch – of course for his heart
You can find the Punches on pgs 209-213 of the Catalog or in the online store by clicking HERE
And I also used my Paper Crimper to texture those arms, legs & neck – this adds a great look to him and is a great fun tool to play with.
His belly is simply a Hershey Nugget that I covered using a strip of polka-dot DSP that I found in my Subtles Patterns DSP Stack (pg 186) – and this is attached using removable tape so that the lucky boy or girl who receives this can take that chocolate off, eat it and it won’t destroy the card because there is another permanent ‘belly’ underneath!
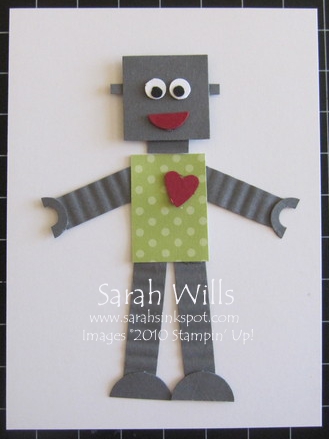
Here is what he looks like without his Nugget belly…still darling!!!
That sentiment? A perfect one for a kid card and found in the same set I used yesterday – Up, Up & Away (pg 63) – I simply stamped it using Basic Gray ink, punched it out with my 1″ Circle Punch and added it using Dimensionals.
I then matted this robot layer onto another white layer to give a framed look and attached all to my card base…
WANT MY FREE TUTORIAL SO THAT YOU CAN MAKE YOUR OWN PUNCH ART ROBOT? Click HERE to find it in my Project Tutorials section where you will find a printable version too!
And during August when you Buy 3 packs of Designer Series Paper you get 1 FREE – this is a fabulous deal and you can find out all about it by clicking HERE – stock up now & save $$$!
CLICK HERE TO ORDER YOUR STAMPIN’ UP! SUPPLIES ONLINE!


This is so very cute. Love this idea – I can think of a few grand children who would love to get a robot card like this. Thanks so much for sharing how you made the robot.
Super cute! TFS
My gosh, Sarah! That is the cutest thing. I can’t wait to try it out. I just finished three boy cards, but will have to put these in the stash for later! Always love your ideas…just darling!
What a great card for kids! I bet they would love making some themselves to give to their friends also. Could easily be done for Halloween cards or Valentines.
Super cute Sarah!! I had seen this on a blog a long time ago and saved it (or so I thought). If I did save it, I didn’t label the subject line. If I find it and it has any info, I’ll let you know.
This is a gorgeous card, and such a clever idea. Thanks so much for the tutorial.
Love Joan xx