I hope you enjoyed this weekend’s New Catalog Blog Hop and that you came away with lots of new must-haves on your wish list!
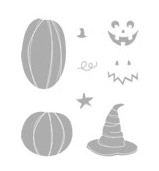
I used the stamp set Jack of All Trades that you can find on pg 26 – it is a set of 8 featuring pumpkins, jack-o-lantern faces and of course that fabulous hat – here are the images of those stamps:
My original blog hop post is below this one so that you can refer to it and the main photos of my projects…
In it I promised to post more details, photos, tutorials and my blog candy winner today so please read on to find out more…and remember that you can click on any photo to get a larger view…
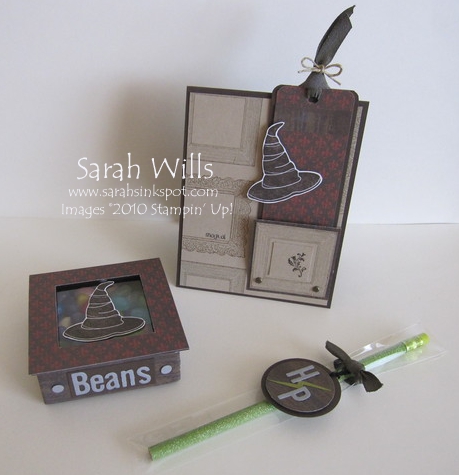
The hat stamp in Jack Of All Trades immediately made me thinking of the ‘sorting hat’ from the Harry Potter movies – my girls are both reading the Harry Potter books & LOVE them which made me think about treats for them…and so I came up with a ‘Harry Potter’ ensemble…
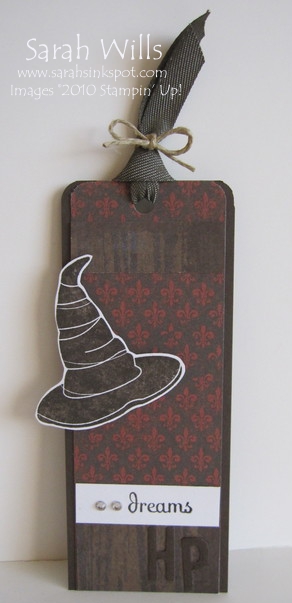
So because they are so big into reading the books, I decided to make a Bookmark each for them…
I used Early Espresso cardstock for my base and cut it to be 2″ wide x 5 ” long…I added patterned papers from Well Worn DSP (pg 185) and stamped my ‘dreams’ sentiment using a stamp from Fabulous Phrases (pg 163) and popped a couple of sparkly Rhinestones next to it for a bit of magical sparkle…
I stamped and added my hat, cut the HP letters using my Big Shot and Billboard Strip Die (pg 225) and added a piece of ribbon to the top – it is a brand new ribbon called Artichoke Denim Jean (pg 194) and fits my theme perfectly – I tied around a piece of Linen Thread and there is one quick and fun book mark!
Sooo to present it in a cute way…I decided to attach it to a card so that it can be presented as a cute little gift and so made a little pocket to slide it into…
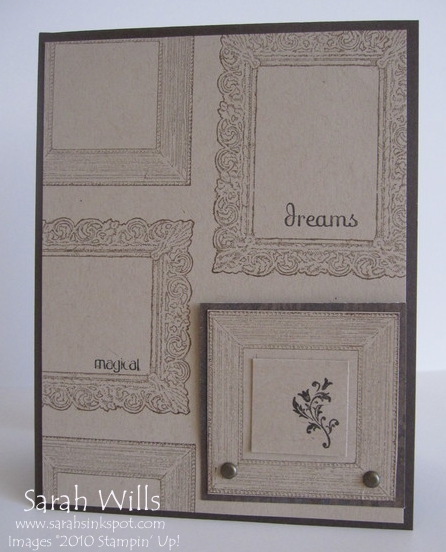
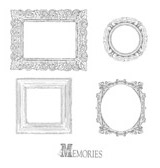
I was flicking through the new Catalog thinking of what to use as a background when I came across the new set Frame It – oh my how perfect! If you’ve seen the movies then you will know that the walls of Hogwarts are covered with beautiful picture frames – and this set fit my theme beautifully…here are the frames included in that set…
I again used Early Espresso as my card base and layered onto it a piece of Crumb Cake cardstock onto which I stamped some of these gorgeous frames using Soft Suede ink…I used that Dreams stamp again and found the ‘magical’ stamp in the set Pony Party (pg 87).
To make my flap that the bookmark slips into I simply cut out one of the frames, mounted it onto a piece of DSP from Well Worn and added it to my base using two Brads. I added a little stamped image to the front using a stamp from Tiny Tags (pg 136) – the bookmark slides in and out easily.
Next came my little bundle of treats – a Box of Bertie Botts Jelly Beans and a Wand…
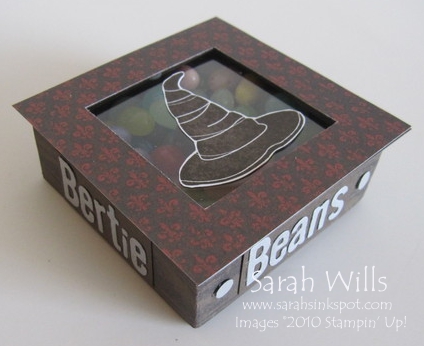
This box is so easy and fun to make – no special tools required – and to keep with my Harry Potter theme I turned it into Bertie Botts Every Flavor Beans which my girls came up with…
So here is one side…
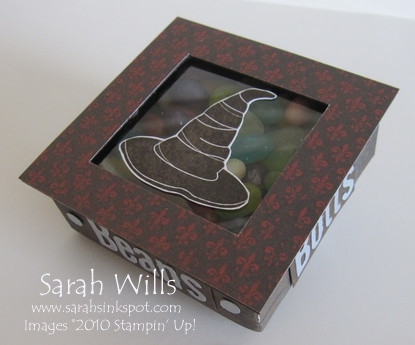
The box is made using Early Espresso cardstock and decorated with papers again from Well Worn DSP (LOVE that new pack of patterned papers!) – I made a square hole in my lid and added a sheet of acetate to keep the beans inside and grubby little fingers away from them!!! You can see that I extended my paper covering the top of my box to give it more of a framed look.
My hat again is stamped and cut out using Paper Snips and I used my Big Shot and Billboard Strip Die to make my letters…to keep with my magical theme I decided to cut them out of Brushed Silver cardstock for a bit of a sparkle…
I then attached the letters onto strips of cardstock that I then trimmed to size and added to my box. And here is the other side…
Finally I added Jelly Beans – which my girls wanted to oversee!!! Needless to say not all beans made it into the box…
WANT MY FREE TUTORIAL SO THAT YOU CAN MAKE YOUR OWN TREAT BOX ? Click HERE to find it in my Project Tutorials section where you will find a printable version too!
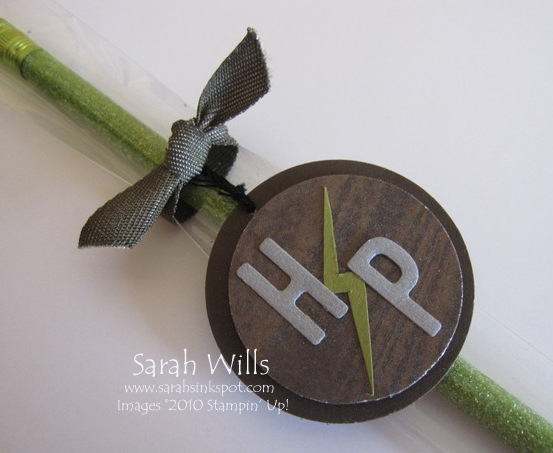
And here is my Wand…
Simply a green sparkly glittered pencil in a Cello Bag. I made the simple tag using my 1 1/2″ and 1 3/4″ Circle Punches and added more Billboard Die Cut letters…the lightning flash I cut out freehand using Paper Snips and added it to the wand using Glue Dots…a bit of Grosgrain Ribbon completes the look.
Then came my Chocolate covered Apple…
Mmmm…I wish I could still bite into them but alas those days are long gone with my having crowns instead of front teeth!!! Ah well…my girls enjoyed eating it…here is that topper that I made to decorate the ‘handle’…
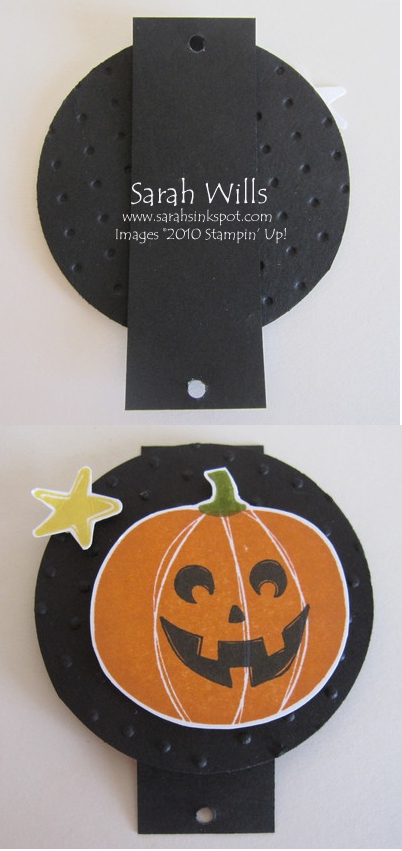
As you can see from the front/back images above, I adhered my jack-o-lantern circle to a strip of cardstock – the strip measures 3″ x 1″ and I made a hole at each end so that it could slide onto my handle easily…
I then made my embellie and stamped my pumpkin & star and cut them out – I mounted them onto a 2 1/2″ diameter circle that I textured using my Big Shot and Perfect Polka Dots Embossing Folder.
I attached my pumpkin and star using Dimensionals and then attached them to my backing strip using Sticky Strip adhesive tape. Lastly I added some ribbons and a sentiment from the set Teeny Tiny Wishes (pg 157)
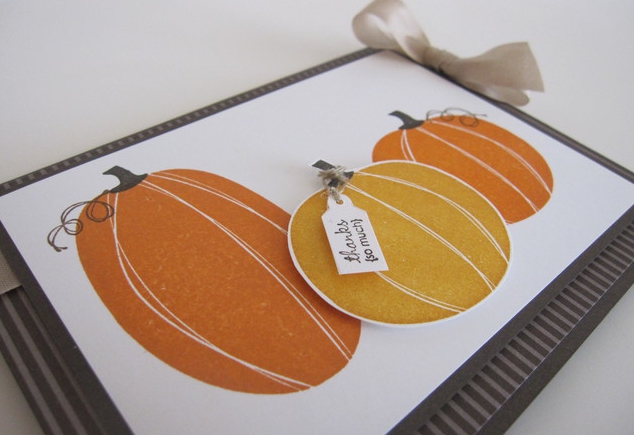
And lastly onto my Thanksgiving Pumpkin Card…
I wanted to show you how different these pumpkins can look – from whimsical for Halloween to a bit glamourous for Thanksgiving…
I stamped two using Pumpkin Pie Ink onto my base and then stamped another using More Mustard Ink onto another piece of cardstock and cut it out – I attached it using Dimensionals for that 3-D look…
I added a tag to that center pumpkin again using a stamp from Tiny Tags which I punched out using the Jewelry Tag Punch (pg 210) and attached using a piece of Linen Thread.
See that GORGEOUS striped background? Simply a piece of Early Espresso patterned paper from Neutrals DSP Paper Stack (pg 186) – it really sets off my card…
And finally a touch of elegance provided by a piece of Crumb Cake Seam Binding (pg 195) – which is utterly lovely to work with!
SPEAKING OF THE BRAND NEW RIBBONS AND DESIGNER SERIES PAPERS – I have open spots for Ribbon & Paper Shares right now – it’s a great way to get a bit of all the new ribbons & papers in a collection at a very affordable price…
You can find more info about them by clicking HERE – my Shares fill up FAST so if you want to secure any spots please email me as soon as possible!
And finally onto the winner of my Blog Candy who wins their choice of my own retiring stamp sets! Drawn using random.org the winning comment is no. 41 by:
mousekemom
July 31, 2011 at 8:18 am
“Just awesome, Sarah! I look forward to seeing that box tutorial. Thanks for sharing your talent!”
A BIG congrats – drop me an email with your mailing address and let me know what color 1/4″ Grosgrain Ribbon you would like…
Thank you SO much for returning to visit me…you can subscribe to me so that you will be notified by email every time I post new ideas – you will find my subscription box at the top of my blog in the right side bar…
ORDER YOUR STAMPIN’ UP SUPPLIES ONLINE BY CLICKING HERE!
