When I give gifts I love to present them not in a paper gift bag, but in useful packaging – something that the recipient can re-use themselves rather than a bag to simply throw in the trash…
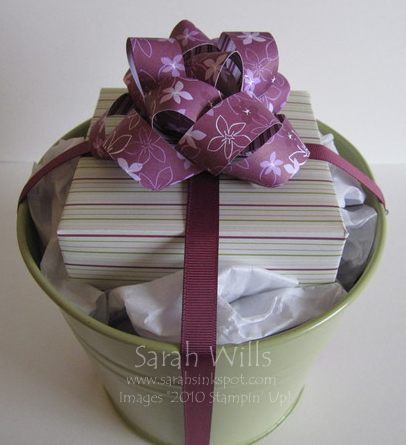
And rather than use a roll of gift wrap, I decided to show you how you can use papercrafting supplies in your gift wrapping. The cute green tin pail below houses my gift which is wrapped in a sheet of Designer Series Paper from the Cottage Wall pack…and the bow on the top? Yup…also made of beautiful papers found in that package…read on for details and a tutorial…
I simply wrapped my gift in one sheet of DSP and placed it into my pail along with some tissue paper for padding. I then cut two lengths of ribbon from my spool of 5/8″ Rich Razzleberry Polka Dot Grosgrain and wrapped each around the pail from side to side to create the X effect.
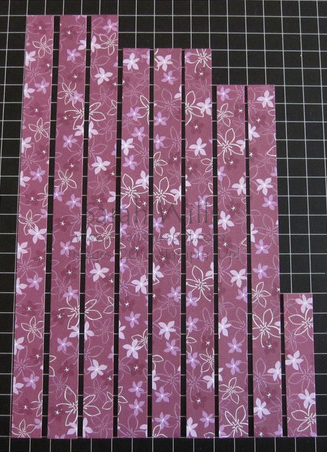
To make the Gift Bow – all you need is your Paper Trimmer, one sheet of co-ordinating Designer Series Paper, a Stapler and some Mini Glue Dots or Sticky Strip…you simply cut your paper as follows – cut 9 strips each 3/4″ wide – cut 3 strips to be 11″ long, 3 strips to be 10″ long, 2 strips to be 9″ long and one strip to be 3 1/2 ” long.

Then take each strip and make a loop in each end and secure in the center using a staple – do this for all of the strips except for the smallest:

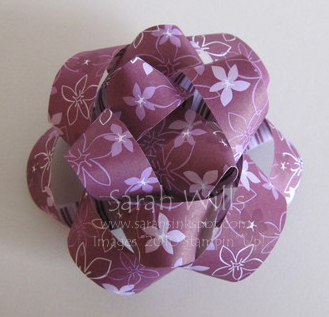
To assemble your bow, take the longest strips and layer them on top of one another, securing each with a Mini Glue Dot or piece of Sticky Strip. Continue until you have layered them all and then take your small strip and make it into a round loop and adhere it into the center of the bow – and there you have a very cute handmade bow to add to your gift…

By using different papers you can fully customise your bows for birthdays, weddings, baby showers…the possibilities are endless! You can find the packs of Designer Series Papers on pgs 160-163 of the main Catalog and also on pgs 13, 25 and 33 of the Occasions Mini Catalog – you will find the links to both of these online catalogs in the sidebar.
I have put together a printable Tutorial with further photographs and information which you can find by clicking HERE – if you have any questions please let me know and I will be very happy to help.
Awesome bow and beautiful gift presentation. tfs.