With a view of delicious goodies!
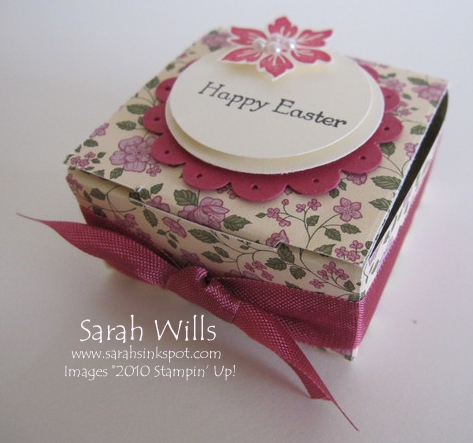
Such an unassuming and sweet little box that you can make to fit any occasion…I have themed mine for Easter to hold some little chocolate eggs but they would make beautiful wedding & party favors…imagine how gorgeous they would be at each place setting at a wedding or other event filled with candies or nuts…
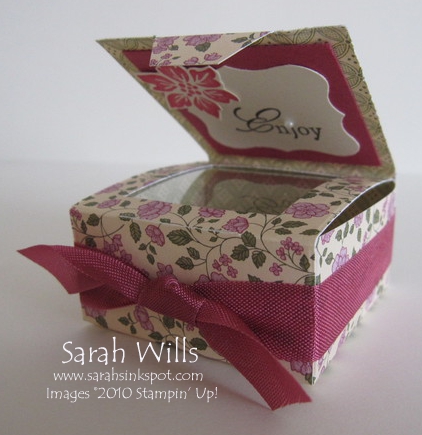
The treats are easy to get to – you simply slide out the securing tab to open the lid and there is a window through which you will see the treats stowed below.
Please read on for details on how to make it plus a link to my free printable tutorial and this week’s blog candy…
Looks just like a regular box, eh? I made it using beautiful floral paper from Springtime Vintage DSP that you can find on pg 15 of the Occasions Mini Catalog and trimmed it with a piece of beautiful Rose Red Seam Binding…
My lid decoration? Very simple – I took my Scallop Circle Punch and punched out a piece of Rose Red card stock – I then used my Paper Piercing Tool to make little holes in the scallops. I stamped Happy Easter using a stamp from Teeny Tiny Wishes (pg 257) and punched it out and matted it using Circle Punches.
That beautiful flower? From the FREE Sale-a-bration set Bliss – I simply stamped it using Rose Red ink, cut it out using Paper Snips and added some Pearls to the center to make one cute embellishment.
Now for the reveal…
It’s coming…you simply slide out that little tab that fits into a slot…and…
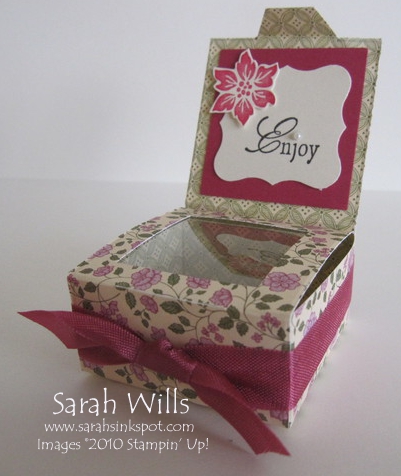
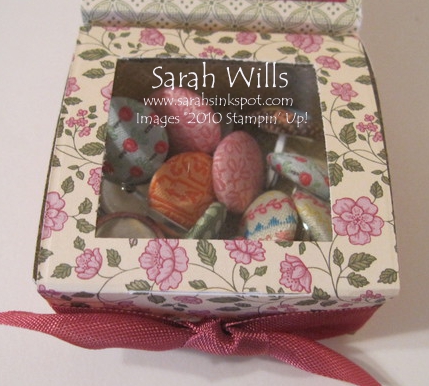
TA-DAH! Isn’t it cute? You make a window using a Punch and cover it using a piece of Window Sheet or acetate to reveal the goodies below (mine is currently empty because I want to fill it with chocolate eggs and stores don’t appear to have them in yet!)
I used the 1 3/8″ Square Punch but you could use any Circle, Scallop Circle, Curly Label punch…whatever shape you wish your window to be! To get the goodies out, you simply slide the window panel up and it opens easily.
On the inside of the lid you have an nice sized area to add more embellishments, a sentiment or write a note…I used a stamp from You’re a Gem featured on pg 25 of the Mini (as you already know, it’s one of my favorite sets!), added a flower and a Pearl and it’s ready for treats…
Speaking of which, you don’t have to fill with candies or chocolates…you could fill with other items such as brads or eyelets for a paper crafter or buttons for a fabric lover…here I filled mine with the beautiful Sweet Stitches Fabric Designer Brads to show you what it looks like – what a great gift for a stampin’ friend…
WANT MY FREE TUTORIAL SO THAT YOU CAN MAKE YOUR OWN MINI WINDOW TREAT BOX? Click HERE to find it in my Project Tutorials section where you will find a printable version too!
Onto this week’s Blog Candy…leave me a comment to let me know what you think of my Mini Window Treat Box and you will be entered into a drawing where one lucky winner will be drawn this Friday morning…
That lucky winner will receive a pack of 10 handstamped mini notecards by myself – so be sure to come back Friday and see if you are the winner!
Want a FREE printed copy of the new Occasions Mini Catalog? Simply click here to email me your US mailing address and I will get one out to you FAST – PLUS I’ll include a free Sale-a-bration Catalog too!
You can also view the Occasions Mini online by clicking HERE
Sarah,
It is a lovely little box, thank you for sharing the tutorial.
Beautiful box and wonderful idea! I have this paper and just don’t know what to do with it and you used it perfectly. This will be on my inspiration post tomorrow. thanks for sharing
What a wonderful way to surprise someone with candy at Easter time. Another project to make.
This is so darn cute. Love it. I’m going to give one a try. Thanks for sharing. Blessings.
Sarah,
You’ve done it once again! Your mini window treat box is just darling and I LOVE you for giving us the template/tutorial at no cost – so VERY generous of you! Thanks as always for sharing your creativity and inspiration!
Hugs,
Christine aka The Stampin’ Ninja
This is just too cute! I love little boxes and this is no exception! Perfect details and the pearls were just the right touch! I can see using this idea a lot – from a handfull of jelly beans at Easter to a cookie or some of my favorite little Oreo Cookie truffles to give! Change of paper and embelishments and we are all set. Then, there is Halloween, Christmas, the sky is the limit! Well, maybe I should check out the tutorial to see if this is doable! I have had good luck with your tutorials before so this should be no exception. Thanks for the inspiration!
Stunning box!
What a wonderful box, I love it! You have such talent and are so wonderful to share it with us.
Just lovely!!! Simply beautiful! Love the colors and the seam binding. Great job! Thanks for sharing your creativity! Can’t wait to make my own box thank you again!!!
What a darling box which could be used for any little thing, including chocolates! Thanks for the tutorial and chance to win blog candy!
what a beautiful little box! The DSP is great! Thanks for the tutorial!
Love this little box. I am not one to make much more then a card…but I want to try this one because it is so cute and perfect for using DSP.
Yvonne
I love your window box! Thank you so much for the free tutorial too!! Just too cute!!!
tionyalynn at yahoo dot com
such a beautiful box; one of the nicest patterns I’ve seen, but the dsp adds the touch of spring/Easter/vintage/maybe chocolates…I can dream; please enter me in your drawing, as I’d love to be the winner of a Sarah Wills originals!
Sarah – once again, a beautiful project! I just love seeing the things you come up with.
Have a great day,
Jane in VT
I love that paper, Makes a beautiful box. TFS
What a beautiful project!! I love the vintage DSP, it’s one of my favorites. Thanks for sharing this!
I love the box that you made, the paper is great as well!
I always enjoy seeing what you come up with : )
I love the window box which is hidden behind the lid. Such a sweet surprise!
Oh, My Gosh! How cute! This is on my list to make real soon! Thanks for sharing your talent with us!
love this box! love that window! it would be a sweet way to give someone a piece of pretty jewlery instead of the same ‘ol velvet box…..
thanks for sharing:)
Love this box – I am really into 3D art and can’t wait to make this. thanks for the tutorial!!
This box cute is super cute, I can wait to make it. Thank for the direction. I just love your blog and thank you for the chance to win fun stuff.