I hope you enjoyed this weekend’s Summer Mini Catalog Blog Hop and that you came away with lots of must-haves from this fab new Mini – I know I did!
Firstly apologies – I auto-scheduled this post for yesterday but got the date wrong so it never appeared – HUGE apologies for that – so here it is…
I used the stamp set Pretty Postage that you can find on pg 11 – it is a set of 4 featuring stamps that co-ordinate with the brand new Postage Stamp Punch on pg 10 – here are the images of those stamps and that punch:
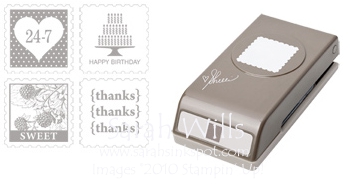 My original blog hop post is below this one so that you can refer to it and the main photos of my projects…
In it I promised to post more details, photos, tutorials and my blog candy winner today so please read on to find out more…you can click on any photo to get a larger view…
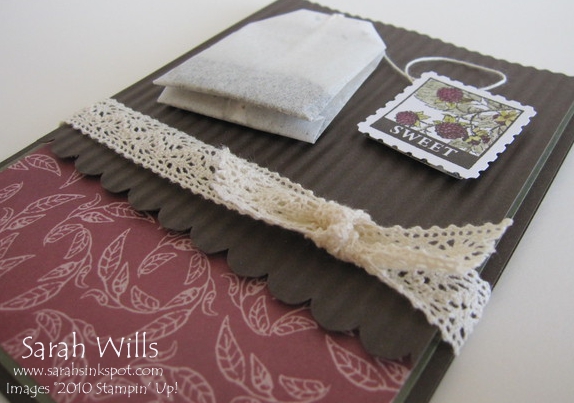
My first item was my Tea Bag Card and here is a close-up of it…
My card uses that gorgeous Early Espresso brown and onto I layered a piece of patterned paper from Paisley Petals DSP…
For my mat I decided to edge it using my Scallop Edge Border Punch and then used my Crimping Tool to get that cool texture – one tip when you do this – cut the mat larger than you need it to be because once you have crimped it, it ‘shrinks’!
I added it to my base using Dimensionals and tied around a piece of that gorgeous Victoria Crochet Trim – LOVE it!
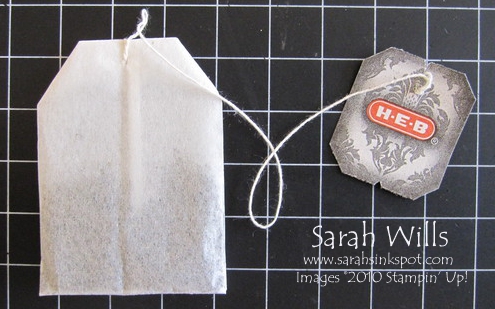
My Tea Bag? OH so easy! I purchased a package of herbal tea bags from my local grocery store…
I stamped my ‘sweet’ image using Early Espresso ink and then used my blender pen and ink pads to color it in – I used the colors Rich Razzleberry, Always Artichoke and Old Olive to do that – punched it out using the Postage Stamp Punch and then added it to the little tag using Dimensionals – and there is one cute, personalised embellishment that is useable!
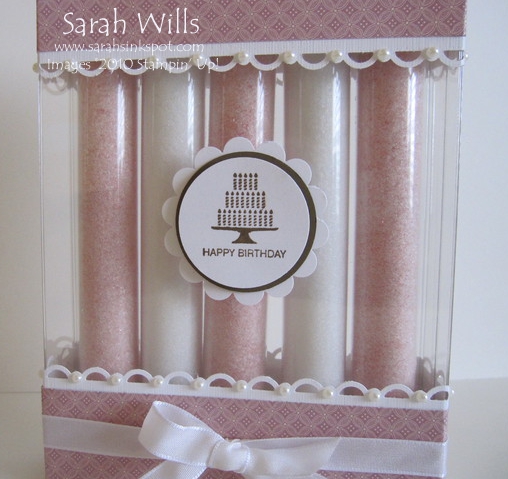
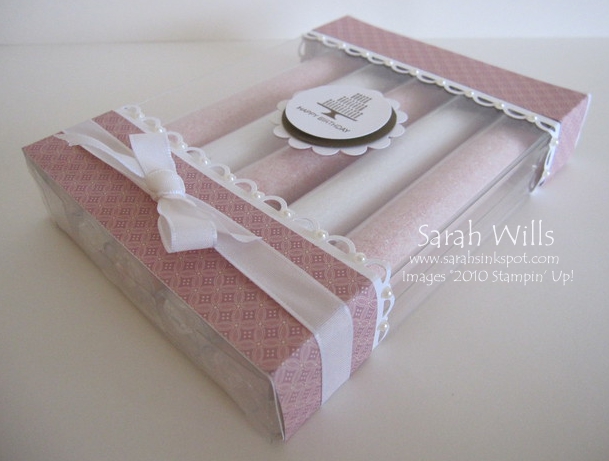
My second item was my ‘scentsational’ set of Bath Bead filled Tubes packaged in a Gift Box…
My Box? It is a clear plastic box that is designed to hold standard A2 sized cards – I had the idea to use it to make a gift and decorated it using Textured Whisper White cardstock and that beautiful soft & subtle patterned paper from Springtime Vintage DSP…which also happens to match my bath beads perfectly!
I edged the white cardstock using my Scallop Trim Border Punch and added beautiful little Pearls between each scallop and a piece of Taffeta Ribbon for a really luxurious and feminine touch…
My image? Stamped using the ‘birthday’ stamp from Pretty Postage and I punched it out using my 1 3/8″ Circle Punch…I then matted it onto a 1 1/4″ Espresso Circle and finally onto a Scallop Circle.
My Bath Beads? I found good sized boxes of Vaseline Moisturising Bath Beads in Walmart for $2.17 each – a fabulous price for a 24oz box – enough to fill lots and lots of Tubes making it a very cost-effective gift for Mother’s Day or Teacher Appreciation…
The ‘flavors’ I used in my set are Honey Vanilla and Soft Petal and they smell absolutely amazing…I used some in a bath and they leave your skin feeling sooo soft too!
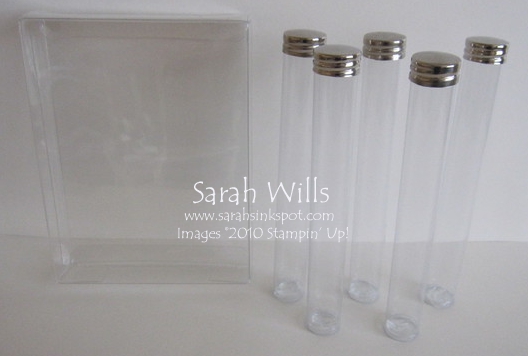
My Tubes? They are 6″ in height, are plastic and have screw tops to hold the contents inside very securely and they fit perfectly in that box…where can you get them?
I have some available! Please see the end of this blog post for details… I am also offering a set which contains 5 Tubes and 1 Box to make it easy for you to re-create this project yourself!
WANT MY FREE TUTORIAL SO THAT YOU CAN MAKE YOUR OWN GIFT SET OF FILLED TUBES? Click HERE to find it in my Project Tutorials section where you will find a printable version too!
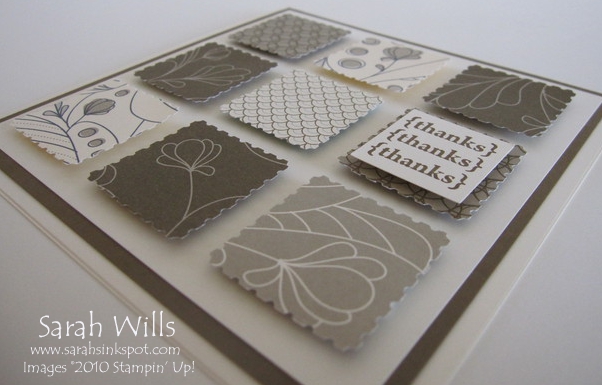
My third item was my clean & simple Thanks Card…
So easy to create using that cool Postage Stamp Punch and some scraps of pretty patterned papers…if you are coming to the end of your packs of DSP with lots of scraps then this is a perfect way to use them up…
My card is sized 5″ x 5″ so that it will fit into a Medium Square Envelope that you can find on pg 171. The colors I used are Very Vanilla and Soft Suede which are a stunning combo and my patterned papers are from Elegant Soiree DSP (pg 175)…
My suede mat measures 4 3/4″ square and my vanilla mat 4 1/2″ square. I again used that Postage Stamp Punch (by now you know you want one!) and punched out 9 shapes from my DSP, laid them out onto my card to get them where I wanted them and adhered them in place using Dimensionals – click on the photo above for a closer look at the dimension on this card.
And finally I stamped my ‘thanks’ sentiment, punched it out with my 1″ Square Punch and added it to one of the squares…LOVE this card!
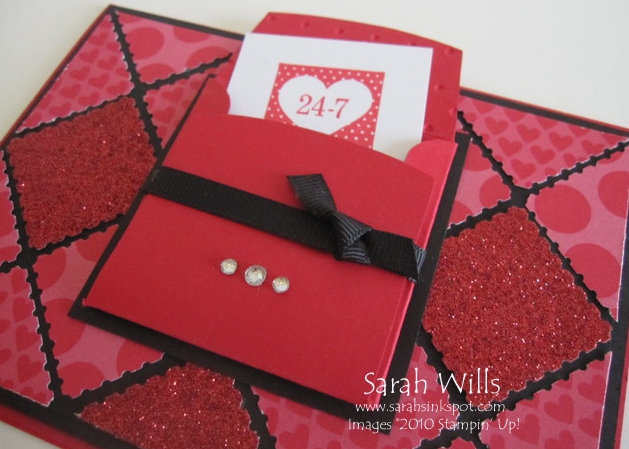
And onto my last card which surprisingly received lots of positive comments – that bright and bold red one…
Like that little envelope? Made using my Big Shot and Bitty Box & Envelope Die – I textured the flap with my Perfect Polka Dots Embossing Folder and tied around a piece of Basic Black 1/4″ Grosgrain and added three sparkly Rhinestones…
My sentiment? Stamped onto a piece of cardstock 1 3/4″ square using the 24-7 heart stamp from Pretty Postage.
My card uses the colors Real Red and Basic Black – like that splash of glitter? I used the Postage Stamp Punch again (now you know you just HAVE to have it!) and punched some shapes from Red Glimmer Paper and patterned papers from Celebrations and Playdate DSP…
And guess what? That Red Glimmer Paper did NOT retire when the Occasions Mini did on Saturday – you can still BUY it – yay!!! Here are it’s ordering details:
121790 Red Glimmer Paper $3.95 – you get 2 sheets per pack of this gorgeous stuff!
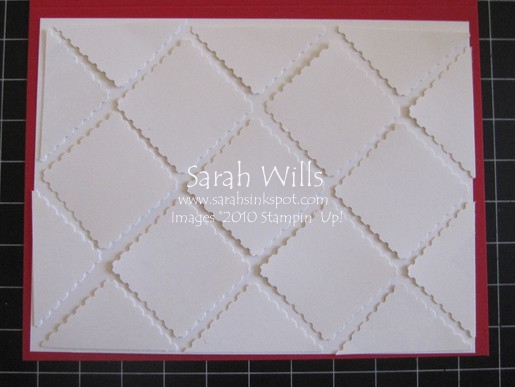
So how did I work out how to position those squares? I made a ‘trial’ version first using some scraps of white cardstock…
And then I decided what patterned papers to use and cut out the number of shapes I needed – and those that need to be cut in half are super easy to do since there is a little ridge right at those corners.
I adhered them flat to the card base but for a neat look you could add some with Dimensionals.
And finally onto the winner of my Blog Candy who wins their very own Pretty Postage Stamp Set! Drawn using random.org the winning comment is no. 17:
Queen Mary
“Sarah, you are so funny! I love your “experiment,” and thanks for the idea of using it for Christmas! I love the bath beads with the pearls though…. Did you make the bath beads? I wish my best efforts were as good as your uncertain experiments! Thanks for sharing your ideas with us!”
Congrats – drop me an email with your mailing address and I’ll get it ordered and on it’s way to you!
Thank you SO much for returning to visit me…you can subscribe to me so that you will be notified by email every time I post new ideas which is usually every day – you will find my subscription box at the top of my blog in the right side bar – come back and see me tomorrow for Tutorial Tuesday featuring a neat little fold-out scrapbook!
SO THOSE TUBES & BOX – I have them available!
There are 2 options – you can purchase just the Tubes or you can purchase a pack containing the Tubes AND a plastic case to make re-creating my project easy!
The Tubes – measure 6″ high, are plastic and have a screw top lid to keep the contents securely contained
The Case – measures 1″ deep x 4 1/2″ wide x 5 7/8″ long
How do you purchase them? By clicking on the Buy Now buttons below…
Want a set of 5 Tubes & 1 Case?
Just want the Tubes?
