You can make beautiful snowflakes from two of the sheets of paper in Flirtatious Specialty DSP – and the best bit is that they are quick & easy and give your card a WOW factor…
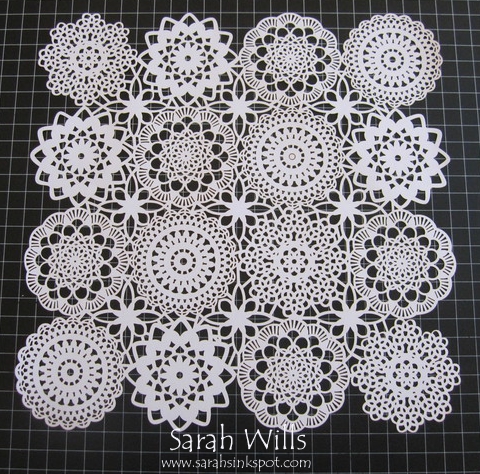
In that package of papers you get two laser cut sheets – one is pink & the other orange – but the reverse side of each is simply white meaning they are perfect to trim out with your scissors and use as snowflakes.
And each sheet has 16 of these beautiful shapes – meaning you get 32 snowflake shapes from the two sheets of laser cut sheets contained in one pack – and they create a beautiful focal point for your Holiday cards…
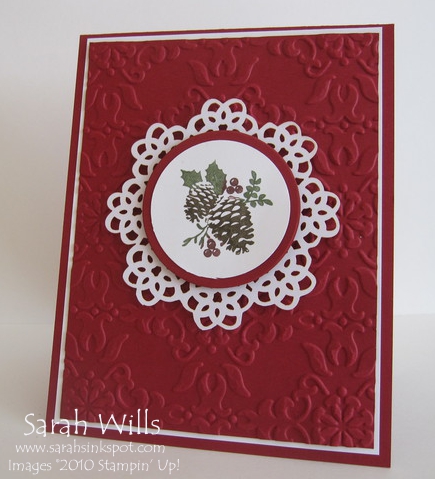
You know how I love Clean & Simple looking cards…well, this card is a perfect example of what you can create using few ‘ingredients’ – all I have used on this card are cardstocks & papers – no ribbons or extra embellishments…
I wanted my card to have an elegant sort of look and so choose Cherry Cobbler for my red – I made my card base, layered a piece of Whisper White cardstock onto it and then matted on a piece of Cherry Cobbler which I textured using my Big Shot & Vintage Wallpaper Embossing Folder…this created a very elegant looking card base to work with…
I then made my snowflake…I took a piece of laser cut doily paper from Flirtatious Specialty DSP and turned it over to see the white side…just look at all of those gorgeous snowflakey shapes that you get on one sheet…
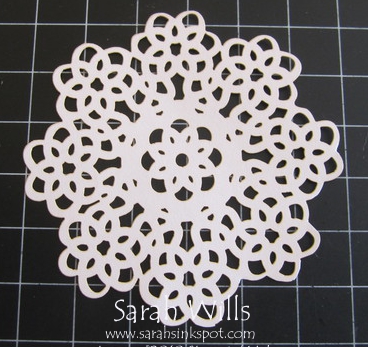
I then chose the snowflake shape I wanted and used my very sharp Paper Snips to trim it out – which took me just 1 minute – and this is what I got:
Isn’t that beautiful? I added it to my card base using Dimensionals which I put in the center so that none would show on the finished card.
Then I stamped that beautiful central image using a stamp from the set Pines & Poinsettias that you can find on pg 21 of the Holiday Mini Catalog – using my Early Espresso, Cherry Cobbler and Always Artichoke Markers to color directlyonto my stamp and then stamping it down onto Whisper White cardstock.
Then I punched it out and layered it using my Circle Punches and added it to my card base…
If you wanted to, you could add some sparkle to it using some Dazzling Diamonds Glitter or the new Dazzling Details Glitter Glue featured on pg 41 of the Holiday Mini.
So you will notice that my card does not have a sentiment on the front – this was by design because I wanted the image & snowflake doily to draw the eye…
And so I decided to add a sentiment to the inside of my card using one of my favorite Holiday stamp sets Christmas Lodge that is featured on pg 29 of the Holiday Mini – can you tell I am loving the fabulous Holiday Mini Catalog?!
Check out the inside…and that GORGEOUS sentiment…it ties in beautifully with my elegant theme…
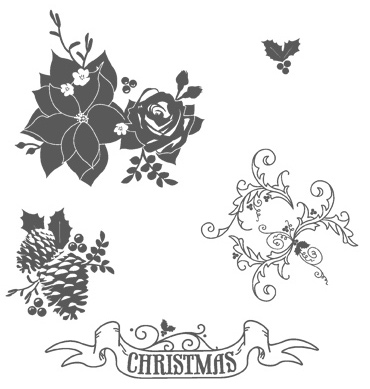
Here are those two stamp sets that I used on my card – click on the pictures of them below to view them in the online store:
Here are the stamps you get in Pines & Poinsettias – it is a set of 5 and is available in both Wood & Clear Mount versions…
And here are the images you get in Christmas Lodge – it is a set of 6 and is also available in both Wood & Clear Mount versions…
Two absolutely stunning sets…
Now off on a tangent, this evening we are expecting our first light freeze here in Central Texas – what a contrast to the extreme summer we have had! And so in light of that I made my last harvest of my chilli peppers out on my patio…
I couldn’t resist taking a photo of them – look at all those gorgeous hues of color…surely inspiration for a future card…hmmm…
If you DO NOT currently have a Demonstrator and would like a copy of the Holiday Mini Catalog including a FREE card kit and some FREE samples of papers & ribbons, please email me by clicking HERE and I will get a package out in the mail to you.
If you DO have a Demonstrator, please contact them for your copy of this fabulous Mini Catalog.
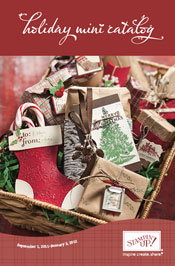
Not got a paper copy and want to see it right now? You can click on the picture of it below to view it online…
CLICK HERE TO ORDER YOUR STAMPIN’ UP! SUPPLIES ONLINE!




Sarah This is beautiful! I am a so clean and simple cardmaker too! I Love this card! Thanks for sharing, I will CASE this one for sure! Thank you!
Wow, this card is fantastic! You said it only took a minute to snip the doily out. So you don’t have to cut the whole thing out unless it is one from the center? So it is laser cut so it is not a solid sheet of paper? Does that make sense? Oh, I really enjoyed the reindeer made from the stocking and the reindeer food. Thanks for some great ideas!
Love this!!! I’m not a huge fan of the dsp, but I love those laser cut designs in white!!
That’s right Chris – it is laser cut and not solid – makes snipping them out easy as you work from the outside in :-)
Great idea and your card is beautiful~