Back in September at Founders Circle, a very kind lady (the daughter of a demonstrator) gave us a ride from the airport to the hotel and we decided to each mail her a little thank you gift…
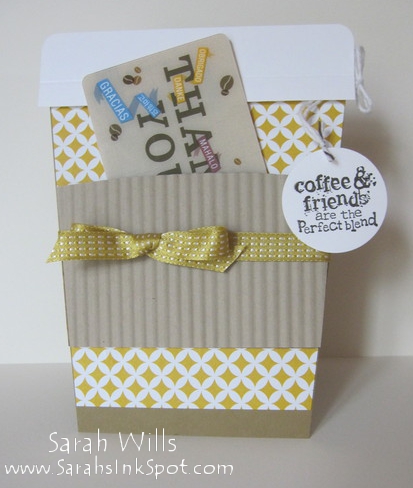
We found out that she loves coffee and so I got her a Starbucks gift certificate and decided to make a cute holder for it…now whilst I was purchasing said gift card of course I had to have a drink too…
And whilst drinking it I started looking at the belly band that they put around those disposable cups and the light bulb in my head went off…what if I could use that belly band to create a gift card holder in the shape of a coffee cup? And so that is what I did and I think it turned out CUTE!!!
FREE TUTORIAL!!! Yup, whilst making it I decided to put together a FREE tutorial for you – and the winner of my Spooky Blog Candy is announced too – please scroll down to find both!
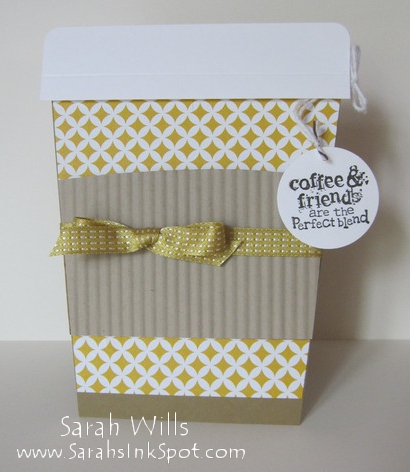
 Isn’t it cute? And what I love about this idea is that you can theme it for any occasion simply by changing the patterned papers and stamps – it can be a simple thank you (like mine) or theme it for Halloween, Thanksgiving, Christmas…Valentines, Easter, Teacher Appreciation…birthdays…any event!
The card base…is Baked Brown Sugar cardstock and the patterned paper that I used is from Eastern Elegance DSP – I have found that the papers that work best for this card have small repetitive patterns – they give you a great background but are not distracting the eyes from the main feature…
The belly band gift card holder…I love to recycle and this is a fab way to recycle those cardboard belly bands that you get on disposable cups! It was easy to trim to size – simply open it up, turn it over and off you go! I also chose to trim the bottom edge to make it straight but you can leave it curved if you prefer. You could also use that band as a template to make your own shape from color cardstock…
I attached it to my card using a piece of Sticky Strip along the bottom edge – it holds my gift card snugly and I didn’t find that I needed to add any tape to the sides, but of course you can do that if you prefer.
The ribbon…is a piece of the beautiful Summer Starfruit Stitched Satin Ribbon that I wrapped around and tied in a bow at the front – I used a Mini Glue Dot to secure it in place.
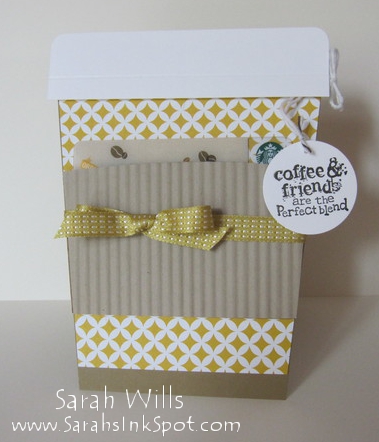
You can pop your gift card in how I did above or you can put it in horizontally to give you a more subtle look, like this…
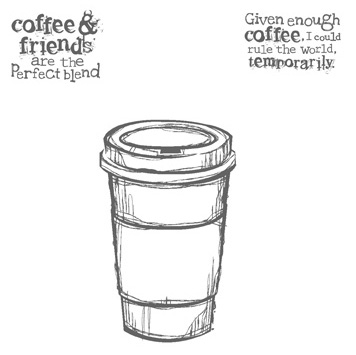
I then decided to do some stamping and added a tag…and I found the PERFECT stamp in the coffee themed set Perfect Blend (pg 37) – I stamped it using Early Espresso ink (I had to use that ‘flavor’ on my coffee cup LOL!!!) and punched it out using my 1 3/8″ Circle Punch.
I then added a small hole and threaded through White Bakers Twine, tied around a piece of Early Espresso Bakers Twine at the top of that hole, and adhered the tag to the card using a Dimensional. I made sure that I had a good amount of twine and I used a Mini Glue Dot underneath that top white ‘lid’ to hold my twine in place – and then I tied a little bow at the end for a cute finishing touch…

I absolutely LOVE how this turned out – and I love too that the card looks fabulous even when the gift card has been taken out to be used…
FREE TUTORIAL!!! If you would like my step by step directions so that you can make your own Coffee Card Gift Card Holder please click HERE – and you will find a free printable pdf version at the end of that tutorial for you to download & print to keep for reference!
Here the the images featured in the coffee themed stamp set Perfect Blend…
Supplies that I used to make this card:
Stamps – Perfect Blend (CM 131392/WM 130745)
DSP – Eastern Elegance DSP (130131)
Cardstock – Baked Brown Sugar (131296), Whisper White (100730)
Ink – Early Espresso (126974)
Punch – 1 3/8″ Circle Punch (119860)
Bakers Twine: White (124262), Early Espresso (123124)
Adhesives – Sticky Strip (104294), Dimensionals (104430)
CLICK HERE TO ORDER YOUR STAMPIN’ UP! SUPPLIES ONLINE!
SPOOKY BLOG CANDY WINNER!!!
And the winner drawn using Random.org is…
KARI VANNOY who said: “So cute, Sarah! I love peanut butter pumpkins and tootsie rolls (which seem to be the least favorite for the trick-or-treaters…so more for me!) This time of year is so fun!”
A BIG CONGRATS TO YOU Kari – I will get your Washi Tape on it’s way to you today!
A big thank you to all who entered…I enjoyed reading your comments and will have more Blog Candy at the end of this week so be sure to come back & see me!
Cute gift card holder. Thanks for the tutorial. Great recycling idea.
Wow! I am so excited! Thank you SO much. And this gift card holder is fabulous…I love it. :)
Congrats to Kari as the blog candy winner, woohoo! Sarah, thanks so much for sharing another free tutorial of yours, that is so gracious of you. Your coffee cup gift card holder is just adorable, love it! Never thought of using the reverse side of the coffee sleeve and I love how you used the stitched stain ribbon, and how it holds the gift card. So cute, thanks so much!