My girls have been huge Minecraft fans for quite a while now, as are lots of their friends…I made them a Minecraft themed cake a couple of week’s ago which was a very fun cake to make (photos below)…
Now one of their Minecraft-mad best friend’s had a birthday this past weekend and so I got to thinking about how to make a cool card & gift card holder for her…one of her favorite characters is the Creeper – if you are not familiar with Minecraft, he is green and square – and so I dug out my Punches & Dies and got to work…
I made a Card with a matching Gift Card Holder for her…first up, here is my card…
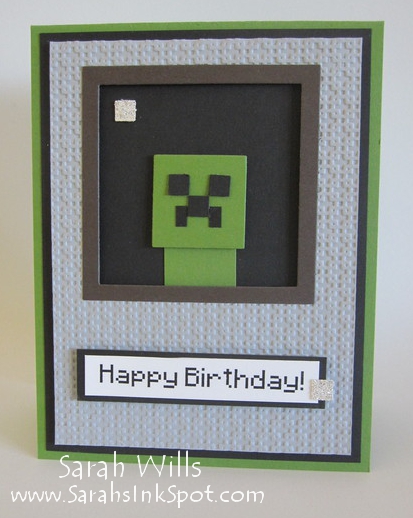
Isn’t that fun? I wanted to create a Creeper looking into the window from outside at night and by using some square tools, this was so much fun to do!
The card base…is Gumball Green (the perfect Creeper color!) onto which I layered a black mat.
The gray textured layer…this is the layer that houses the window – the layer is Smoky Slate cardstock and measures 3 3/4″ x 5″ – to cut the window hole, I used my Big Shot, a die from Squares Collection Framelits and the Magnetic Platform (pg 184) to ensure perfect placement of the die on my cardstock.
Minecraft has a block-theme and so I used the Square Lattice Embossing Folder (pg 191) to texture the gray cardstock – it worked brilliantly well to create a small block effect! I then added my gray layer to the card base using Dimensionals to lift that layer off of the base to give a realistic window look.
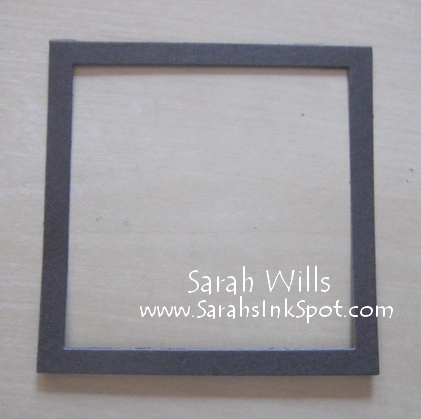
The window…was easy to make using Early Espresso cardstock and two dies from Squares Collection Framelits – now this is a collection of EIGHT square dies that nest and layer beautifully making layering a piece of cake
Find the SQUARES COLLECTION FRAMELITS in the online store by CLICKING HERE – I find them to be an essential part of my kit and for projects like this, they are invaluable – you get 8 different sized square dies in this collection for JUST $26.95 – a fabulous price because think how much it would cost you to purchase 8 separate punches!
Again I used my Big Shot with the Magnetic Platform to ensure that the dies did not move whilst cutting – you simply take two dies, position them into place on the Magnetic Platform and run them through the Big Shot…

And the other end you get a perfect window shape…isn’t it cool that those dies nest perfectly?
SARAH’S NOTE – not used the Magnetic Platform? Once you have you will wonder why you didn’t get it long ago! You can find it by clicking HERE – it is a very powerful magnetic base and dies literally adhere to it so that when you run them through your Big Shot, the die does not move a wiggle – it stays firmly in place and so you cut exactly where you want to every time which is a great time saver on a project like this!
I used my Glue Pen to adhere this into place and then I made the Creeper…
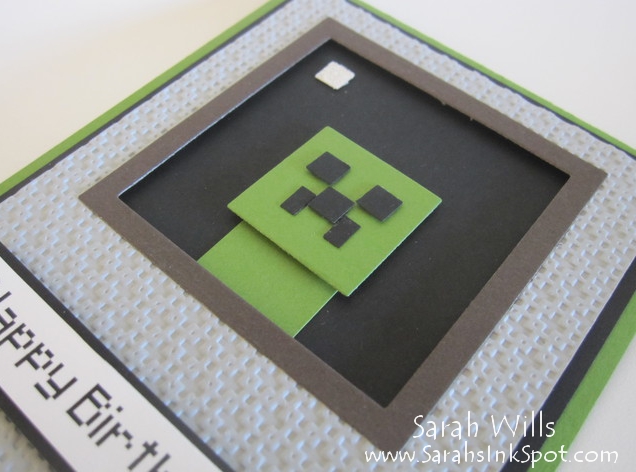
The Creeper…I cut a strip of Gumball Green cardstock to make his body and adhered it to my card – I then used a small square die from Squares Collections Framelits to cut his head out and added that using Dimensionals. His eyes, nose and mouth are made using a 1/4″ Square Punch – Mini Glue Dots make small pieces like this easy to adhere!
The square moon…simply a scrap of Silver Glimmer Paper…click on the photo below for a larger view…
The sentiment…I found a Minecraft font here and used MDS to print it onto white cardstock – I layered it onto a piece of black and added it to my card…

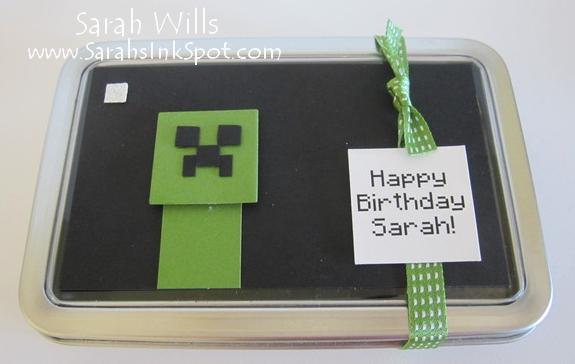
Onto the co-ordinating Gift Card Holder…for this project I used a rectangular window tin from Specialty Bottle (find it here) and decorated the lid to match the card.
The ribbon that I used is Gumball Green 3/8″ Stitched Satin and I printed out that tag again using the Minecraft font & MDS…
When you open the lid…you see a giant Creeper head and three Hershey Nuggets!
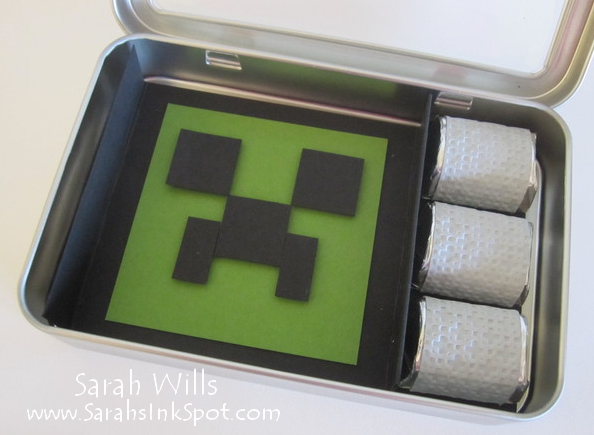
I used more embossing gray cardstock to cover my Nuggets – it is easy & fast to do – simply cut strips measuring 3 1/4″ x 1″ and use strong tape to stick them to the candy wrappers.
The gift card goes into the space where the Creeper head is along with some notes from my girls that they write on pieces of paper…
And there you have one cute card & gift ensemble that the Birthday Girl absolutely loved…

What do you think? I love how they turned out and have a feeling I am going to be making similar items for more upcoming birthdays!
Back to that cake…here are a couple more photos of the Minecraft cake that I made for my girls…
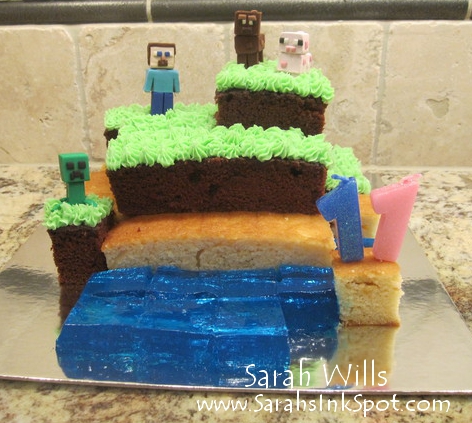
The cake…I made vanilla & chocolate sheet cakes and cut them into blocks and the water in the front is made from Berry Blue Jello…
If you are looking for a FABULOUS chocolate sheet cake recipe I highly recommend The Pioneer Woman’s recipe – you can find that recipe by clicking HERE and let me tell ya – it was DELISH!!!
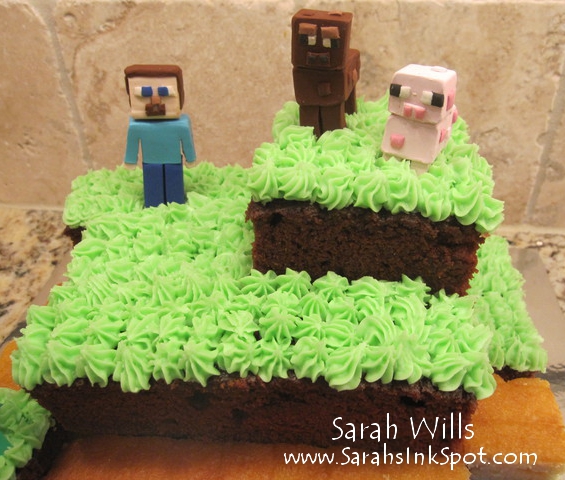
The characters…I was going to make the characters out of fondant icing but decided not to, because I wanted the girls to be able to play with them afterwards…and so I decided to make them using Sculpey – I just love the look on the cow’s face!!!
The cake was a BIG HIT and was made thankfully with no disasters – a first for me LOL!!!
Supplies used to make this Card & Gift Card Holder:
Cardstocks: Gumball Green (126840), Smoky Slate (131202), Basic Black (121045), Whisper White (100730), Early Espresso (119686)
Specialty Paper: Silver Glimmer (124005)
Die Cutting: Squares Collection Framelits (130921), Magnetic Platform (130658), Big Shot (113439)
Embossing: Square Lattice EF (119976)
Ribbon: Gumball Green 3/8″ Stitched Satin (126848)
Tin: Tin Rectangular Window 5.5″ by 3.7″ by Specialty Bottle
Misc: Dimensionals (104430), Mini Glue Dots (103683), Glue Pen (100425), Gift Card & Hershey Nuggets
CLICK HERE TO ORDER YOUR STAMPIN UP SUPPLIES ONLINE!
that minecraft cake is amazing! my son would love that! hopefully he will still be into minecraft next year because his birthday has already passed! I am going to make one of those cards right away though, before I forget about it, because I am sure there will be some birthday parties that it would be perfect for!
thanks for sharing!
Thank you for your brilliant card and thank you for the detailed instructions! My son and I just made this for his friend. My son said ” I am so proud of this” after we completed it. :)