Did you enjoy that mega blog hop? A big welcome back to Sarahs Ink Spot to discover my tutorials for my Milk Carton Caddy, Punch Penguins and Mini Notecard Box along with how-tos…and my tutorials all have a printable version too so that you can keep em for easy reference – you’ll find the links for them below along with my blog candy winner…
The stamp set I used was Got Treats that you can find on pg 55 of the Catalog – it is one very cute set and has stamps designed to be used with that adorable Mini Milk Carton…
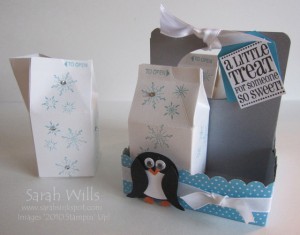
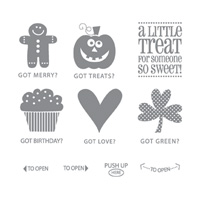 Firstly I made my Milk Carton Caddy containing 4 milk cartons that are sooo easy to make using the Mini Milk Carton Die that you can find on pg 209 and it is exclusive and ONLY AVAILABLE from Stampin’ Up!…
I made my milk cartons using Shimmery White cardstock as I love how thick and sturdy it makes them and stamped on snowflakes from the set Serene Snowflakes (pg 42) and decorated some of them using the new Basic Rhinestones (pg 188) – the stamps showing you where to open them at the top are from Got Treats…
The Caddy…isn’t it cool? It is the perfect size to hold 4 of those cartons and it is sooo easy to make – I used Brushed Silver cardstock to make mine and decorated it with Island Oasis DSP from the Summer Mini…and there is that cute Punch Penguin that you can make using the new Owl Punch that you can find on pg 201…want the Tutorials?
Click HERE for the Punch Penguin tutorial
Click HERE for the Milk Carton Caddy tutorial
They will open in a new browser window and at the end of each you will find a link for a printable version.
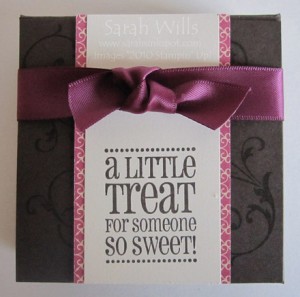
Onto my next project – a Notecard Box that contains 3″ x 3″ sized cards and co-ordinating envelopes…these are sooo cute and just perfect for Back to School teacher gifts – teachers always need thank you cards and what a fab way to present them too…
This box is so easy to make from just one sheet of cardstock and you can decorate it with DSP or stamp a pattern onto it like I did above using the beautiful swirl stamp from Elements of Style (pg 133)…want the Tutorial?
Click HERE for my Mini Notecard Box tutorial
And here are close-up photos of each of the cards that I made to fill the box – I made 4 but you could fit around 6 notecards in there. The envelope flaps are sooo easy to decorate – simply trace around your flap onto a piece of DSP, cut it out and adhere in place – it makes a fabulous finishing touch…
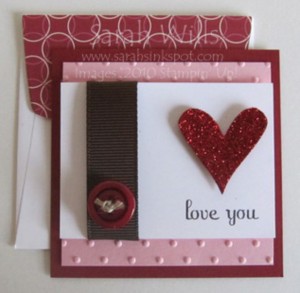
Here is my Love card featuring the heart stamp from Got Treats – I stamped it onto Cherry Cobbler cardstock using Versamark Ink and sprinkled on Heat & Stick Powder (pg 196) which I then melted using my Heat Tool. Then I sprinkled on Fine Red Glitter and gave it another quick blast of heat and there you have one cute glittery heart. I love Heat & Stick Powder – you can use it with any stamp to create a glittered image and it is just perfect for the upcoming Holiday season…
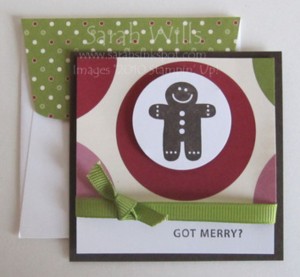
Here is my Holiday card featuring that cute Gingerbread boy…I stamped him in Early Espresso and used a Circle Punch to cut him out…I then used DSP from Jolly Holiday on pg 174 as it also features circles and finished it off with some Old Olive 1/4″ Grosgrain Ribbon…
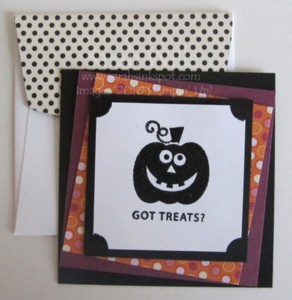
Here is my Halloween card featuring the cool Jack-o-lantern…I went with the traditional halloweeny colors of black, orange and purple and used paper from Sweet & Sour Specialty (pg 172) as a cool background. I decided to stagger the layers on angles for a different look…makes your eyes go a bit funny, eh?! I used Black Embossing Powder (pg 196) on my Jack-o-lantern to make him shine and stand out…I love how it turned out…
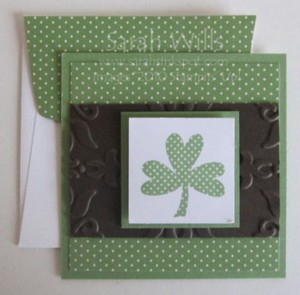
And here is my last notecard featuring that Shamrock…of course I had to use greens on this card as shamrocks just remind me of Ireland and all the green grass there…the green I used on this card is Old Olive and for a little bit of an accent I used a piece of Early Espresso cardstock that I embossed using the new Vintage Wallpaper Embossing Folder (pg 214)…I love embossing folders as they are a very affordable and easy way to create backgrounds for your cards…
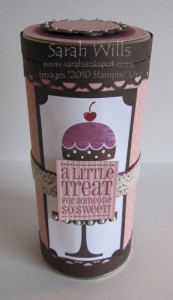
And finally my last item is my Decorated Tea tin… you can use this size as a gift holder for candy and pretzel sticks, herbal tea bags, bath salts…just about anything you can think of. I think that the tallness makes it look so elegant – I purchased mine from www.specialtybottle.com for just over $1 per tin which makes them fabulous value for money…
I covered my tin using Blushing Bride papers from the In Color Patterns Paper Stack (pg 175) and added borders to the top and bottom using Early Espresso cardstock and the Scallop Trim Border Punch (pg 201). My images were punched using stamps from On a Pedestal and Got Treats (pg 55) and I used Basic Pearls (pg 188) to decorate the cake stand.
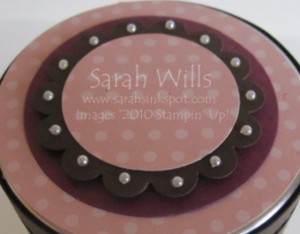
I attached a piece of Rich Razzleberry Satin Ribbon around the center and layered on a piece of the beautiful brand new Crochet Trim Ribbon on top (pg 190) and then added my sentiment on the top using Dimensionals – and for the lid I used Circle and the Scallop Circle Punches, Pearls and Dimensionals to c0-ordinate it with the base.
I love how it turned out – you could make them themed for Back to School, Thanksgiving, Halloween and Christmas to make very cute gift holders for very grateful recipients…
And lastly…announcing the winner of my Blog Candy…the lucky winner will be receiving a kit giving them all the pre-cut cardstocks and consumables that they need to make a Milk Carton Caddy containing 4 Mini Milk Cartons…
And the lucky winner chosen by random number generator is…
Comment no. 15 left by Lisa Eisner who said:
“All great projects, but I think my fav is the milk carton set. I’m a subscriber so I’ll definitely be getting those tutorials! Thanks for the blog candy chance”.
A BIG congrats Lisa – please email me with your mailing address and I will get your goodies on their way to you…enjoy!
Thanks so much for the tutorials!!! I cannot wait to try them!
Thank you for these wonderful tutorials. And, an extra big thanks for the milk carton kit win!!! I’m off to E-mail you.
thanks for the tutorials!