Did you enjoy that blog hop? Weren’t there some amazing ideas for you featuring all those new goodies? You get to buy them very very soon…just one more day to go!
Here are my tutorials for my Lip Balm Card, Tea Bag Holder, Test Tube Rack and Test Tube Collars along with extra details and photos…,and all my tutorials all have a printable version too so that you can keep em for easy reference…
The stamp set I used was FANGTASTIC that you can find on pg 6 of the Holiday Mini – it is one very cute set and perfect for creating cute halloween treats, especially for kids…I am not allowed to post images until Wednesday but to keep you going, here are more close-ups and details…
Now a few of my projects feature Test Tubes and the ones that I use are PLASTIC, have screw-tops and flat bottoms making them perfect for filling with treats for school children – they are kid-perfect!
Need Test Tubes? I have two sizes available in my store – Tall and Small – you can find them by clicking HERE for Small Tubes and HERE for Tall Tubes! Email me if you want to mix and match them…
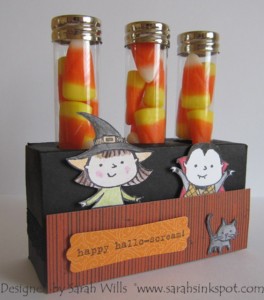
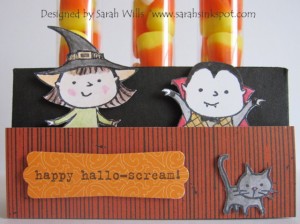
OK first up is my Test Tube Rack which is so fun to make – it holds 3 of the Small Test Tubes and would make a great gift…
The rack is made of Basic Black cardstock around which I wrapped a piece of Raven Lace Trim (Holiday Mini) – I made the ‘fence’ by cutting a piece of DSP from Wicked Fun Specialty (pg 172) and attached it using Dimensionals…it has perfect fence-like lines…I stamped my sentiment on a piece of DSP from Sweet & Sour Specialty (pg 172) and punched it out using my Modern Label Punch (pg 202).
The cute characters? Stamped from Fangtastic and colored in using Watercolor Wonder Crayons (pgs 166-169) – I attached them with Dimensionals and just love how they turned out…
WANT THE TUTORIAL FOR THIS CUTE PROJECT? Click HERE to find it – you will also find a printable version so you can keep it!
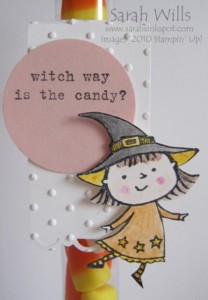
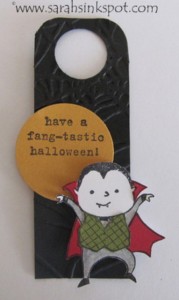
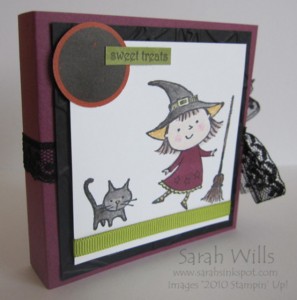
Next we have my Individual Test Tube Treats which are a great size for class give-aways…I used the Tall Tubes for these and created a boy and a girl version of Collars…
For my girl version I choose to use white cardstock which I textured using the Perfect Polka Dots Embossing Folder (pg 214), trimmed the edge using the Scallop Trim Punch (pg 200) and I used the cute witch image which I attached using Dimensionals so she pops out a little…
For my boy Collar I used Basic Black cardstock and the brand new Spider Web Embossing Folder (Holiday Mini pg 6 and the cute dracula image…again, I used Dimensionals to pop him out a bit…
WANT THE TUTORIAL FOR MAKING THESE CUTE COLLARS? Click HERE to find it – you will also find a printable version so you can keep it!
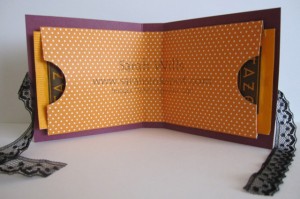
Moving on, next we had my Tea Bag Holding Card…I just love this and it is so easy to make but looks like a wow project…
My card base is Rich Razzleberry and I used my Spider Web Embossing Folder to make the layer…the ribbon is Raven Lace Trim (Holiday Mini pg 9) and the images were stamped using Fang-tastic. The moon? I used a piece of DSP from Wicked Fun Specialty (pg 172) and a Circle Punch…the sentiment is from the set Teeny Tiny Wishes (pg 157)…and what’s inside?
I created the inside bit to hold the tea bags out of Island Oasis DSP – AND YOU CAN ONLY PURCHASE IT FOR ONE MORE DAY! It retires with the Summer Mini Catalog on Tuesday night – I love it because this paper is fab for halloween projects – you can find it on pg 27 of the Summer Mini and if you want it, order it FAST (order code 117173)…
WANT THE TUTORIAL FOR THIS COOL CARD? Click HERE to find it where you will also find a printable version so you can keep it too!
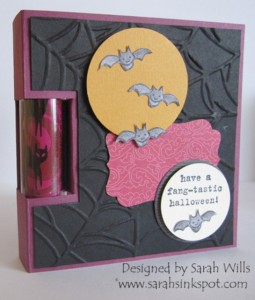
And now onto the most popular item of mine…the Lip Balm Card! Everyone seemed to love it and it is so fun and easy to make…
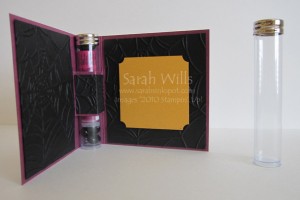
Again I used the Spider Web Embossing Folder on the front and the bats were from Fangtastic – like the little punched out piece of Sweet & Sour Specialty DSP? That was created using a brand new punch in the Holiday Mini – you can find it on pg 25 and it is the Decorative Label Punch…gorgeous, isn’t it? The moon is simply a piece of More Mustard that I created using my 1 3/4″ Circle Punch…and what’s inside? This…
More texturing with the Spider Web Embossing Folder – I wanted to keep it clean and simple so just used that along with a piece of More Mustard that I used my Ticket Corner Punch on (pg 200) and attached it using Dimensionals…
This card uses a Small Tube that I put a lip balm into with some black jelly beans to fill it…
Where did I find the lip balms? Avon.com – they have a fab seasonal selection year round and you can often find them in the Clearance section – they are great quality and value for money…
WANT THE TUTORIAL SO YOU CAN MAKE YOUR OWN? You know you want to! Click HERE to find it where of course you will also find a printable version too!
Have questions about any of my projects? Drop me an email by clicking here and I will be very happy to help.
And lastly…announcing the winner of my Blog Candy…the lucky winner will be receiving a pack of 3 Test Tubes to fill with their own creations…and the lucky winner chosen by random number generator is…
Comment no. 59, Paige who said:
“I really like the Lip Balm Card. I love the idea of something new to try out…”
A BIG congrats Paige – please email me with your mailing address and I will get your goodies on their way to you…enjoy!
I’m so excited. I was just visiting your blog and saw the I won the blog candy you offered on the Blog hop!!! Thank you so much… I really can’t wait to try the lip balm card holder.:o) My address e-mail address is paigegathome@yahoo.com. I have tried several times to contact you through this site but it will not send the e-mail.
Thanks again, I look forward to the next hop! :o)
WoW Sarah, you are a doll to give us such comprehensive tutorials and templates and to make them available as a PDF. Now that’s class – not to mention a lovely early holiday present!
Thanks for sharing the inspiration and creativity.
Thanks for the great tutorials.