Are you intrigued?! Well for Festive Friday this week I wanted to show you a card that has a background made from something that you can find in your kitchen…
And that something is Aluminum Foil! And what a stunning background it makes when you texture it using an Embossing Folder – wow!
Please read on to find out how I made it along with my free printable tutorial showing you how to texture foil to make your own backgrounds…and please leave me a comment to give you a chance to win this week’s Festive blog candy…
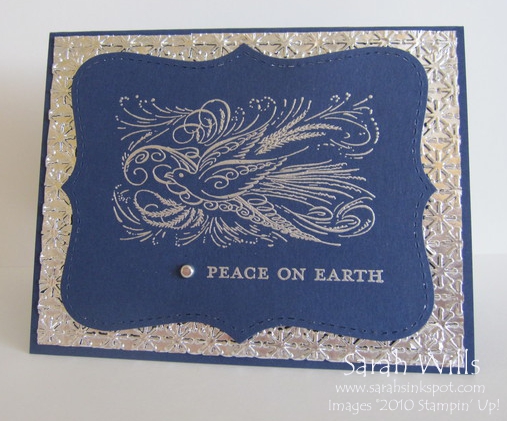
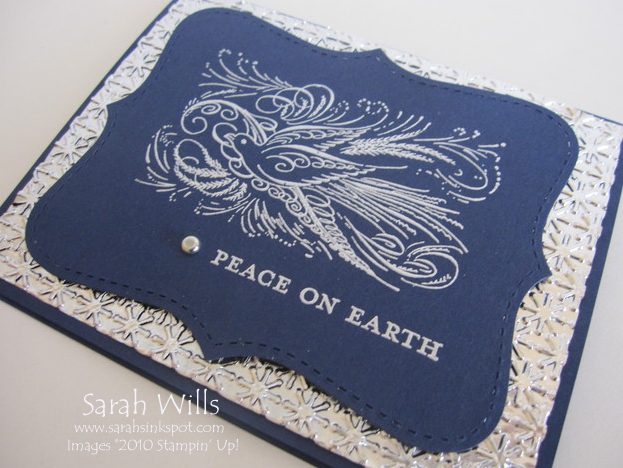
Now the photo does not do this card justice – that foil background is so sparkly and stunning in real life – its so hard to capture on camera! And what I love is that this card is made using very few consumable products making it an economical way to make a bunch of holiday cards.
My card is simply a base of Night of Navy cardstock, a layer of embossed Aluminum Foil, a top layer cut using the Top Note Die and the images stamped on to that…easy…simple…fun!
That textured Aluminum Foil? You simply cut a piece of Heavy Duty Aluminum Foil to the size you want – and it is important that it is heavy duty as regular foil is too thin and will tear easily – I cut mine to be 4″ x 5 1/4″…and then you pop it into your Embossing Folder and run it through the Big Shot – open the lid carefully and voila – a beautifully textured piece of foil – GORGEOUS!
Be super careful when removing your foil from the folder to avoid tearing it – and then you simply adhere it to your base.
I know you are wondering…see that gorgeous textured design that I made on my foil? Made using a brand new Embossing Folder that will debut on September 1st in the Holiday Mini Catalog – it is called Snow Burst and I LOVE it!
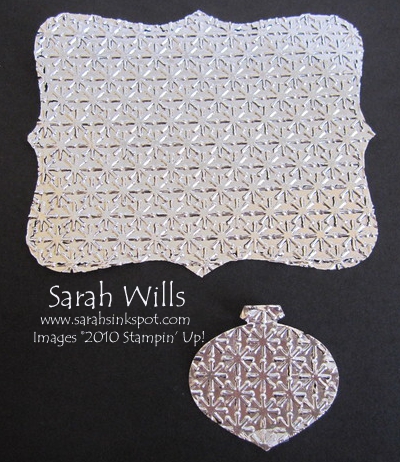
You know what else you can do with textured foil? You can use your punches & dies to punch shapes out of a textured sheet of foil – check out my shapes below made simply by using that cool Ornament Punch (pg 210) and Top Note Die (pg 222)…
Imagine the beautiful cards you can make using foil in that way?
Now back to my card…
So onto that gorgeous textured layer I added a die cut made using the Big Shot and Top Note Die – I added it using Dimensionals to give some depth to my card.
Those images? They are gorgeous and are from a brand new stamp set that will also debut in the Holiday Mini Catalog – it is called Comfort & Joy which features the most beautiful image of a dove along with two beautiful sentiments…
I stamped those images onto my die cut using Versamark Ink, sprinkled on Silver Embossing Powder and heated it using my Heat Tool – I added a Silver Brad as a finishing touch and there is one beautiful holiday card…
You can click on the photo above for a closer view.
If you have not used embossing powders before, I have a free printable step-by-step guide to Embossing which you can find by clicking HERE
It is so worth investing in a Big Shot, a couple of dies and some embossing folders to get you going – once you have a few of each you can do so much with so little – I use a combination of those items on almost everything I make!
WANT MY FREE TUTORIAL SO THAT YOU CAN TEXTURE SOME ALUMINUM FOIL TOO? Click HERE to find it in my Technique Tutorials section where you will find a printable version too!
Now finally onto my Festive Friday Blog Candy…leave me a comment to let me know what you think of this neat technique and you will be entered into a prize draw…
The winner will be chosen by random.org on Tuesday and one lucky winner will win a sampling of things from the new Holiday Mini Catalog including brand new embellishments and a felt die cut stocking cut using a brand new die from the that Mini Catalog!
CLICK HERE TO ORDER YOUR STAMPIN’ UP! SUPPLIES ONLINE!


What a great idea! What a reasonable way to get some metallic bling on a card. Thanks for sharing the technique.
Beautiful Sarah! I’ve been meaning to do this with foil forever, and never have. I really love that ornament punch done that way! Great idea.
Absolutely gorgeous! I can’t wait to try it!
Love everything all shiny and bright!
Oh, the possibilities! Heavy Duty Aluminium Foil is my new Friend!!! It has never let me down in the kitchen and I am sure it will not let me down in the craft room!! Thanks for the tip and how to’s, you are great!
Love the embossed foil ornament, will definitely be using it this year. Thanks for getting me inspired early!
I can’t wait to give this a try!! Thanks for sharing!!
I love your creativity – I would have never thought of using aluminum foil, but it really turned out great. Thanks for all of your step-by-step instructions.
I just love the new embossing folder… and I wish I had read this tutorial before I did it with regular foil… ugh! I don’t have the new folder, but the one I used has a similar design and it took me hours to remove the foil from the the nooks! haha I’ll try heavy duty next time.
So cool; and the result is gorgeous! I bet it really is even prettier in person so you can see the shimmer & glimmer better. And the best part is that we all already have what we need in the kitchen just awaiting our creativity. Such a pretty card that could be made for the holidays. I can see it with some beautiful embossed snowflakes also. The little ornaments could be added to chip board and used on presents instead of bows. Thanks for sharing!
Love, love, love the card and that set!! Now I’ll have to get it… :)) You’re bad Sarah!!
I love this card….it’s really striking. I’m wondering how you adhered it to the card stock. Put the adhesive on the card stock and then carefully lay down the foil? thanx for sharing your wonderful creativity.
Great idea to use foil. Navy & Silver look so pretty together.
I love this idea! We have a huge roll of heavy duty foil in the kitchen and I can’t wait to try this out! Thanks for the inspiration:)
Your card is simply beautiful: it looks very Christmas-y without a lot of hassle. Great job!
Super! Love the card.
I was going to the grocery store this afternoon. I just put heavy duty foil on the list. Love the technique Thanks for sharing.
It is wonderful! Everygirl loves bling so this is perfect.
Hi, Sarah
I’m another one that has been meaning to try the aluminum foil emboss! I’m getting out my foil today! Thanks for sharing!
I use Mini Glue Dots at the corners & edges and then tape in the center on the cardstock and then lay down the foil onto it :-)
Love it Sarah, a neat idea and with something that everyone has in the kitchen, thanks for sharing and for the opportunity to win
Eileen
WOW, Sarah!! Great idea. The background is beautiful and so simple. I can’t wait to try it. Now I want that embossing folder, of course ! Thanks for sharing and giving the directions. You are awesomely talented.
Cindy
Stunning! I love navy and silver anyways, but this is a really beautiful card. I will definately try this. Thanks for sharing.
Wow, I love the look of tin foil. Definitely something I’d like to try!
Sarah, this is gorgeous. First time I’ve seen anyone use aluminum foil in an embossing folder. What a beautiful concept! Thanks for sharing and for the chance to win your awesome blog candy! Truly appreciate all your tutorials and for sharing with us.
GORGEOUS!!! and thanks for the tip :)
you always do such cool stuff!
Susan
Sarah, OMG!! What a wonderful idea you have passed on. I would never of thought of using alum foil; I can hardly wait to try it. Thank for giving us an opportunity to win your blog candy, and also thank you very much or sharing your wonderful ideas.
I love reading your blog and seeing all your wonderful creations! Can’t wait to try the foil in the embossing folder – very neat! And thanks so much for the chance to win the blog candy!
Hi Sarah!
This is just the coolest! I love discovering new ways to use things and this is just fabulous. The foil is festive for Holiday card making and I can’t wait to give this a try. The ornament punched with foil is just the cutest too. Thanks for sharing and a chance to win some new goodies.
Your shiny foil ornament certainly caught my eye. Thanks for the video showing how to make the embossed foil.
That is a great new technique to try! I would have never thought of that! I did your canning jar topper for sewing needles/pins the other day and they turned out super cute! GREAT ideas!
great idea. my daughter did this lastbyear for her Christmas cards and theynwere beautiful and verynwell received by friends!
Oh, goodness I had forgotten about using the tin foil, it makes such a great bling for Christmas.
This will be one of my faves this year.
Thanks for sharing,
Seletta