It’s here again…already!!! It is now 13 weeks until Christmas Eve and I am having a great time getting on with my holiday projects which is putting me in a great festive frame of mind…
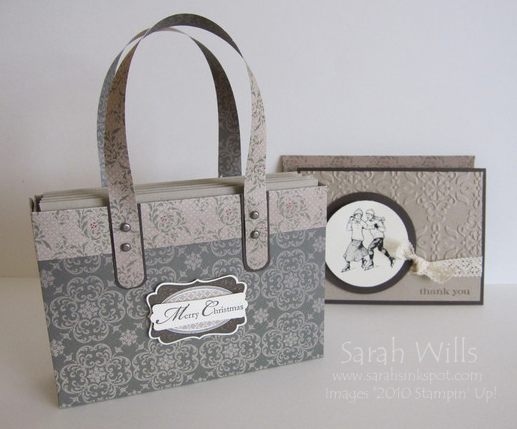
This week I am going to show you a Designer Paper Handbag that is perfectly sized to hold a set of your handmade cards & envelopes – the handbag is made from one sheet of double sided paper and makes a beautiful gift – it is going to be my holiday teacher gift this year…read on for the deets plus a link to the tutorial showing you how to make your own handbag…
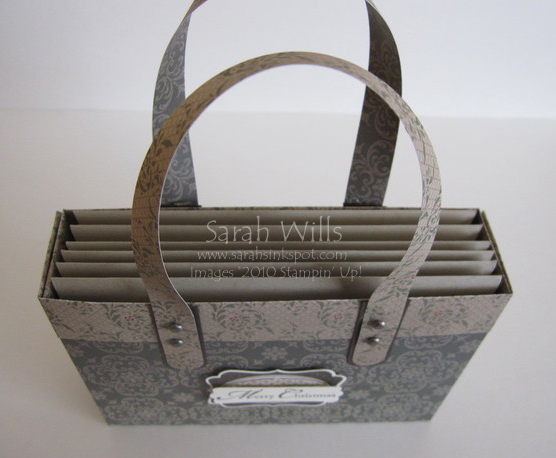
My handbag above is made from one sheet of Designer Series Paper from the Deck the Halls pack that you can find on pg 18 of the Holiday Mini Catalog – it has some beautiful vintage looking papers in it and was perfect for my project. The handles are also made of paper and I used Metallic Brads (pg 187) to give an authentic look. Despite being made of paper, this bag is surprisingly strong and sturdy!
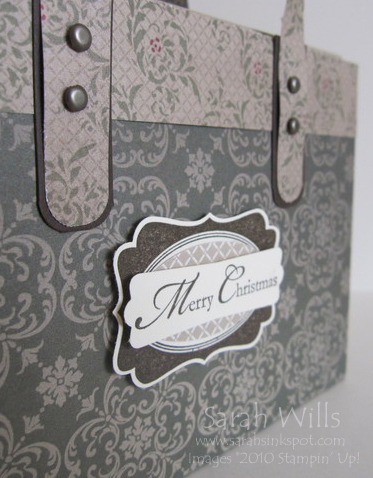
My tag is made with a stamp from Tags til Christmas on pg 24 of the Holiday Mini – I stamped it using Espresso ink and punched it out using the new Decorative Label Punch on pg 25 of the Holiday Mini – I punched out a piece of DSP using my Large Oval Punch and adhered it to the center. My sentiment is taken from A Cardinal Christmas on pg 39 of the main catalog and I used my Modern Label Punch to cut it out and mounted it onto my tag with Dimensionals…
And then you fill your handbag with handmade cards & envelopes – I decided to fill mine with ‘thank you’ cards that have a holiday theme to them – I figure that teachers receive a lot of gifts during the holidays and so a gift bag containing a batch of thank you cards would be very handy for them to have for the post-Christmas period…to show you what it looks like I put 6 cards & envies in the bag but it would comfortably hold up to 12…
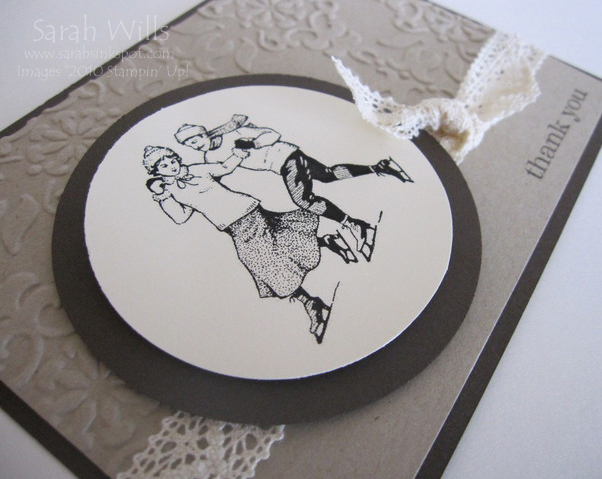
For my card I decided to continue with a vintage theme to match my bag and so I went looking through my stamp collection…but to no avail! It appears that up until now, I have not really been much of a vintage girl! So I decided to see if there was anything vintage that I could use on My Digital Studio, the fab digital software package…and lo & behold I found the perfect image on there from the stamp set Winter Post…
I only have a black & white printer (a color one is on my santa wish list!) but no problem – I selected my image and printed it out onto Very Vanilla cardstock and cut it out using my Circle Scissors Plus – I used Dimensionals to layer my image onto Early Espresso and then onto my card base…
My base is Espresso onto which I layered a piece of Crumb Cake (formerly known as Kraft) that I had partially embossed using the Vintage Wallpaper Embossing Folder (pg 214) – finished with a piece of the gorgeous Crochet Trim (pg 190) and a ‘thank you’ from the set Just Believe (pg 109)…
I paired my cards with Crumb Cake envelopes (pg 171) and decorated the envelope flaps with DSP from Deck the Halls…and there you have a great gift that is very affordable and fun to make.
WANT THE TUTORIAL SO YOU CAN MAKE YOUR OWN? Click HERE to find it in my Project Tutorials – it will be at the top of the list – and of course you will also find a printable version and the template too!
And lastly…announcing the winner of my Blog Candy from this week’s Tutorial Tuesday…the lucky winner will be receiving their choice of either the Scallop Trim Border Punch or the stamp set Because I Care…and the lucky winner chosen by random number generator is…
Comment no. 3 by Anita A who said…
“Stunning! I love the idea of being able to add a gift card”
A BIG congrats Anita – please email me with your mailing address and I will get the item of your choice on it’s way to you…enjoy!
Don’t forget to come back and visit me especially for Tutorial Tuesday where I will have more blog candy up for grabs – have a wonderful weekend!


I absolutely love this….I am going to have to stop what I am doing and make this tonight!!! Thanks for sharing!!
Karey
Sarah, this is just beautiful! Thank you so much for making your tutorials free to us! I, for one, really appreciate it!
What an awesome gift for anyone, any time! Love this handbag and the card set is darling. Thanks for sharing the template and tutorial!
thank you so much for this tutorial, it will be great gift.
Love the purse!!! Thank you so much for the instructions. This will be a great gift for so many different occasions.
Sarah,
What a wonderful blog. Thank you for sharing with us. Donna
Wow, so pretty! And you are so sweet to share so many tutorials with us!