I hope you enjoyed this past weekend’s Big Shot Blog Hop and that you came away with lots of different ideas on using your Big Shot…
If you don’t yet have a Big Shot you can get one for FREE when you join Stampin’ Up! during October – an AMAZING deal – and you will also get a fabulous discount on all your favorite crafting supplies too & lots of other benefits! Click HERE to find out more!
Already got a Big Shot & want to join? Fear not! You have the choice of a free Big Shot OR $100 in Stampin’ Up! products of your choice so you get to choose the freebies you want!
Join my Team during October and I’m also going to give you a free Stamp Set of your choice and a beautiful set of Welcome Gifts to get you up & running – click HERE to see them!
For my projects I used the Fancy Favor Bigz XL Die that you can find on pg 221 of the Catalog – traditionally it is used to create formal favors but I wanted to show you how you can use it in other ways too.
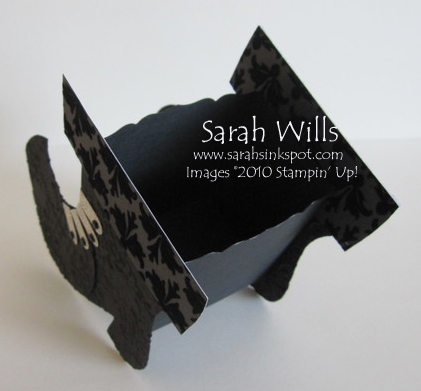
Here is the shape of the Fancy Favor Die – it features a beautifully shaped top edge…
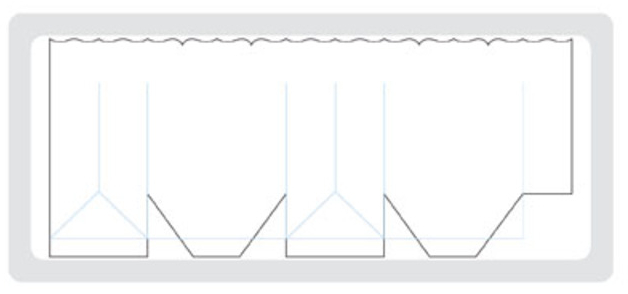 Want to view the Fancy Favor Bigz XL Die online? Click HERE to go to it!
My original blog hop post is below this one so that you can refer to it and the main photos of my projects and in it I promised to post more details, photos, all of the FREE tutorials and my blog candy winner so please read on to find out more…and remember that you can click on any photo to get a larger view…
Want to find the products that I used in my projects below? If you see a product name in blue print below, you can click on it – this will take you to that product’s page in the online store for easy viewing!
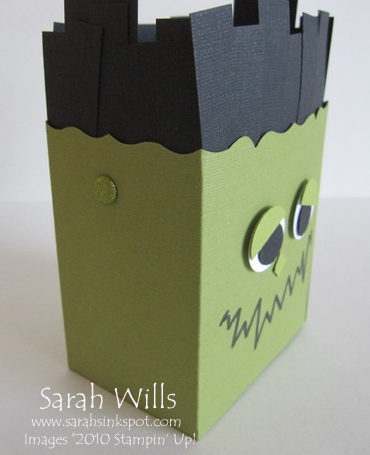
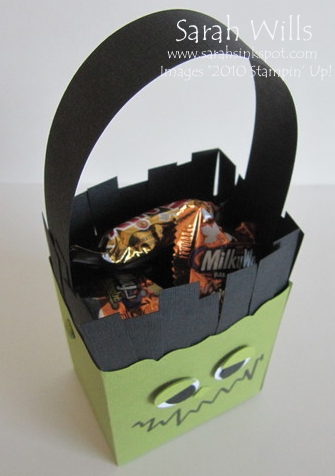
First up was my FrankenMonster Treat Bag…
Isn’t he cute? My girls keep on asking me to make them for their friends…I think I am going to be making 48 of these this coming weekend!
I used Lucky Limeade cardstock to make his head -that is a very fun & halloweeny color – and I decided to use Textured cardstock simply because it gives him a bit more definition.
Sarah’s note – when planning how much cardstock you will need to make a bunch of these, bear in mind that you will need to use 12×12 sized sheets for this project because the Fancy Favor Die is LONG!
I drew on his mouth using a Black Sharpie Marker and made his eyes using the 1/2″ and 3/4″ Circle Punches & his nose using a small square punch…
His hair & the handle is made simply using strips of Basic Black cardstock and I used two Old Olive Glimmer Brads to secure the handle to his head…and then I filled him with bite sized candies…
WANT MY FREE STEP-BY-STEP PRINTABLE TUTORIAL showing you how to make your very own FrankenMonster Treat Bag? Click HERE to find it – included are photos, instructions and cutting dimensions.
Next was my Witches Boot Treat Holder…
Isn’t it gorgeous? Sandwiched between those two Boots is my Fancy Favor Box that I cut using Basic Black Textured cardstock…
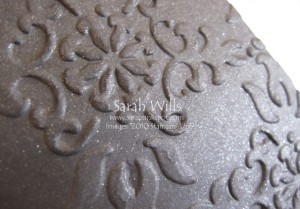
After I made it I realised that it would be really cool to texture that box using the Vintage Wallpaper Embossing Folder so that the texture on it would match the boots…oh well…next time!
It is just perfect for filling with some goodies – I plan to fill with shredded paper and add some chocolates & a gift card just at the top.
SO HOW TO MAKE THAT WITCHES BOOT? It was designed by the amazingly talented Susan Adams – and here is another…
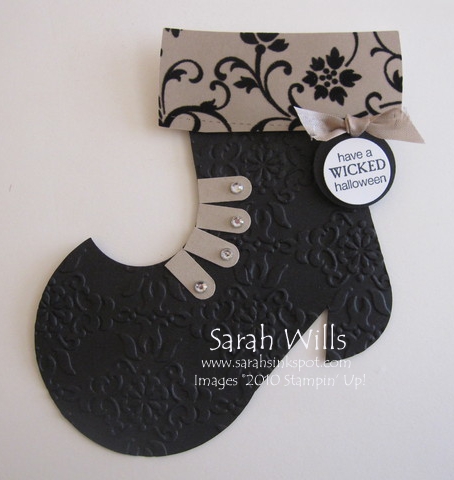
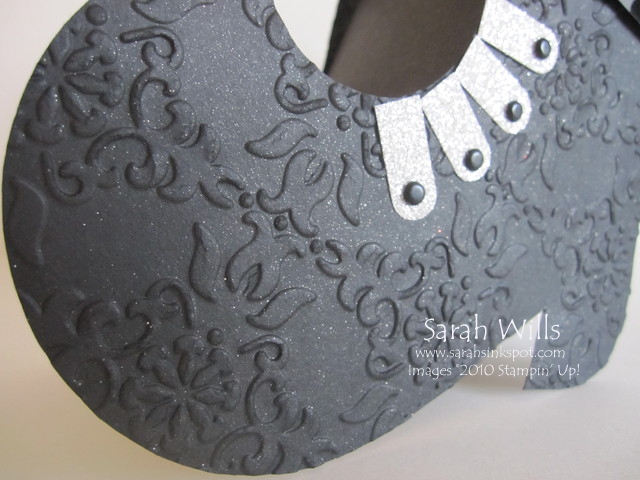
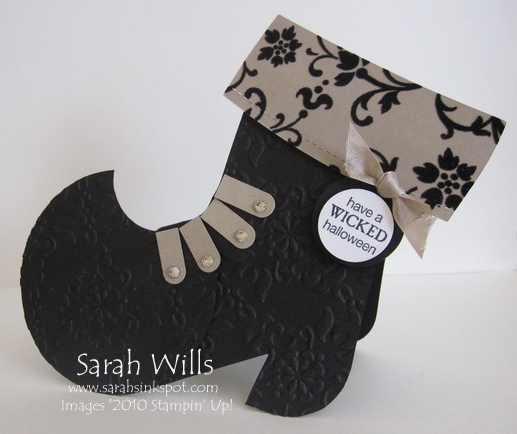
Made using Basic Black cardstock that is textured with the Vintage Wallpaper Embossing Folder – and that shape is made using the Holiday Stocking Die (pg 24 Holiday Mini Catalog) and the 3 1/2″ Circle Die.
The top trim of both versions is made using the gorgeous papers in Morning Mocha DSP (pg 183) – the laces are made using the Word Window Punch (pg 209) and above they are made using Crumb Cake cardstock & Rhinestones…on my Treat Holder Boots they are made using Silver Glimmer Paper & Black Brads.
You can use this Witches Boot to create cool Treat Holders, Gift Card Holders & Halloween Cards…I HAVE FREE TUTORIALS FOR ALL OF THEM…scroll down to find em & their tutorials!
WANT THE FREE STEP-BY-STEP PRINTABLE TUTORIAL showing you how to make your very own Witches Boot? Click HERE to find it
And check this out…the box & Boots are all shimmery…very hard to see in the photo (click to enlarge it) but they are sooo sparkly!!!
So how do you add sparkle without glitter? You spray it on using the fabulous Shimmer Paints!
This is so easy and so much fun to do – you can find the Shimmer Paints on pg 203 OR BY CLICKING HERE – they come in 3 colors and I love to use the color Champagne Mist on black cardstock – they are great value for money since one pot will last you a very long time!
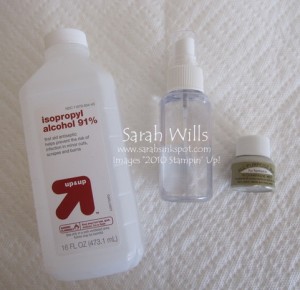
You will need to gather your pot of Shimmer Paint, a paper towel, a small spray bottle (I found mine in the travel sized toiletries section of Target for just $1) and a bottle of Isopropyl Alcohol – I like to use the 91% version.
Put about 1 oz of alcohol into your spray bottle and add approximately 10 drops of Shimmer Paint to it – close the lid of your spray bottle and shake to mix it.
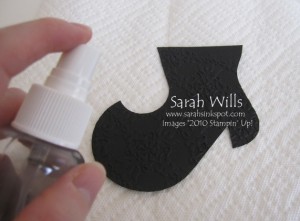
Place your Boot onto your paper towel and spray all over – you might want to do this one more time – and then see how sparkly your boot looks…
Isn’t it pretty? And because of the alcohol, it is going to dry fast…
SO WHAT ELSE DID I CREATE USING THIS GORGEOUS BOOT?
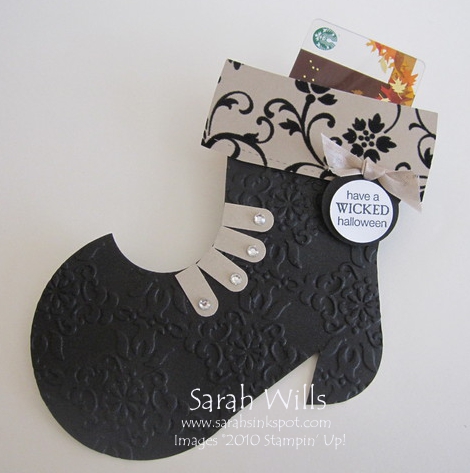
I turned the Witches Boot into a cute Gift Card Holder – perfect for a candy-free Halloween gift…I simply added a shaped pocket behind the top trim & into it I popped in a Starbucks Gift Card – I thought that this would make a cute teacher, friend or co-worker Halloween gift…
WANT MY FREE STEP-BY-STEP PRINTABLE TUTORIAL showing you how to make your very own Witches Boot Gift Card Holder? Click HERE to find it!
I also gave it a card base to turn it into a cute Halloween Card…
WANT MY FREE STEP-BY-STEP PRINTABLE TUTORIAL showing you how to make that base to create your very own Witches Boot Card? Click HERE to find it!
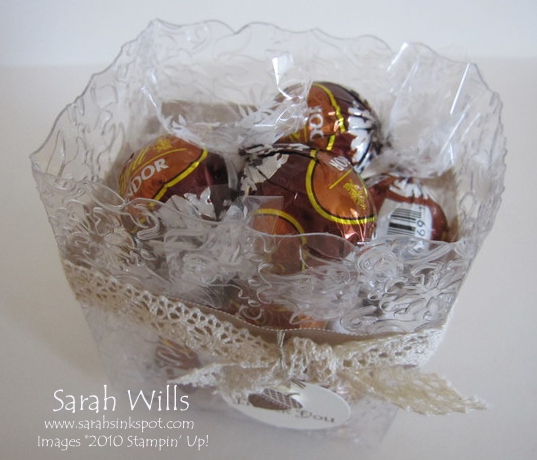
And finally onto my Clear Acetate Treat Boxes…
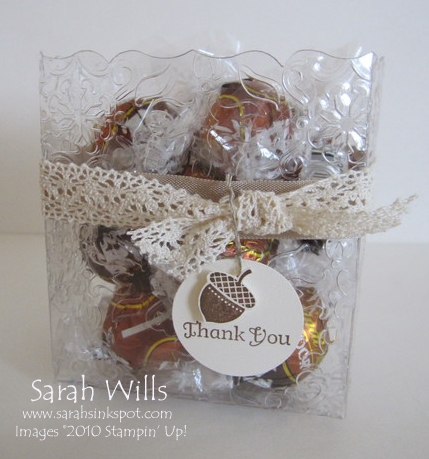
They are just GORGEOUS and look like crystal glassware! PERFECT for each place setting on your Thanksgiving or Christmas table this year…
They are so easy and fun to make – you simply cut the shape using the Fancy Favor Die and then emboss the acetate using an embossing folder – I used the Vintage Wallpaper Embossing Folder on this one and just love how it turned out…
I tied around a piece of Crumb Cake Seam Binding and on top of it, a piece of beautiful Victoria Crochet Trim. I made a tag using stamps from the set Day of Gratitude, punched it out using my 1 1/4″ Circle Punch and added it to my ribbon using Linen Thread…
I found some delicious Lindt Truffles to fill it…what a fabulous & stunning addition to your table or a gift for a friend.
WANT MY FREE STEP-BY-STEP PRINTABLE TUTORIAL showing you how to emboss Clear Acetate Window Sheets & make these boxes? Click HERE to find it!
WANT TO FIND ALL OF THE TUTORIALS I HAVE FEATURED TODAY IN ONE PLACE? Click HERE to find them all in my Project Tutorials section – all my tutorials are absolutely FREE because I love to share!
And finally onto the winner of my Blog Candy who wins a kit to make the Witches Boot Treat…drawn using random.org the winning comment is no. 4…
By Sara on October 14, 2011 at 10:31 am who said:
‘I LOVE the treat holders! Very pretty. The halloween items are just as cute!’
A BIG congrats Sara– drop me an email with your mailing address and your goodies will be on their way to you!
Thank you SO much for returning to visit me…you can subscribe to me so that you will be notified by email every time I post new ideas – you will find my subscription box at the top of my blog in the right side bar…
ORDER YOUR STAMPIN’ UP SUPPLIES ONLINE BY CLICKING HERE!
The fancy favor acetate boxes are so stinkin cute! I am going to case this one. My family gets together either before Christmas or a couple of days after for an Ornament Exchange party and it is fun. What a great little box to tuck the tissue wrapped ornament into for picking out and opening! Thanks for Sharing!
Thanks for these fun tutorials, Sarah. You are so very generous to share! I look forward to your posts.